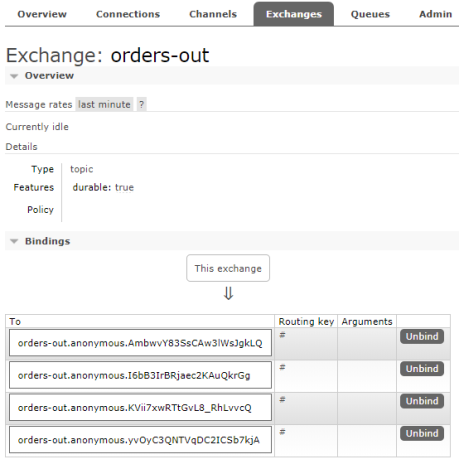
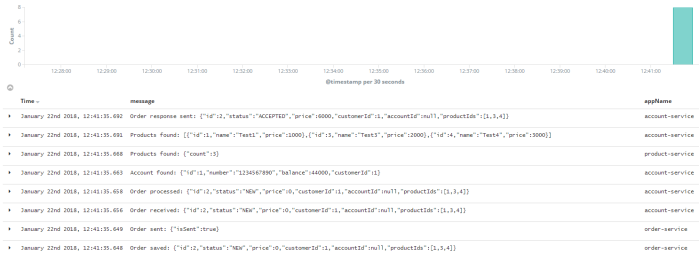
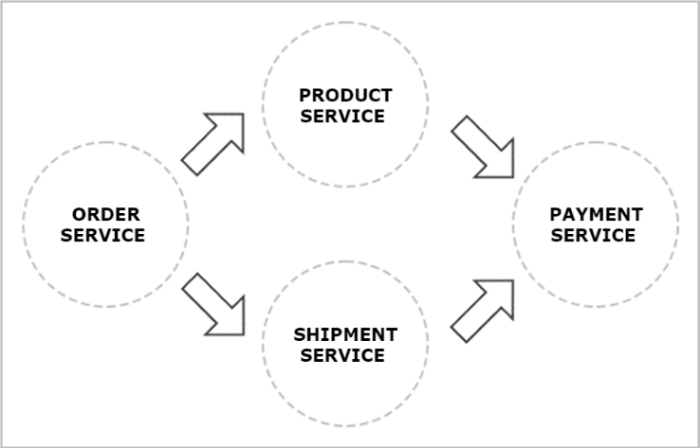
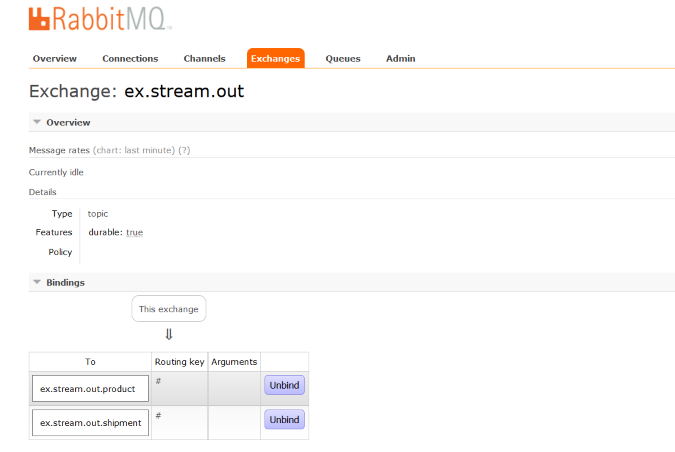
Spring Cloud Stream framework allows to easily include well-known Spring patterns and best practices to applications while implementing event-driven microservices architecture. It uses Spring Integration project to provide connectivity to a message broker. It provides built-in support for such features like persistent publish-subscribe model, consumer grouping and partitioning. The integration with specific message broker solution is realized by binder implementations that are hidden behind middleware-neutral core. Continue reading “Introduction to event-driven microservices with Spring Cloud Stream”
Category: Spring Cloud
A Deep Dive Into Spring Cloud Load Balancer
Spring Cloud is currently on the verge of large changes. I have been writing about it in my previous article A New Era of Spring Cloud. While almost all of Spring Cloud Netflix components will be removed in the next release, it seems that the biggest change is a replacement of Ribbon client into Spring Cloud Load Balancer. Continue reading “A Deep Dive Into Spring Cloud Load Balancer”
A New Era Of Spring Cloud
Almost 1.5 years ago Spring Team has announced the decision of moving the most of Spring Cloud Netflix components into maintenance mode. It means that new features have no longer been added to these modules beginning from Greenwich Release Train. Currently, they are starting work on Ilford Release Train, which is removing such popular projects like Ribbon, Hystrix, or Zuul from Spring Cloud. The only module that will still be used is a Netflix discovery server — Eureka.
This change is significant for Spring Cloud since from beginning it was recognized by its integration with Netflix components. Moreover, Spring Cloud Netflix is still the most popular Spring Cloud project on GitHub (~4k stars). Continue reading “A New Era Of Spring Cloud”
Kubernetes ConfigMap Versioning for Spring Boot Apps
Kubernetes doesn’t provide built-in support for ConfigMap or Secret versioning. Sometimes such a feature may be useful, when we are deciding to rollback current version of our application. In Kubernetes we are able to rollback just a version of Deployment without any additional configuration properties stored in ConfigMap or Secret. Continue reading “Kubernetes ConfigMap Versioning for Spring Boot Apps”
Using Spring Cloud Kubernetes External Library
In this article I’m going to introduce my newest library for registering Spring Boot applications running outside Kubernetes cluster. The motivation for creating this library has already been described in the details in my article Spring Cloud Kubernetes for Hybrid Microservices Architecture. Since Spring Cloud Kubernetes doesn’t implement registration in service registry in any way, and just delegates it to the platform, it will not provide many benefits to applications running outside Kubernetes cluster. To take an advantage of Spring Cloud Kubernetes Discovery you may just include library spring-cloud-kubernetes-discovery-ext-client to your Spring Boot application running externally. Continue reading “Using Spring Cloud Kubernetes External Library”
Timeouts and Retries In Spring Cloud Gateway
In this article I’m going to describe two features of Spring Cloud Gateway: retrying based on GatewayFilter pattern and timeouts based on a global configuration. In some previous articles in this series I have described rate limiting based on Redis, and circuit breaker built with Resilience4J. For more details about those two features you may refer to the following blog posts:
- Rate Limiting In Spring Cloud Gateway with Redis
- Circuit Breaking in Spring Cloud Gateway with Resilience4J
Continue reading “Timeouts and Retries In Spring Cloud Gateway”
Microservices API Documentation with Springdoc OpenAPI
I have already written about documentation for microservices more than two years ago in my article Microservices API Documentation with Swagger2. In that case I used project SpringFox for auto-generating Swagger documentation for Spring Boot applications. Since that time the SpringFox library is not being actively developed by the maintainers – the latest version has been released on June 2018. Currently, the most important problems with this library are a lack of support for OpenAPI in the newest version 3, and for Spring reactive APIs built using WebFlux. All these features are implemented by Springdoc OpenAPI library. Therefore, it may threaten as a replacement for SpringFox as Swagger and OpenAPI 3 generation tool for Spring Boot applications. Continue reading “Microservices API Documentation with Springdoc OpenAPI”
Spring Boot Admin on Kubernetes
The main goal of this article is to show how to monitor Spring Boot applications running on Kubernetes with Spring Boot Admin. I have already written about Spring Boot Admin more than two years ago in the article Monitoring Microservices With Spring Boot Admin. You can find there a detailed description of its main features. During this time some new features have been added. They have also changed a look of the application to more modern. But the principles of working have not been changes anymore, so you can still refer to my previous article to understand the main concept around Spring Boot Admin. Continue reading “Spring Boot Admin on Kubernetes”
Local Java Development on Kubernetes
There are many tools, which may simplify your local development on Kubernetes. For Java applications you may also take an advantage of integration between popular runtime frameworks and Kubernetes. In this article I’m going to present some of available solutions. Continue reading “Local Java Development on Kubernetes”
Spring Cloud Kubernetes For Hybrid Microservices Architecture
You might use Spring Cloud Kubernetes to build applications running both inside and outside Kubernetes cluster. The only problem with starting application outside Kubernetes is that there is no auto-configured registration mechanism. Spring Cloud Kubernetes delegates registration to the platform, what is an obvious behaviour if you are deploying your application internally using Kubernetes objects. With external application the situation is different. In fact, you should guarantee registration by yourself on the application side. Continue reading “Spring Cloud Kubernetes For Hybrid Microservices Architecture”
Microservices With Spring Cloud Kubernetes
Spring Cloud and Kubernetes are the popular products applicable to various different use cases. However, when it comes to microservices architecture they are sometimes described as competitive solutions. They are both implementing popular patterns in microservices architecture like service discovery, distributed configuration, load balancing or circuit breaking. Of course, they are doing it differently. Continue reading “Microservices With Spring Cloud Kubernetes”
Circuit Breaking In Spring Cloud Gateway With Resilience4J
In the newest version of Spring Cloud Gateway (2.2.1) we may take an advantage of a new implementation of circuit breaker built on top of project Resilience4J (https://github.com/resilience4j/resilience4j). Resilience4J has been selected as a replacement for Netflix’s Hystrix, that had been moved to the maintenance mode. Of course, you can still use Hystrix as circuit breaker implementation, however it is deprecated and probably won’t be available in the future versions of Spring Cloud. A new implementation is called no different than just Spring Cloud Circuit Breaker. Continue reading “Circuit Breaking In Spring Cloud Gateway With Resilience4J”
Spring Boot Best Practices for Microservices
In this article I’m going to propose my list of “golden rules” for building Spring Boot applications, which are a part of microservices-based system. I’m basing on my experience in migrating monolithic SOAP applications running on JEE servers into REST-based small applications built on top of Spring Boot. This list of best practices assumes you are running many microservices on the production under a huge incoming traffic. Let’s begin. Continue reading “Spring Boot Best Practices for Microservices”
Secure Spring Cloud Config
If you are building microservices architecture on top of Spring Boot and Spring Cloud I’m almost sure that one of projects you are using is Spring Cloud Config. Spring Cloud Config is responsible for implementing one of the most popular microservices pattern called distributed configuration. It provides server-side (Spring Cloud Config Server) and client-side (Spring Cloud Config Server) support for externalized configuration in a distributed system. In this article I focus on security aspects related to that project. If you are interested in some basics please refer to my previous article about it Microservices Configuration With Spring Cloud Config. Continue reading “Secure Spring Cloud Config”
Rate Limiting In Spring Cloud Gateway With Redis
Currently Spring Cloud Gateway is second the most popular Spring Cloud project just after Spring Cloud Netflix (in terms of number of stars on GitHub). It has been created as a successor of Zuul proxy in Spring Cloud family. This project provides an API Gateway for microservices architecture, and is built on top of reactive Netty and Project Reactor. It is designed to provide a simple, but effective way to route to APIs and address such popular concerns as security, monitoring/metrics, and resiliency. Continue reading “Rate Limiting In Spring Cloud Gateway With Redis”
Microservices with Spring Boot, Spring Cloud Gateway and Consul Cluster
The Spring Cloud Consul project provides integration for Consul and Spring Boot applications through auto-configuration. By using the well-known Spring Framework annotation style, we may enable and configure common patterns within microservice-based environments. These patterns include service discovery using Consul agent, distributed configuration using Consul key/value store, distributed events with Spring Cloud Bus, and Consul Events. The project also supports a client-side load balancer based on Netflix’s Ribbon and an API gateway based on Spring Cloud Gateway. Continue reading “Microservices with Spring Boot, Spring Cloud Gateway and Consul Cluster”
Using New Spring Cloud Load Balancer In Microservices Communication
Almost a year ago Spring Cloud has announced that most of Spring Cloud Netflix OSS projects will be moved to the maintenance mode starting from Spring Cloud Greenwich Release Train. In fact the maintenance mode only does not include Eureka, which still will be supported. I referred to that information in one of my previous articles The Future of Spring Cloud Microservices After Netflix Era. I have shared there some opinions about future of microservices with Spring Cloud. Of course, I also included an example of building microservices architecture without Netflix OSS using HashiCorp’s Consul, Spring Cloud Gateway and an early version of Spring Cloud LoadBalancer.
Continue reading “Using New Spring Cloud Load Balancer In Microservices Communication”
The Future of Spring Cloud Microservices After Netflix Era
If somebody would ask you about Spring Cloud, the first thing that comes into your mind will probably be Netflix OSS support. Support for such tools like Eureka, Zuul or Ribbon is provided not only by Spring, but also by some other popular frameworks used for building microservices architecture like Apache Camel, Vert.x or Micronaut. Currently, Spring Cloud Netflix is the most popular project being a part of Spring Cloud. It has around 3.2k stars on GitHub, while the second best has around 1.4k. Therefore, it is quite surprising that Pivotal has announced that most of Spring Cloud Netflix modules are entering maintenance mode. You can read more about in the post published on the Spring blog by Spencer Gibb https://spring.io/blog/2018/12/12/spring-cloud-greenwich-rc1-available-now. Continue reading “The Future of Spring Cloud Microservices After Netflix Era”
Kotlin Microservices with Micronaut, Spring Cloud and JPA
Micronaut Framework provides support for Kotlin built upon Kapt compiler plugin. It also implements the most popular cloud-native patterns like distributed configuration, service discovery and client-side load balancing. These features allows to include your application built on top of Micronaut into the existing microservices-based system. The most popular example of such approach may be an integration with Spring Cloud ecosystem. If you have already used Spring Cloud, it is very likely you built your microservices-based architecture using Eureka discovery server and Spring Cloud Config as a configuration server. Beginning from version 1.1 Micronaut supports both these popular tools being a part of Spring Cloud project. That’s a good news, because in version 1.0 the only supported distributed solution was Consul, and there were no possibility to use Eureka discovery together with Consul property source (running them together ends with exception). Continue reading “Kotlin Microservices with Micronaut, Spring Cloud and JPA”
Secure Spring Cloud Microservices with Vault and Nomad
One of the significant topics related to microservices security is managing and protecting sensitive data like tokens, passwords or certificates used by your application. As a developer you probably often implement a software that connects with external databases, message brokers or just the other applications. How do you store the credentials used by your application? To be honest, most of the software code I have seen in my life just stored a sensitive data as a plain text in the configuration files. Thanks to that, I could always be able to retrieve the credentials to every database I needed at a given time just by looking at the application source code. Of course, we can always encrypt sensitive data, but if we working with many microservices having separated databases I may not be very comfortable solution. Continue reading “Secure Spring Cloud Microservices with Vault and Nomad”
Microservices with Spring Cloud Alibaba
Some days ago Spring Cloud has announced a support for several Alibaba components used for building microservices-based architecture. The project is still under the incubation stage, but there is a plan for graduating it from incubation to officially join a Spring Cloud Release Train in 2019. The currently released version 0.0.2.RELEASE is compatible with Spring Boot 2, while older version 0.0.1.RELEASE is compatible with Spring Boot 1.x. This project seems to be very interesting, and currently it is the most popular repository amongst Spring Cloud Incubator repositories (around 1.5k likes on GitHub).
Currently, the most commonly used Spring Cloud project for building microservices architecture is Spring Cloud Netflix. As you probably know this project provides Netflix OSS integrations for Spring Boot apps, including service discovery (Eureka), circuit breaker (Hystrix), intelligent routing (Zuul) and client side load balancing (Ribbon). The first question that came to my mind when I was reading about Spring Cloud Alibaba was: ’Can Spring Cloud Alibaba be an alternative for Spring Cloud Netflix ?’. The answer is yes, but not entirely. Spring Cloud Alibaby still integrates with Ribbon, which is used for load balancing based on service discovery. Netflix Eureka server is replaced in that case by Nacos.
Nacos (Dynamic Naming and Configuration Service) is an easy-to-use platform designed for dynamic service discovery and configuration and service management. It helps you to build cloud native applications and microservices platform easily. Following that definition you can use Nacos for:
- Service Discovery – you can register your microservice and discover other microservices via a DNS or HTTP interface. It also provides real-time healthchecks for registered services
- Distributed Configuration – dynamic configuration service provided by Nacos allows you to manage configurations of all services in a centralized and dynamic manner across all environments. In fact, you can replace Spring Cloud Config Server using it
- Dynamic DNS – it supports weighted routing, making it easier to implement mid-tier load balancing, flexible routing policies, flow control, and simple DNS resolution services
Spring Cloud supports another popular Alibaba component – Sentinel. Sentinel is responsible for flow control, concurrency, circuit breaking and load protection.
Our sample system consisting of three microservices and API gateway is very similar to the architecture described in my article Quick Guide to Microservices with Spring Boot 2.0, Eureka and Spring Cloud. The only difference is in tools used for configuration management and service discovery. Microservice organization-service calls some endpoints exposed by department-service, while department-service calls endpoints exposed by employee-service. An inter-service communication is realized using OpenFeign client. The complexity of the whole system is hidden behind an API gateway implemented using Netflix Zuul.
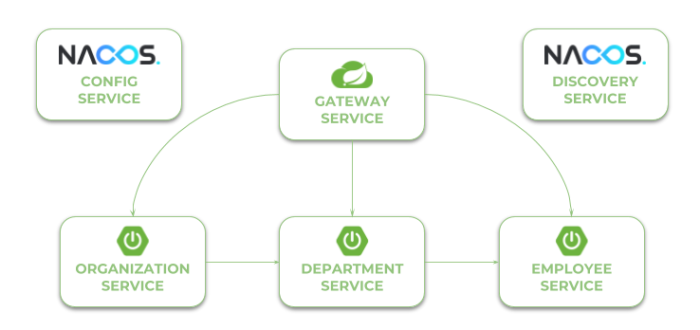
1. Running Nacos server
You can run Nacos on both Windows and Linux systems. First, you should download latest stable release provided on the site https://github.com/alibaba/nacos/releases. After unzipping you have to run it in standalone mode by executing the following command.
cmd nacos/bin/startup.cmd -m standalone
By default, Nacos is starting on port 8848. It provides HTTP API under context /nacos/v1, and admin web console under address http://localhost:8848/nacos. If you take a look on the logs you will find out that it is just an application written using Spring Framework.
2. Dependencies
As I have mentioned before Spring Cloud Alibaba is still under incubation stage, therefore it is not included into Spring Cloud Release Train. That’s why we need to include special BOM for Alibaba inside dependency management section in pom.xml. We will also use the newest stable version of Spring Cloud, which is now Finchley.SR2.
<dependencyManagement>
	<dependencies>
		<dependency>
			<groupId>org.springframework.cloud</groupId>
			<artifactId>spring-cloud-dependencies</artifactId>
			<version>Finchley.SR2</version>
			<type>pom</type>
			<scope>import</scope>
		</dependency>
		<dependency>
			<groupId>org.springframework.cloud</groupId>
			<artifactId>spring-cloud-alibaba-dependencies</artifactId>
			<version>0.2.0.RELEASE</version>
			<type>pom</type>
			<scope>import</scope>
		</dependency>
	</dependencies>
</dependencyManagement>
Spring Cloud Alibaba provides three starters for the currently supported components. These are spring-cloud-starter-alibaba-nacos-discovery for service discovery with Nacos, spring-cloud-starter-alibaba-nacos-config for distributed configuration Nacos, and spring-cloud-starter-alibaba-sentinel for Sentinel dependencies.
<dependency>
	<groupId>org.springframework.cloud</groupId>
	<artifactId>spring-cloud-starter-alibaba-nacos-discovery</artifactId>
</dependency>
<dependency>
	<groupId>org.springframework.cloud</groupId>
	<artifactId>spring-cloud-starter-alibaba-nacos-config</artifactId>
</dependency>
<dependency>
	<groupId>org.springframework.cloud</groupId>
	<artifactId>spring-cloud-starter-alibaba-sentinel</artifactId>
</dependency>
3. Enabling distributed configuration with Nacos
To enable configuration management with Nacos we only need to include starter spring-cloud-starter-alibaba-nacos-config. It does not provide auto-configured address of Nacos server, so we need to explicitly set it for the application inside bootstrap.yml file.
spring:
  application:
    name: employee-service
  cloud:
    nacos:
      config:
        server-addr: localhost:8848
Our application tries to connect with Nacos and fetch configuration provided inside file with the same name as value of property spring.application.name. Currently, Spring Cloud Alibaba supports only .properties file, so we need to create configuration inside file employee-service.properties. Nacos comes with an elegant way of creating and managing configuration properties. We can use web admin console for that. The field Data ID visible on the picture below is in fact the name of our configuration file. The list of configuration properties should be placed inside Configuration Content field.
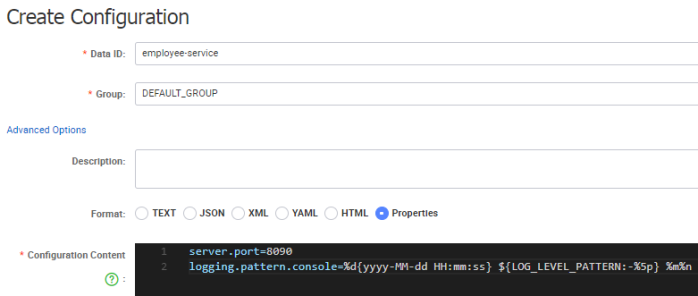
The good news related with Spring Cloud Alibaba is that it dynamically refresh application configuration after modifications on Nacos. The only thing you have to do in your application is to annotate the beans that should be refreshed with @RefreshScope or @ConfigurationProperties. Now, let’s consider the following situation. We will modify our configuration a little to add some properties with test data as shown below.
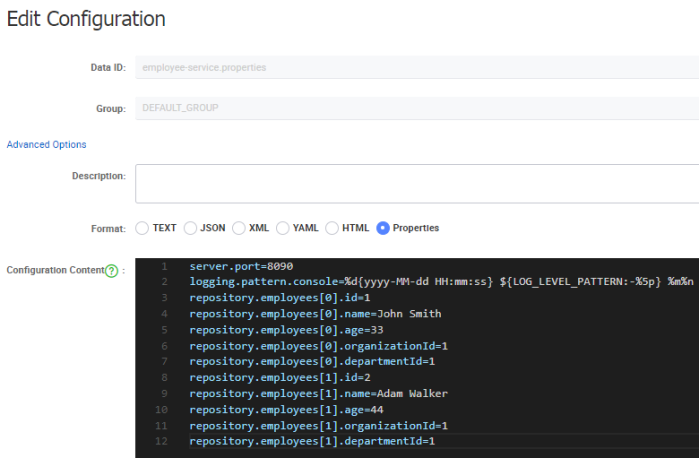
Here’s the implementation of our repository bean. It injects all configuration properties with prefix repository.employees into the list of employees.
@Repository
@ConfigurationProperties(prefix = "repository")
public class EmployeeRepository {

	private List<Employee> employees = new ArrayList<>();

	public List<Employee> getEmployees() {
		return employees;
	}

	public void setEmployees(List<Employee> employees) {
		this.employees = employees;
	}

	public Employee add(Employee employee) {
		employee.setId((long) (employees.size()+1));
		employees.add(employee);
		return employee;
	}

	public Employee findById(Long id) {
		Optional<Employee> employee = employees.stream().filter(a -> a.getId().equals(id)).findFirst();
		if (employee.isPresent())
			return employee.get();
		else
			return null;
	}

	public List<Employee> findAll() {
		return employees;
	}

	public List<Employee> findByDepartment(Long departmentId) {
		return employees.stream().filter(a -> a.getDepartmentId().equals(departmentId)).collect(Collectors.toList());
	}

	public List<Employee> findByOrganization(Long organizationId) {
		return employees.stream().filter(a -> a.getOrganizationId().equals(organizationId)).collect(Collectors.toList());
	}

}
Now, you can change some values of properties as shown on the picture below. Then, if you call employee-service, that is available on port 8090 (http://localhost:8090) you should see the full list of employees with modified values.

The same configuration properties should be created for our two other microservices department-service and organization-service. Assuming you have already done it, your should have the following configuration entries on Nacos.
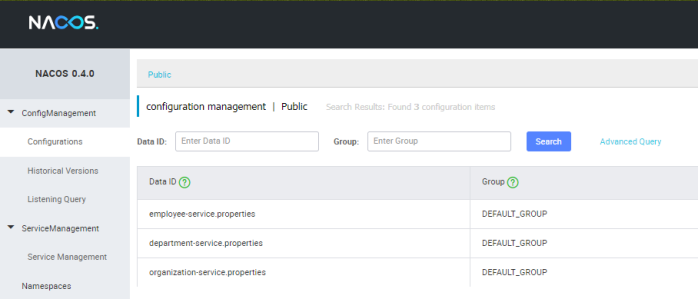
4. Enabling service discovery with Nacos
To enable service discovery with Nacos you first need to include starter spring-cloud-starter-alibaba-nacos-discovery. The same as for the configuration server you also need to set address of Nacos server inside bootstrap.yml file.
spring:
  application:
    name: employee-service
  cloud:
    nacos:
      discovery:
        server-addr: localhost:8848
The last step is to enable discovery client for the application by annotating the main class with @EnableDiscoveryClient.
@SpringBootApplication
@EnableDiscoveryClient
@EnableSwagger2
public class EmployeeApplication {

	public static void main(String[] args) {
		SpringApplication.run(EmployeeApplication.class, args);
	}

}
If you provide the same implementation for all our microservices and run them you will see the following list of registered application in Nacos web console.
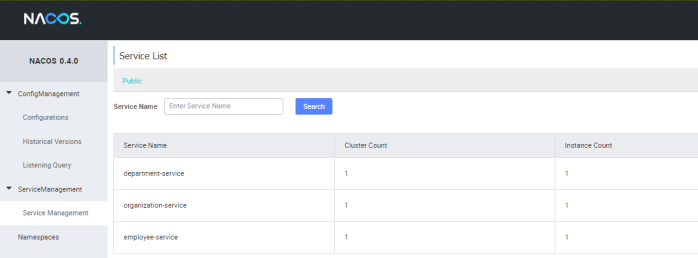
5. Inter-service communication
Communication between microservices is realized using the standard Spring Cloud components: RestTemplate or OpenFeign client. By default, load balancing is realized by Ribbon client. The only difference in comparison to Spring Cloud Netflix is discovery server used as service registry in the communication process. Here’s the implementation of Feign client in department-service responsible for integration with endpoint GET /department/{departmentId} exposed by employee-service.
@FeignClient(name = "employee-service")
public interface EmployeeClient {

	@GetMapping("/department/{departmentId}")
	List<Employee> findByDepartment(@PathVariable("departmentId") Long departmentId);

}
Don’t forget to enable Feign clients for Spring Boot application.
@SpringBootApplication
@EnableDiscoveryClient
@EnableFeignClients
@EnableSwagger2
public class DepartmentApplication {

	public static void main(String[] args) {
		SpringApplication.run(DepartmentApplication.class, args);
	}

}
We should also run multiple instances of employee-service in order to test load balancing on the client side. Before doing that we could enable dynamic generation of port number by setting property server.port to 0 inside configuration stored on Nacos. Now, we can run many instances of single service using the same configuration settings without risk of the port number conflict for a single microservice. Let’s scale up number of employee-service instances.
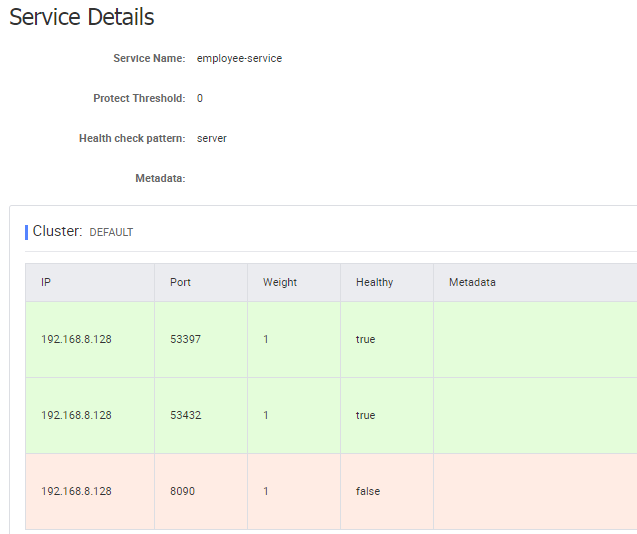
If you would like to test an inter-service communication you can call the following methods that uses OpenFeign client for calling endpoints exposed by other microservices: GET /organization/{organizationId}/with-employees from department-service, and GET /{id}/with-departments, GET /{id}/with-departments-and-employees, GET /{id}/with-employees from organization-service.
6. Running API Gateway
Now it is a time to run the last component in our architecture – an API Gateway. It is built on top of Spring Cloud Netflix Zuul. It also uses Nacos a s a discovery and configuration server.
<dependency>
	<groupId>org.springframework.cloud</groupId>
	<artifactId>spring-cloud-starter-alibaba-nacos-discovery</artifactId>
</dependency>
<dependency>
	<groupId>org.springframework.cloud</groupId>
	<artifactId>spring-cloud-starter-alibaba-nacos-config</artifactId>
</dependency>
<dependency>
	<groupId>org.springframework.cloud</groupId>
	<artifactId>spring-cloud-starter-netflix-zuul</artifactId>
</dependency>
After including required dependencies we need to enable Zuul proxy and discovery client for the application.
@SpringBootApplication
@EnableDiscoveryClient
@EnableZuulProxy
@EnableSwagger2
public class ProxyApplication {

	public static void main(String[] args) {
		SpringApplication.run(ProxyApplication.class, args);
	}

}
Here’s the configuration of Zuul routes defined for our three sample microservices.
zuul:
  routes:
    department:
      path: /department/**
      serviceId: department-service
    employee:
      path: /employee/**
      serviceId: employee-service
    organization:
      path: /organization/**
      serviceId: organization-service
After running gateway exposes Swagger2 specification for API exposed by all defined microservices. Assuming you have run it on port 8080, you can access it under address http://localhost:8080/swagger-ui.html. Thanks to that you can all the methods from one, single location.
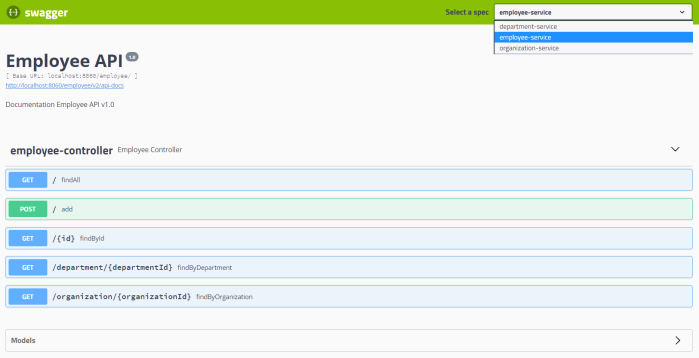
Conclusion
Sample applications source code is available on GitHub under repository sample-spring-microservices-new in branch alibaba: https://github.com/piomin/sample-spring-microservices-new/tree/alibaba. The main purpose of this article was to show you how to replace some popular Spring Cloud components with Alibaba Nacos used for service discovery and configuration management. Spring Cloud Alibaba project is at an early stage of development, so we could probably expect some new interesting features near the future. You can find some other examples on Spring Cloud Alibaba Github site here https://github.com/spring-cloud-incubator/spring-cloud-alibaba/tree/master/spring-cloud-alibaba-examples.
Spring Boot Autoscaler
One of more important reasons we are deciding to use such a tools like Kubernetes, Pivotal Cloud Foundry or HashiCorp’s Nomad is an availability of auto-scaling our applications. Of course those tools provides many other useful mechanisms, but we can implement auto-scaling by ourselves. At first glance it seems to be difficult, but assuming we use Spring Boot as a framework for building our applications and Jenkins as a CI server, it finally does not require a lot of work. Today, I’m going to show you how to implement such a solutions using the following frameworks/tools:
- Spring Boot
- Spring Boot Actuator
- Spring Cloud Netflix Eureka
- Jenkins CI
How it works?
Every Spring Boot application, which contains Spring Boot Actuator library can expose metrics under endpoint /actuator/metrics. There are many valuable metrics that gives you the detailed information about an application status. Some of them may be especially important when talking about autoscaling: JVM, CPU metrics, a number of running threads and a number of incoming HTTP requests. There is dedicated Jenkins pipeline responsible for monitoring application’s metrics by polling endpoint /actuator/metrics periodically. If any monitored metrics is below or above target range it runs new instance or shutdown a running instance of application using another Actuator endpoint /actuator/shutdown. Before that, it needs to fetch the current list of running instances of a single application in order to get an address of existing application selected for shutting down or the address of server with the smallest number of running instances for a new instance of application..
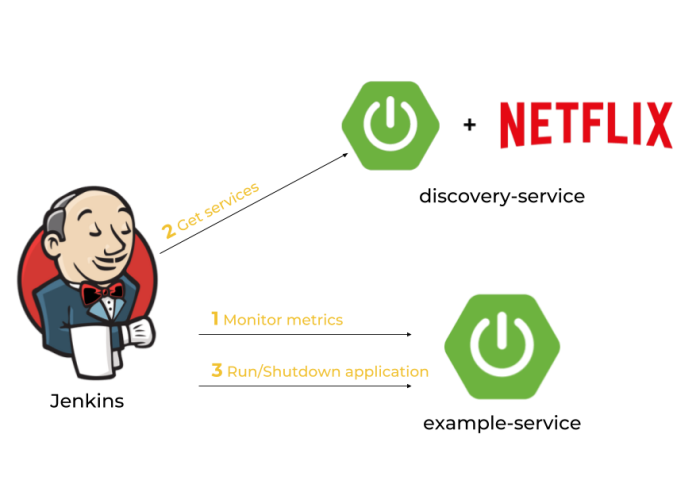
After discussing an architecture of our system we may proceed to the development. Our application needs to meet some requirements: it has to expose metrics and endpoint for graceful shutdown, it needs to register in Eureka after after startup and deregister on shutdown, and finally it also should dynamically allocate running port randomly from the pool of free ports. Thanks to Spring Boot we may easily implement all these mechanisms if five minutes 🙂
Dynamic port allocation
Since it is possible to run many instances of application on a single machine we have to guarantee that there won’t be conflicts in port numbers. Fortunately, Spring Boot provides such mechanisms for an application. We just need to set port number to 0 inside application.yml file using server.port property. Because our application registers itself in eureka it also needs to send unique instanceId, which is by default generated as a concatenation of fields spring.cloud.client.hostname, spring.application.name and server.port.
Here’s current configuration of our sample application. I have changed the template of instanceId field by replacing number of port to randomly generated number.
spring:
  application:
    name: example-service
server:
  port: ${PORT:0}
eureka:
  instance:
    instanceId: ${spring.cloud.client.hostname}:${spring.application.name}:${random.int[1,999999]}
Enabling Actuator metrics
To enable Spring Boot Actuator we need to include the following dependency to pom.xml.
<dependency>
	<groupId>org.springframework.boot</groupId>
	<artifactId>spring-boot-starter-actuator</artifactId>
</dependency>
We also have to enable exposure of actuator endpoints via HTTP API by setting property management.endpoints.web.exposure.include to '*'. Now, the list of all available metric names is available under context path /actuator/metrics, while detailed information for each metric under path /actuator/metrics/{metricName}.
Graceful shutdown
Besides metrics Spring Boot Actuator also provides endpoint for shutting down an application. However, in contrast to other endpoints this endpoint is not available by default. We have to set property management.endpoint.shutdown.enabled to true. After that we will be to stop our application by sending POST request to /actuator/shutdown endpoint.
This method of stopping application guarantees that service will unregister itself from Eureka server before shutdown.
Enabling Eureka discovery
Eureka is the most popular discovery server used for building microservices-based architecture with Spring Cloud. So, if you already have microservices and want to provide auto-scaling mechanisms for them, Eureka would be a natural choice. It contains IP address and port number of every registered instance of application. To enable Eureka on the client side you just need to include the following dependency to your pom.xml.
<dependency>
	<groupId>org.springframework.cloud</groupId>
	<artifactId>spring-cloud-starter-netflix-eureka-client</artifactId>
</dependency>
As I have mentioned before we also have to guarantee an uniqueness of instanceId send to Eureka server by client-side application. It has been described in the step “Dynamic port allocation”.
The next step is to create application with embedded Eureka server. To achieve it we first need to include the following dependency into pom.xml.
<dependency>
	<groupId>org.springframework.cloud</groupId>
	<artifactId>spring-cloud-starter-netflix-eureka-server</artifactId>
</dependency>
The main class should be annotated with @EnableEurekaServer.
@SpringBootApplication
@EnableEurekaServer
public class DiscoveryApp {

    public static void main(String[] args) {
        new SpringApplicationBuilder(DiscoveryApp.class).run(args);
    }

}
Client-side applications by default tries to connect with Eureka server on localhost under port 8761. We only need single, standalone Eureka node, so we will disable registration and attempts to fetching list of services form another instances of server.
spring:
  application:
    name: discovery-service
server:
  port: ${PORT:8761}
eureka:
  instance:
    hostname: localhost
  client:
    registerWithEureka: false
    fetchRegistry: false
    serviceUrl:
      defaultZone: http://localhost:8761/eureka/
The tests of the sample autoscaling system will be performed using Docker containers, so we need to prepare and build image with Eureka server. Here’s Dockerfile with image definition. It can be built using command docker build -t piomin/discovery-server:2.0 ..
FROM openjdk:8-jre-alpine
ENV APP_FILE discovery-service-1.0-SNAPSHOT.jar
ENV APP_HOME /usr/apps
EXPOSE 8761
COPY target/$APP_FILE $APP_HOME/
WORKDIR $APP_HOME
ENTRYPOINT ["sh", "-c"]
CMD ["exec java -jar $APP_FILE"]
Building Jenkins pipeline for autoscaling
The first step is to prepare Jenkins pipeline responsible for autoscaling. We will create Jenkins Declarative Pipeline, which runs every minute. Periodical execution may be configured with the triggers directive, that defines the automated ways in which the pipeline should be re-triggered. Our pipeline will communicate with Eureka server and metrics endpoints exposed by every microservice using Spring Boot Actuator.
The test service name is EXAMPLE-SERVICE, which is equal to value (big letters) of property spring.application.name defined inside application.yml file. The monitored metric is the number of HTTP listener threads running on Tomcat container. These threads are responsible for processing incoming HTTP requests.
pipeline {
    agent any
    triggers {
        cron('* * * * *')
    }
    environment {
        SERVICE_NAME = "EXAMPLE-SERVICE"
        METRICS_ENDPOINT = "/actuator/metrics/tomcat.threads.busy?tag=name:http-nio-auto-1"
        SHUTDOWN_ENDPOINT = "/actuator/shutdown"
    }
    stages { ... }
}
Integrating Jenkins pipeline with Eureka
The first stage of our pipeline is responsible for fetching list of services registered in service discovery server. Eureka exposes HTTP API with several endpoints. One of them is GET /eureka/apps/{serviceName}, which returns list of all instances of application with given name. We are saving the number of running instances and the URL of metrics endpoint of every single instance. These values would be accessed during next stages of pipeline.
Here’s the fragment of pipeline responsible for fetching list of running instances of application. The name of stage is Calculate. We use HTTP Request Plugin for HTTP connections.
stage('Calculate') {
	steps {
		script {
			def response = httpRequest "http://192.168.99.100:8761/eureka/apps/${env.SERVICE_NAME}"
			def app = printXml(response.content)
			def index = 0
			env["INSTANCE_COUNT"] = app.instance.size()
			app.instance.each {
				if (it.status == 'UP') {
					def address = "http://${it.ipAddr}:${it.port}"
					env["INSTANCE_${index++}"] = address
				}
			}
		}
	}
}

@NonCPS
def printXml(String text) {
    return new XmlSlurper(false, false).parseText(text)
}
Here’s a sample response from Eureka API for our microservice. The response content type is XML.

Integrating Jenkins pipeline with Spring Boot Actuator metrics
Spring Boot Actuator exposes endpoint with metrics, which allows to find metric by name and optionally by tag. In the fragment of pipeline visible below I’m trying to find the instance with metric below or above a defined threshold. If there is such an instance we stop the loop in order to proceed to the next stage, which performs scaling down or up. The ip addresses of running applications are taken from pipeline environment variable with prefix INSTANCE_, which has been saved in the previous stage.
stage('Metrics') {
	steps {
		script {
			def count = env.INSTANCE_COUNT
			for(def i=0; i<count; i++) {
				def ip = env["INSTANCE_${i}"] + env.METRICS_ENDPOINT
				if (ip == null)
					break;
				def response = httpRequest ip
				def objRes = printJson(response.content)
				env.SCALE_TYPE = returnScaleType(objRes)
				if (env.SCALE_TYPE != "NONE")
					break
			}
		}
	}
}

@NonCPS
def printJson(String text) {
    return new JsonSlurper().parseText(text)
}

def returnScaleType(objRes) {
def value = objRes.measurements[0].value
if (value.toInteger() > 100)
		return "UP"
else if (value.toInteger() < 20)
		return "DOWN"
else
		return "NONE"
}
Shutdown application instance
In the last stage of our pipeline we will shutdown the running instance or start new instance depending on the result saved in the previous stage. Shutdown may be easily performed by calling Spring Boot Actuator endpoint. In the following fragment of pipeline we pick the instance returned by Eureka as first. Then we send POST request to that ip address.
If we need to scale up our application we call another pipeline responsible for build fat JAR and launch it on our machine.
stage('Scaling') {
	steps {
		script {
			if (env.SCALE_TYPE == 'DOWN') {
				def ip = env["INSTANCE_0"] + env.SHUTDOWN_ENDPOINT
				httpRequest url:ip, contentType:'APPLICATION_JSON', httpMode:'POST'
			} else if (env.SCALE_TYPE == 'UP') {
				build job:'spring-boot-run-pipeline'
			}
			currentBuild.description = env.SCALE_TYPE
		}
	}
}
Here’s a full definition of our pipeline spring-boot-run-pipeline responsible for starting new instance of application. It clones the repository with application source code, builds binaries using Maven commands, and finally runs the application using java -jar command passing address of Eureka server as a parameter.
pipeline {
    agent any
    tools {
        maven 'M3'
    }
    stages {
        stage('Checkout') {
            steps {
                git url: 'https://github.com/piomin/sample-spring-boot-autoscaler.git', credentialsId: 'github-piomin', branch: 'master'
            }
        }
        stage('Build') {
            steps {
                dir('example-service') {
                    sh 'mvn clean package'
                }
            }
        }
        stage('Run') {
            steps {
                dir('example-service') {
                    sh 'nohup java -jar -DEUREKA_URL=http://192.168.99.100:8761/eureka target/example-service-1.0-SNAPSHOT.jar 1>/dev/null 2>logs/runlog &'
                }
            }
        }
    }
}
Remote extension
The algorithm discussed in the previous sections will work fine only for microservices launched on the single machine. If we would like to extend it to work with many machines, we will have to modify our architecture as shown below. Each machine has Jenkins agent running and communicating with Jenkins master. If we would like to start new instance of microservices on the selected machine, we have to run pipeline using agent running on that machine. This agent is responsible only for building application from source code and launching it on the target machine. The shutdown of instance is still performed just by calling HTTP endpoint.
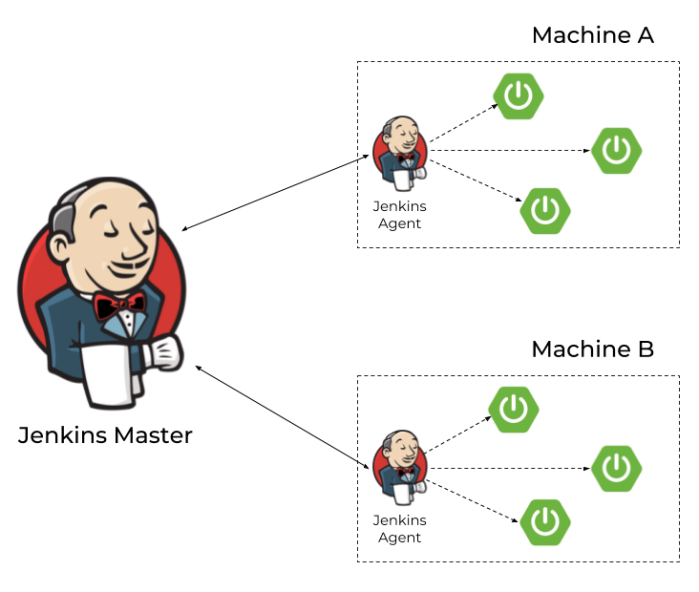
You can find more information about running Jenkins agents and connecting them with Jenkins master via JNLP protocol in my article Jenkins nodes on Docker containers. Assuming we have successfully launched some agents on the target machines we need to parametrize our pipelines in order to be able to select agent (and therefore the target machine) dynamically.
When we are scaling up our application we have to pass agent label to the downstream pipeline.
build job:'spring-boot-run-pipeline', parameters:[string(name: 'agent', value:"slave-1")]
The calling pipeline will be ran by agent labelled with given parameter.
pipeline {
    agent {
        label "${params.agent}"
    }
    stages { ... }
}
If we have more than one agent connected to the master node we can map their addresses into the labels. Thanks to that you would be able to map IP address of microservice instance fetched from Eureka to the target machine with Jenkins agent.
pipeline {
    agent any
    triggers {
        cron('* * * * *')
    }
    environment {
        SERVICE_NAME = "EXAMPLE-SERVICE"
        METRICS_ENDPOINT = "/actuator/metrics/tomcat.threads.busy?tag=name:http-nio-auto-1"
        SHUTDOWN_ENDPOINT = "/actuator/shutdown"
        AGENT_192.168.99.102 = "slave-1"
        AGENT_192.168.99.103 = "slave-2"
    }
    stages { ... }
}
Summary
In this article I have demonstrated how to use Spring Boot Actuator metrics in order to scale up/scale down your Spring Boot application. Using basic mechanisms provided by Spring Boot together with Spring Cloud Netflix Eureka and Jenkins you can implement auto-scaling for your applications without getting any other third-party tools. The case described in this article assumes using Jenkins agents on the remote machines to launch there new instance of application, but you may as well use a tool like Ansible for that. If you would decide to run Ansible playbooks from Jenkins you will not have to launch Jenkins agents on remote machines. The source code with sample applications is available on GitHub: https://github.com/piomin/sample-spring-boot-autoscaler.git.
Testing Microservices: Tools and Frameworks
There are some key challenges around microservices architecture testing that we are facing. The selection of right tools is one of that elements that helps us deal with the issues related to those challenges. First, let’s identify the most important elements involved into the process of microservices testing. These are some of them:
- Teams coordination – with many independent teams managing their own microservices, it becomes very challenging to coordinate the overall process of software development and testing
- Complexity – there are many microservices that communicate to each other. We need to ensure that every one of them is working properly and is resistant to the slow responses or failures from other microservices
- Performance – since there are many independent services it is important to test the whole architecture under traffic close to the production
Let’s discuss some interesting frameworks helping that may help you in testing microservice-based architecture.
Components tests with Hoverfly
Hoverfly simulation mode may be especially useful for building component tests. During component tests we are verifying the whole microservice without communication over network with other microservices or external datastores. The following picture shows how such a test is performed for our sample microservice.
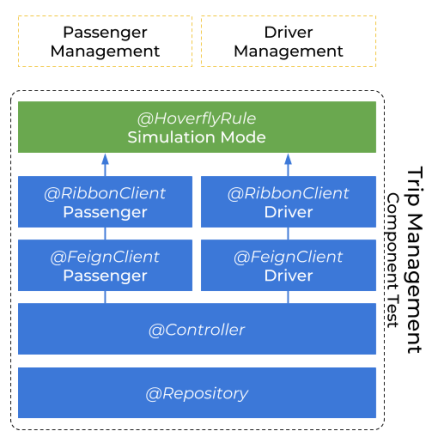
Hoverfly provides simple DSL for creating simulations, and a JUnit integration for using it within JUnit tests. It may orchestrated via JUnit @Rule. We are simulating two services and then overriding Ribbon properties to resolve address of these services by client name. We should also disable communication with Eureka discovery by disabling registration after application boot or fetching list of services for Ribbon client. Hoverfly simulates responses for PUT and GET methods exposed by passenger-management and driver-management microservices. Controller is the main component that implements business logic in our application. It store data using in-memory repository component and communicates with other microservices through @FeignClient interfaces. By testing three methods implemented by the controller we are testing the whole business logic implemented inside trip-management service.
@SpringBootTest(properties = {
        "eureka.client.enabled=false",
        "ribbon.eureka.enable=false",
        "passenger-management.ribbon.listOfServers=passenger-management",
        "driver-management.ribbon.listOfServers=driver-management"
})
@RunWith(SpringRunner.class)
@AutoConfigureMockMvc
@FixMethodOrder(MethodSorters.NAME_ASCENDING)
public class TripComponentTests {

    ObjectMapper mapper = new ObjectMapper();

    @Autowired
    MockMvc mockMvc;

    @ClassRule
    public static HoverflyRule rule = HoverflyRule.inSimulationMode(SimulationSource.dsl(
            HoverflyDsl.service("passenger-management:80")
                    .get(HoverflyMatchers.startsWith("/passengers/login/"))
                    .willReturn(ResponseCreators.success(HttpBodyConverter.jsonWithSingleQuotes("{'id':1,'name':'John Walker'}")))
                    .put(HoverflyMatchers.startsWith("/passengers")).anyBody()
                    .willReturn(ResponseCreators.success(HttpBodyConverter.jsonWithSingleQuotes("{'id':1,'name':'John Walker'}"))),
            HoverflyDsl.service("driver-management:80")
                    .get(HoverflyMatchers.startsWith("/drivers/"))
                    .willReturn(ResponseCreators.success(HttpBodyConverter.jsonWithSingleQuotes("{'id':1,'name':'David Smith','currentLocationX': 15,'currentLocationY':25}")))
                    .put(HoverflyMatchers.startsWith("/drivers")).anyBody()
                    .willReturn(ResponseCreators.success(HttpBodyConverter.jsonWithSingleQuotes("{'id':1,'name':'David Smith','currentLocationX': 15,'currentLocationY':25}")))
    )).printSimulationData();

    @Test
    public void test1CreateNewTrip() throws Exception {
        TripInput ti = new TripInput("test", 10, 20, "walker");
        mockMvc.perform(MockMvcRequestBuilders.post("/trips")
                .contentType(MediaType.APPLICATION_JSON_UTF8)
                .content(mapper.writeValueAsString(ti)))
                .andExpect(MockMvcResultMatchers.status().isOk())
                .andExpect(MockMvcResultMatchers.jsonPath("$.id", Matchers.any(Integer.class)))
                .andExpect(MockMvcResultMatchers.jsonPath("$.status", Matchers.is("NEW")))
                .andExpect(MockMvcResultMatchers.jsonPath("$.driverId", Matchers.any(Integer.class)));
    }

    @Test
    public void test2CancelTrip() throws Exception {
        mockMvc.perform(MockMvcRequestBuilders.put("/trips/cancel/1")
                .contentType(MediaType.APPLICATION_JSON_UTF8)
                .content(mapper.writeValueAsString(new Trip())))
                .andExpect(MockMvcResultMatchers.status().isOk())
                .andExpect(MockMvcResultMatchers.jsonPath("$.id", Matchers.any(Integer.class)))
                .andExpect(MockMvcResultMatchers.jsonPath("$.status", Matchers.is("IN_PROGRESS")))
                .andExpect(MockMvcResultMatchers.jsonPath("$.driverId", Matchers.any(Integer.class)));
    }

    @Test
    public void test3PayTrip() throws Exception {
        mockMvc.perform(MockMvcRequestBuilders.put("/trips/payment/1")
                .contentType(MediaType.APPLICATION_JSON_UTF8)
                .content(mapper.writeValueAsString(new Trip())))
                .andExpect(MockMvcResultMatchers.status().isOk())
                .andExpect(MockMvcResultMatchers.jsonPath("$.id", Matchers.any(Integer.class)))
                .andExpect(MockMvcResultMatchers.jsonPath("$.status", Matchers.is("PAYED")));
    }

}
The tests visible above verify only positive scenarios. What about testing some unexpected behaviour like network delays or server errors? With Hoverfly we can easily simulate such a behaviour and define some negative scenarios. In the following fragment of code I have defined three scenarios. In the first of them target service has been delayed 2 seconds. In order to simulate timeout on the client side I had to change default readTimeout for Ribbon load balancer and then disabled Hystrix circuit breaker for Feign client. The second test simulates HTTP 500 response status from passenger-management service. The last scenario assumes empty response from method responsible for searching the nearest driver.
@SpringBootTest(properties = {
        "eureka.client.enabled=false",
        "ribbon.eureka.enable=false",
        "passenger-management.ribbon.listOfServers=passenger-management",
        "driver-management.ribbon.listOfServers=driver-management",
        "feign.hystrix.enabled=false",
        "ribbon.ReadTimeout=500"
})
@RunWith(SpringRunner.class)
@AutoConfigureMockMvc
public class TripNegativeComponentTests {

    private ObjectMapper mapper = new ObjectMapper();
    @Autowired
    private MockMvc mockMvc;

    @ClassRule
    public static HoverflyRule rule = HoverflyRule.inSimulationMode(SimulationSource.dsl(
            HoverflyDsl.service("passenger-management:80")
                    .get("/passengers/login/test1")
                    .willReturn(ResponseCreators.success(HttpBodyConverter.jsonWithSingleQuotes("{'id':1,'name':'John Smith'}")).withDelay(2000, TimeUnit.MILLISECONDS))
                    .get("/passengers/login/test2")
                    .willReturn(ResponseCreators.success(HttpBodyConverter.jsonWithSingleQuotes("{'id':1,'name':'John Smith'}")))
                    .get("/passengers/login/test3")
                    .willReturn(ResponseCreators.serverError()),
            HoverflyDsl.service("driver-management:80")
                    .get(HoverflyMatchers.startsWith("/drivers/"))
                    .willReturn(ResponseCreators.success().body("{}"))
            ));

    @Test
    public void testCreateTripWithTimeout() throws Exception {
        mockMvc.perform(MockMvcRequestBuilders.post("/trips").contentType(MediaType.APPLICATION_JSON).content(mapper.writeValueAsString(new TripInput("test", 15, 25, "test1"))))
                .andExpect(MockMvcResultMatchers.status().isOk())
                .andExpect(MockMvcResultMatchers.jsonPath("$.id", Matchers.nullValue()))
                .andExpect(MockMvcResultMatchers.jsonPath("$.status", Matchers.is("REJECTED")));
    }

    @Test
    public void testCreateTripWithError() throws Exception {
        mockMvc.perform(MockMvcRequestBuilders.post("/trips").contentType(MediaType.APPLICATION_JSON).content(mapper.writeValueAsString(new TripInput("test", 15, 25, "test3"))))
                .andExpect(MockMvcResultMatchers.status().isOk())
                .andExpect(MockMvcResultMatchers.jsonPath("$.id", Matchers.nullValue()))
                .andExpect(MockMvcResultMatchers.jsonPath("$.status", Matchers.is("REJECTED")));
    }

    @Test
    public void testCreateTripWithNoDrivers() throws Exception {
        mockMvc.perform(MockMvcRequestBuilders.post("/trips").contentType(MediaType.APPLICATION_JSON).content(mapper.writeValueAsString(new TripInput("test", 15, 25, "test2"))))
                .andExpect(MockMvcResultMatchers.status().isOk())
                .andExpect(MockMvcResultMatchers.jsonPath("$.id", Matchers.nullValue()))
                .andExpect(MockMvcResultMatchers.jsonPath("$.status", Matchers.is("REJECTED")));
    }

}
All the timeouts and errors in communication with external microservices are handled by the bean annotated with @ControllerAdvice. In such cases trip-management microservice should not return server error response, but 200 OK with JSON response containing field status equals to REJECTED.
@ControllerAdvice
public class TripControllerErrorHandler extends ResponseEntityExceptionHandler {

    @ExceptionHandler({RetryableException.class, FeignException.class})
    protected ResponseEntity handleFeignTimeout(RuntimeException ex, WebRequest request) {
        Trip trip = new Trip();
        trip.setStatus(TripStatus.REJECTED);
        return handleExceptionInternal(ex, trip, null, HttpStatus.OK, request);
    }

}
Contract tests with Pact
The next type of test strategy usually implemented for microservices-based architecture is consumer-driven contract testing. In fact, there are some tools especially dedicated for such type of tests. One of them is Pact. Contract testing is a way to ensure that services can communicate with each other without implementing integration tests. A contract is signed between two sides of communication: consumer and provider. Pact assumes that contract code is generated and published on the consumer side, and than verified by the provider.
Pact provides tool that can store and share the contracts between consumers and providers. It is called Pact Broker. It exposes a simple RESTful API for publishing and retrieving pacts, and embedded web dashboard for navigating the API. We can easily run Pact Broker on the local machine using its Docker image.
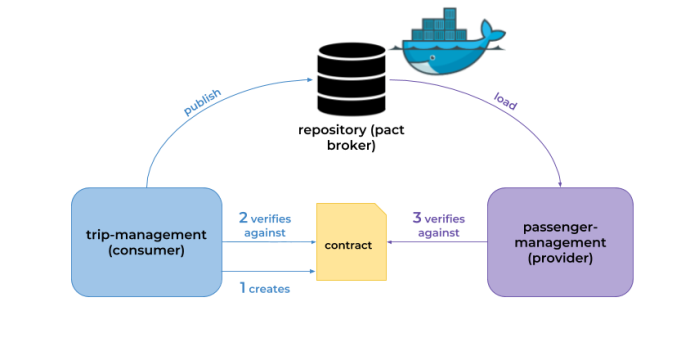
We will begin from running Pact Broker. Pact Broker requires running instance of postgresql, so first we have to launch it using Docker image, and then link our broker container with that container.
docker run -d --name postgres -p 5432:5432 -e POSTGRES_USER=oauth -e POSTGRES_PASSWORD=oauth123 -e POSTGRES_DB=oauth postgres
docker run -d --name pact-broker --link postgres:postgres -e PACT_BROKER_DATABASE_USERNAME=oauth -e PACT_BROKER_DATABASE_PASSWORD=oauth123 -e PACT_BROKER_DATABASE_HOST=postgres -e PACT_BROKER_DATABASE_NAME=oauth -p 9080:80 dius/pact-broker
The next step is to implement contract tests on the consumer side. We will use JVM implementation of Pact library for that. It provides PactProviderRuleMk2 object responsible for creating stubs of the provider service. We should annotate it with JUnit @Rule. Ribbon will forward all requests to passenger-management to the stub address – in that case localhost:8180. Pact JVM supports annotations and provides DSL for building test scenarios. Test method responsible for generating contract data should be annotated with @Pact. It is important to set fields state and provider, because then generated contract would be verified on the provider side using these names. Generated pacts are verified inside the same test class by the methods annotated with @PactVerification. Field fragment points to the name of the method responsible for generating pact inside the same test class. The contract is tested using PassengerManagementClient @FeignClient.
@RunWith(SpringRunner.class)
@SpringBootTest(properties = {
        "driver-management.ribbon.listOfServers=localhost:8190",
        "passenger-management.ribbon.listOfServers=localhost:8180",
        "ribbon.eureka.enabled=false",
        "eureka.client.enabled=false",
        "ribbon.ReadTimeout=5000"
})
public class PassengerManagementContractTests {

    @Rule
    public PactProviderRuleMk2 stubProvider = new PactProviderRuleMk2("passengerManagementProvider", "localhost", 8180, this);
    @Autowired
    private PassengerManagementClient passengerManagementClient;

    @Pact(state = "get-passenger", provider = "passengerManagementProvider", consumer = "passengerManagementClient")
    public RequestResponsePact callGetPassenger(PactDslWithProvider builder) {
        DslPart body = new PactDslJsonBody().integerType("id").stringType("name").numberType("balance").close();
        return builder.given("get-passenger").uponReceiving("test-get-passenger")
                .path("/passengers/login/test").method("GET").willRespondWith().status(200).body(body).toPact();
    }

    @Pact(state = "update-passenger", provider = "passengerManagementProvider", consumer = "passengerManagementClient")
    public RequestResponsePact callUpdatePassenger(PactDslWithProvider builder) {
        return builder.given("update-passenger").uponReceiving("test-update-passenger")
                .path("/passengers").method("PUT").bodyWithSingleQuotes("{'id':1,'amount':1000}", "application/json").willRespondWith().status(200)
                .bodyWithSingleQuotes("{'id':1,'name':'Adam Smith','balance':5000}", "application/json").toPact();
    }

    @Test
    @PactVerification(fragment = "callGetPassenger")
    public void verifyGetPassengerPact() {
        Passenger passenger = passengerManagementClient.getPassenger("test");
        Assert.assertNotNull(passenger);
        Assert.assertNotNull(passenger.getId());
    }

    @Test
    @PactVerification(fragment = "callUpdatePassenger")
    public void verifyUpdatePassengerPact() {
        Passenger passenger = passengerManagementClient.updatePassenger(new PassengerInput(1L, 1000));
        Assert.assertNotNull(passenger);
        Assert.assertNotNull(passenger.getId());
    }

}
Just running the tests is not enough. We also have to publish pacts generated during tests to Pact Broker. In order to achieve it we have to include the following Maven plugin to our pom.xml and then execute command mvn clean install pact:publish.
<plugin>
	<groupId>au.com.dius</groupId>
	<artifactId>pact-jvm-provider-maven_2.12</artifactId>
	<version>3.5.21</version>
	<configuration>
		<pactBrokerUrl>http://192.168.99.100:9080</pactBrokerUrl>
	</configuration>
</plugin>
Pact provides support for Spring on the provider side. Thanks to that we may use MockMvc controllers or inject properties from application.yml into the test class. Here’s dependency declaration that has to be included to our pom.xml
<dependency>
	<groupId>au.com.dius</groupId>
	<artifactId>pact-jvm-provider-spring_2.12</artifactId>
	<version>3.5.21</version>
	<scope>test</scope>
</dependency>
Now , the contract is being verified on the provider side. We need to pass provider name inside @Provider annotation and name of states for every verification test inside @State. These values has been during the tests on the consumer side inside @Pact annotation (fields state and provider).
@RunWith(SpringRestPactRunner.class)
@Provider("passengerManagementProvider")
@PactBroker
public class PassengerControllerContractTests {

    @InjectMocks
    private PassengerController controller = new PassengerController();
    @Mock
    private PassengerRepository repository;
    @TestTarget
    public final MockMvcTarget target = new MockMvcTarget();

    @Before
    public void before() {
        MockitoAnnotations.initMocks(this);
        target.setControllers(controller);
    }

    @State("get-passenger")
    public void testGetPassenger() {
        target.setRunTimes(3);
        Mockito.when(repository.findByLogin(Mockito.anyString()))
                .thenReturn(new Passenger(1L, "Adam Smith", "test", 4000))
                .thenReturn(new Passenger(3L, "Tom Hamilton", "hamilton", 400000))
                .thenReturn(new Passenger(5L, "John Scott", "scott", 222));
    }

    @State("update-passenger")
    public void testUpdatePassenger() {
        target.setRunTimes(1);
        Passenger passenger = new Passenger(1L, "Adam Smith", "test", 4000);
        Mockito.when(repository.findById(1L)).thenReturn(passenger);
        Mockito.when(repository.update(Mockito.any(Passenger.class)))
                .thenReturn(new Passenger(1L, "Adam Smith", "test", 5000));
    }
}
Pact Broker host and port are injected from application.yml file.
pactbroker:
  host: "192.168.99.100"
  port: "8090"
Performance tests with Gatling
An important step of testing microservices before deploying them on production is performance testing. One of interesting tools in this area is Gatling. It is highly capable load testing tool written in Scala. It means that we also have to use Scala DSL in order to build test scenarios. Let’s begin from adding required library to pom.xml file.
<dependency>
	<groupId>io.gatling.highcharts</groupId>
	<artifactId>gatling-charts-highcharts</artifactId>
	<version>2.3.1</version>
</dependency>
Now, we may proceed to the test. In the scenario visible above we are testing two endpoints exposed by trip-management: POST /trips and PUT /trips/payment/${tripId}. In fact, this scenario verifies the whole functionality of our sample system, where we are setting up trip and then pay for it after finish.
Every test class using Gatling needs to extend Simulation class. We are defining scenario using scenario method and then setting its name. We may define multiple executions inside single scenario. After every execution of POST /trips method test save generated id returned by the service. Then it inserts that id into the URL used for calling method PUT /trips/payment/${tripId}. Every single test expects response with 200 OK status.
Gatling provides two interesting features, which are worth mentioning. You can see how they are used in the following performance test. First of them is feeder. It is used for polling records and injecting their content into the test. Feed rPassengers selects one of five defined logins randomly. The final test result may be verified using Assertions API. It is responsible for verifying global statistics like response time or number of failed requests matches expectations for a whole simulation. In the scenario visible below the criterium is max response time that needs to be lower 100 milliseconds.
class CreateAndPayTripPerformanceTest extends Simulation {

  val rPassengers = Iterator.continually(Map("passenger" -> List("walker","smith","hamilton","scott","holmes").lift(Random.nextInt(5)).get))

  val scn = scenario("CreateAndPayTrip").feed(rPassengers).repeat(100, "n") {
    exec(http("CreateTrip-API")
      .post("http://localhost:8090/trips")
      .header("Content-Type", "application/json")
      .body(StringBody("""{"destination":"test${n}","locationX":${n},"locationY":${n},"username":"${passenger}"}"""))
      .check(status.is(200), jsonPath("$.id").saveAs("tripId"))
    ).exec(http("PayTrip-API")
      .put("http://localhost:8090/trips/payment/${tripId}")
      .header("Content-Type", "application/json")
      .check(status.is(200))
    )
  }

  setUp(scn.inject(atOnceUsers(20))).maxDuration(FiniteDuration.apply(5, TimeUnit.MINUTES))
    .assertions(global.responseTime.max.lt(100))

}
In order to run Gatling performance test you need to include the following Maven plugin to your pom.xml. You may run a single scenario or run multiple scenarios. After including the plugin you only need to execute command mvn clean gatling:test.
<plugin>
	<groupId>io.gatling</groupId>
	<artifactId>gatling-maven-plugin</artifactId>
	<version>2.2.4</version>
	<configuration>
		<simulationClass>pl.piomin.performance.tests.CreateAndPayTripPerformanceTest</simulationClass>
	</configuration>
</plugin>
Here are some diagrams illustrating result of performance tests for our microservice. Because maximum response time has been greater than set inside assertion (100ms), the test has failed.
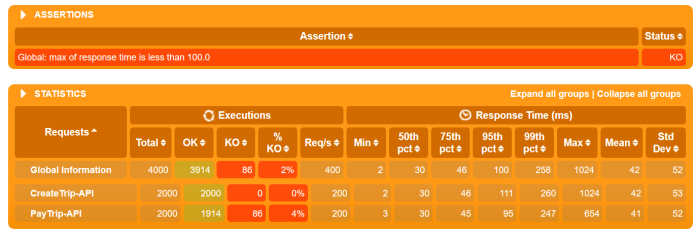
and …
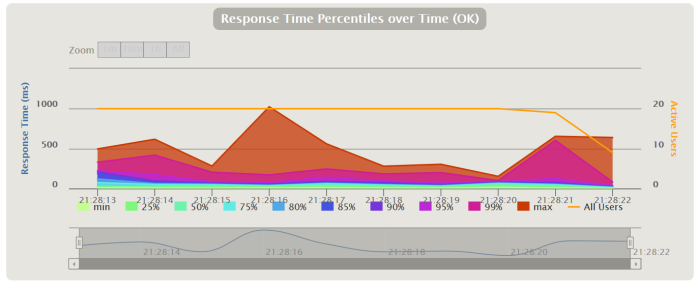
Summary
The right selection of tools is not the most important element phase of microservices testing. However, right tools can help you facing the key challenges related to it. Hoverfly allows to create full component tests that verifies if your microservice is able to handle delays or error from downstream services. Pact helps you to organize team by sharing and verifying contracts between independently developed microservices. Finally, Gatling can help you implementing load tests for selected scenarios, in order to verify an end-to-end performance of your system.
The source code used as a demo for this article is available on GitHub: https://github.com/piomin/sample-testing-microservices.git. If you find this article interesting for you you may be also interested in some other articles related to this subject:
GraphQL – The Future of Microservices?
Often, GraphQL is presented as a revolutionary way of designing web APIs in comparison to REST. However, if you would take a closer look on that technology you will see that there are so many differences between them. GraphQL is a relatively new solution that has been open sourced by Facebook in 2015. Today, REST is still the most popular paradigm used for exposing APIs and inter-service communication between microservices. Is GraphQL going to overtake REST in the future? Let’s take a look how to create microservices communicating through GraphQL API using Spring Boot and Apollo client.
Let’s begin from an architecture of our sample system. We have three microservices that communicates to each other using URLs taken from Eureka service discovery.
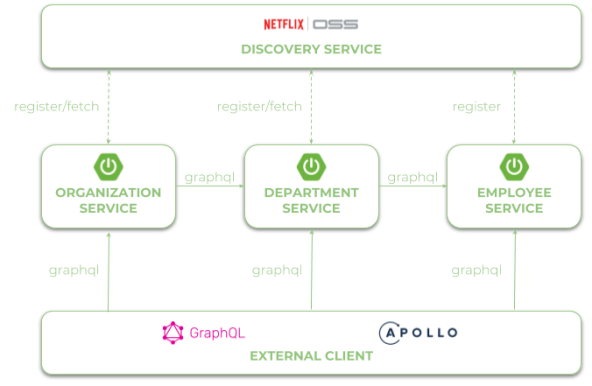
1. Enabling Spring Boot support for GraphQL
We can easily enable support for GraphQL on the server-side Spring Boot application just by including some starters. After including graphql-spring-boot-starter the GraphQL servlet would be automatically accessible under path /graphql. We can override that default path by settings property graphql.servlet.mapping in application.yml file. We should also enable GraphiQL – an in-browser IDE for writing, validating, and testing GraphQL queries, and GraphQL Java Tools library, which contains useful components for creating queries and mutations. Thanks to that library any files on the classpath with .graphqls extension will be used to provide the schema definition.
<dependency>
	<groupId>com.graphql-java</groupId>
	<artifactId>graphql-spring-boot-starter</artifactId>
	<version>5.0.2</version>
</dependency>
<dependency>
	<groupId>com.graphql-java</groupId>
	<artifactId>graphiql-spring-boot-starter</artifactId>
	<version>5.0.2</version>
</dependency>
<dependency>
	<groupId>com.graphql-java</groupId>
	<artifactId>graphql-java-tools</artifactId>
	<version>5.2.3</version>
</dependency>
2. Building GraphQL schema definition
Every schema definitions contains data types declaration, relationships between them, and a set of operations including queries for searching objects and mutations for creating, updating or deleting data. Usually we will start from creating type declaration, which is responsible for domain object definition. You can specify if the field is required using ! char or if it is an array using [...]. Definition has to contain type declaration or reference to other types available in the specification.
type Employee {
  id: ID!
  organizationId: Int!
  departmentId: Int!
  name: String!
  age: Int!
  position: String!
  salary: Int!
}
Here’s an equivalent Java class to GraphQL definition visible above. GraphQL type Int can be also mapped to Java Long. The ID scalar type represents a unique identifier – in that case it also would be Java Long.
public class Employee {

	private Long id;
	private Long organizationId;
	private Long departmentId;
	private String name;
	private int age;
	private String position;
	private int salary;

	// constructor

	// getters
	// setters

}
The next part of schema definition contains queries and mutations declaration. Most of the queries return list of objects – what is marked with [Employee]. Inside EmployeeQueries type we have declared all find methods, while inside EmployeeMutations type methods for adding, updating and removing employees. If you pass the whole object to that method you need to declare it as an input type.
schema {
  query: EmployeeQueries
  mutation: EmployeeMutations
}

type EmployeeQueries {
  employees: [Employee]
  employee(id: ID!): Employee!
  employeesByOrganization(organizationId: Int!): [Employee]
  employeesByDepartment(departmentId: Int!): [Employee]
}

type EmployeeMutations {
  newEmployee(employee: EmployeeInput!): Employee
  deleteEmployee(id: ID!) : Boolean
  updateEmployee(id: ID!, employee: EmployeeInput!): Employee
}

input EmployeeInput {
  organizationId: Int
  departmentId: Int
  name: String
  age: Int
  position: String
  salary: Int
}
3. Queries and mutation implementation
Thanks to GraphQL Java Tools and Spring Boot GraphQL auto-configuration we don’t need to do much to implement queries and mutations in our application. The EmployeesQuery bean has to GraphQLQueryResolver interface. Basing on that Spring would be able to automatically detect and call right method as a response to one of the GraphQL query declared inside the schema. Here’s a class containing an implementation of queries.
@Component
public class EmployeeQueries implements GraphQLQueryResolver {

	private static final Logger LOGGER = LoggerFactory.getLogger(EmployeeQueries.class);

	@Autowired
	EmployeeRepository repository;

	public List employees() {
		LOGGER.info("Employees find");
		return repository.findAll();
	}

	public List employeesByOrganization(Long organizationId) {
		LOGGER.info("Employees find: organizationId={}", organizationId);
		return repository.findByOrganization(organizationId);
	}

	public List employeesByDepartment(Long departmentId) {
		LOGGER.info("Employees find: departmentId={}", departmentId);
		return repository.findByDepartment(departmentId);
	}

	public Employee employee(Long id) {
		LOGGER.info("Employee find: id={}", id);
		return repository.findById(id);
	}

}
If you would like to call, for example method employee(Long id) you should build the following query. You can easily test it in your application using GraphiQL tool available under path /graphiql.
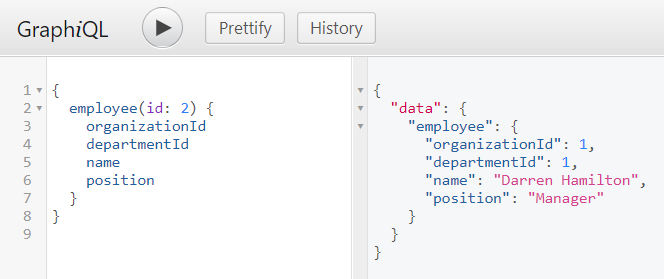
The bean responsible for implementation of mutation methods needs to implement GraphQLMutationResolver. Despite declaration of EmployeeInput we still to use the same domain object as returned by queries – Employee.
@Component
public class EmployeeMutations implements GraphQLMutationResolver {

	private static final Logger LOGGER = LoggerFactory.getLogger(EmployeeQueries.class);

	@Autowired
	EmployeeRepository repository;

	public Employee newEmployee(Employee employee) {
		LOGGER.info("Employee add: employee={}", employee);
		return repository.add(employee);
	}

	public boolean deleteEmployee(Long id) {
		LOGGER.info("Employee delete: id={}", id);
		return repository.delete(id);
	}

	public Employee updateEmployee(Long id, Employee employee) {
		LOGGER.info("Employee update: id={}, employee={}", id, employee);
		return repository.update(id, employee);
	}

}
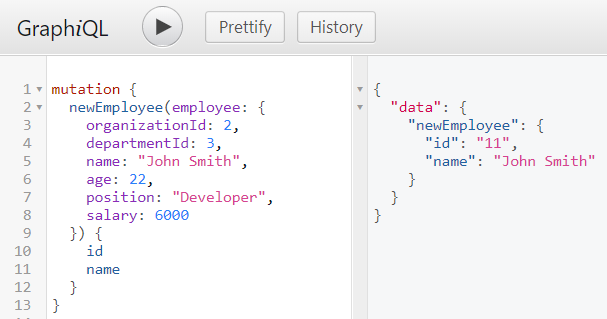
We can also use GraphiQL to test mutations. Here’s the command that adds new employee, and receives response with employee’s id and name.
4. Generating client-side classes
Ok, we have successfully created server-side application. We have already tested some queries using GraphiQL. But our main goal is to create some other microservices that communicate with employee-service application through GraphQL API. Here the most of tutorials about Spring Boot and GraphQL ending.
To be able to communicate with our first application through GraphQL API we have two choices. We can get a standard REST client and implement GraphQL API by ourselves with HTTP GET requests or use one of existing Java clients. Surprisingly, there are no many GraphQL Java client implementations available. The most serious choice is Apollo GraphQL Client for Android. Of course it is not designed only for Android devices, and you can successfully use it in your microservice Java application.
Before using the client we need to generate classes from schema and .grapql files. The recommended way to do it is through Apollo Gradle Plugin. There are also some Maven plugins, but none of them provide the level of automation as Gradle plugin, for example it automatically downloads node.js required for generating client-side classes. So, the first step is to add Apollo plugin and runtime to the project dependencies.
buildscript {
  repositories {
    jcenter()
    maven { url 'https://oss.sonatype.org/content/repositories/snapshots/' }
  }
  dependencies {
    classpath 'com.apollographql.apollo:apollo-gradle-plugin:1.0.1-SNAPSHOT'
  }
}

apply plugin: 'com.apollographql.android'

dependencies {
  compile 'com.apollographql.apollo:apollo-runtime:1.0.1-SNAPSHOT'
}
GraphQL Gradle plugin tries to find files with .graphql extension and schema.json inside src/main/graphql directory. GraphQL JSON schema can be obtained from your Spring Boot application by calling resource /graphql/schema.json. File .graphql contains queries definition. Query employeesByOrganization will be called by organization-service, while employeesByDepartment by both department-service and organization-service. Those two application needs a little different set of data in the response. Application department-service requires more detailed information about every employee than organization-service. GraphQL is an excellent solution in that case, because we can define the require set of data in the response on the client side. Here’s query definition of employeesByOrganization called by organization-service.
query EmployeesByOrganization($organizationId: Int!) {
  employeesByOrganization(organizationId: $organizationId) {
    id
    name
  }
}
Application organization-service would also call employeesByDepartment query.
query EmployeesByDepartment($departmentId: Int!) {
  employeesByDepartment(departmentId: $departmentId) {
    id
    name
  }
}
The query employeesByDepartment is also called by department-service, which requires not only id and name fields, but also position and salary.
query EmployeesByDepartment($departmentId: Int!) {
  employeesByDepartment(departmentId: $departmentId) {
    id
    name
    position
    salary
  }
}
All the generated classes are available under build/generated/source/apollo directory.
5. Building Apollo client with discovery
After generating all required classes and including them into calling microservices we may proceed to the client implementation. Apollo client has two important features that will affect our development:
- It provides only asynchronous methods based on callback
- It does not integrate with service discovery based on Spring Cloud Netflix Eureka
Here’s an implementation of employee-service client inside department-service. I used EurekaClient directly (1). It gets all running instances registered as EMPLOYEE-SERVICE. Then it selects one instance form the list of available instances randomly (2). The port number of that instance is passed to ApolloClient (3). Before calling asynchronous method enqueue provided by ApolloClient we create lock (4), which waits max. 5 seconds for releasing (8). Method enqueue returns response in the callback method onResponse (5). We map the response body from GraphQL Employee object to returned object (6) and then release the lock (7).
@Component
public class EmployeeClient {

	private static final Logger LOGGER = LoggerFactory.getLogger(EmployeeClient.class);
	private static final int TIMEOUT = 5000;
	private static final String SERVICE_NAME = "EMPLOYEE-SERVICE";
	private static final String SERVER_URL = "http://localhost:%d/graphql";

	Random r = new Random();

	@Autowired
	private EurekaClient discoveryClient; // (1)

	public List findByDepartment(Long departmentId) throws InterruptedException {
		List employees = new ArrayList();
		Application app = discoveryClient.getApplication(SERVICE_NAME); // (2)
		InstanceInfo ii = app.getInstances().get(r.nextInt(app.size()));
		ApolloClient client = ApolloClient.builder().serverUrl(String.format(SERVER_URL, ii.getPort())).build(); // (3)
		CountDownLatch lock = new CountDownLatch(1); // (4)
		client.query(EmployeesByDepartmentQuery.builder().build()).enqueue(new Callback() {

			@Override
			public void onFailure(ApolloException ex) {
				LOGGER.info("Err: {}", ex);
				lock.countDown();
			}

			@Override
			public void onResponse(Response res) { // (5)
				LOGGER.info("Res: {}", res);
				employees.addAll(res.data().employees().stream().map(emp -> new Employee(Long.valueOf(emp.id()), emp.name(), emp.position(), emp.salary())).collect(Collectors.toList())); // (6)
				lock.countDown(); // (7)
			}

		});
		lock.await(TIMEOUT, TimeUnit.MILLISECONDS); // (8)
		return employees;
	}

}
Finally, EmployeeClient is injected into the query resolver class – DepartmentQueries, and used inside query departmentsByOrganizationWithEmployees.
@Component
public class DepartmentQueries implements GraphQLQueryResolver {

	private static final Logger LOGGER = LoggerFactory.getLogger(DepartmentQueries.class);

	@Autowired
	EmployeeClient employeeClient;
	@Autowired
	DepartmentRepository repository;

	public List departmentsByOrganizationWithEmployees(Long organizationId) {
		LOGGER.info("Departments find: organizationId={}", organizationId);
		List departments = repository.findByOrganization(organizationId);
		departments.forEach(d -> {
			try {
				d.setEmployees(employeeClient.findByDepartment(d.getId()));
			} catch (InterruptedException e) {
				LOGGER.error("Error calling employee-service", e);
			}
		});
		return departments;
	}

	// other queries

}
Before calling target query we should take a look on the schema created for department-service. Every Department object can contain the list of assigned employees, so we also define type Employee referenced by Department type.
schema {
  query: DepartmentQueries
  mutation: DepartmentMutations
}

type DepartmentQueries {
  departments: [Department]
  department(id: ID!): Department!
  departmentsByOrganization(organizationId: Int!): [Department]
  departmentsByOrganizationWithEmployees(organizationId: Int!): [Department]
}

type DepartmentMutations {
  newDepartment(department: DepartmentInput!): Department
  deleteDepartment(id: ID!) : Boolean
  updateDepartment(id: ID!, department: DepartmentInput!): Department
}

input DepartmentInput {
  organizationId: Int!
  name: String!
}

type Department {
  id: ID!
  organizationId: Int!
  name: String!
  employees: [Employee]
}

type Employee {
  id: ID!
  name: String!
  position: String!
  salary: Int!
}
Now, we can call our test query with list of required fields using GraphiQL. An application department-service is by default available under port 8091, so we may call it using address http://localhost:8091/graphiql.

Conclusion
GraphQL seems to be an interesting alternative to standard REST APIs. However, we should not consider it as a replacement to REST. There are some use cases where GraphQL may be better choice, and some use cases where REST is better choice. If your clients does not need the full set of fields returned by the server side, and moreover you have many clients with different requirements to the single endpoint – GraphQL is a good choice. When it comes to microservices there are no solutions based on Java that allow you to use GraphQL together with service discovery, load balancing or API gateway out-of-the-box. In this article I have shown an example of usage Apollo GraphQL client together with Spring Cloud Eureka for inter-service communication. Sample applications source code is available on GitHub https://github.com/piomin/sample-graphql-microservices.git.
Quick Guide to Microservices with Kubernetes, Spring Boot 2.0 and Docker
Here’s the next article in a series of “Quick Guide to…”. This time we will discuss and run examples of Spring Boot microservices on Kubernetes. The structure of that article will be quite similar to this one Quick Guide to Microservices with Spring Boot 2.0, Eureka and Spring Cloud, as they are describing the same aspects of applications development. I’m going to focus on showing you the differences and similarities in development between for Spring Cloud and for Kubernetes. The topics covered in this article are:
- Using Spring Boot 2.0 in cloud-native development
- Providing service discovery for all microservices using Spring Cloud Kubernetes project
- Injecting configuration settings into application pods using Kubernetes Config Maps and Secrets
- Building application images using Docker and deploying them on Kubernetes using YAML configuration files
- Using Spring Cloud Kubernetes together with Zuul proxy to expose a single Swagger API documentation for all microservices
Spring Cloud and Kubernetes may be threaten as a competitive solutions when you build microservices environment. Such components like Eureka, Spring Cloud Config or Zuul provided by Spring Cloud may be replaced by built-in Kubernetes objects like services, config maps, secrets or ingresses. But even if you decide to use Kubernetes components instead of Spring Cloud you can take advantage of some interesting features provided throughout the whole Spring Cloud project.
The one raelly interesting project that helps us in development is Spring Cloud Kubernetes (https://github.com/spring-cloud-incubator/spring-cloud-kubernetes). Although it is still in incubation stage it is definitely worth to dedicating some time to it. It integrates Spring Cloud with Kubernetes. I’ll show you how to use implementation of discovery client, inter-service communication with Ribbon client and Zipkin discovery using Spring Cloud Kubernetes.
Before we proceed to the source code, let’s take a look on the following diagram. It illustrates the architecture of our sample system. It is quite similar to the architecture presented in the already mentioned article about microservices on Spring Cloud. There are three independent applications (employee-service, department-service, organization-service), which communicate between each other through REST API. These Spring Boot microservices use some build-in mechanisms provided by Kubernetes: config maps and secrets for distributed configuration, etcd for service discovery, and ingresses for API gateway.

Let’s proceed to the implementation. Currently, the newest stable version of Spring Cloud is Finchley.RELEASE. This version of spring-cloud-dependencies should be declared as a BOM for dependency management.
<dependencyManagement>
	<dependencies>
		<dependency>
			<groupId>org.springframework.cloud</groupId>
			<artifactId>spring-cloud-dependencies</artifactId>
			<version>Finchley.RELEASE</version>
			<type>pom</type>
			<scope>import</scope>
		</dependency>
	</dependencies>
</dependencyManagement>
Spring Cloud Kubernetes is not released under Spring Cloud Release Trains. So, we need to explicitly define its version. Because we use Spring Boot 2.0 we have to include the newest SNAPSHOT version of spring-cloud-kubernetes artifacts, which is 0.3.0.BUILD-SNAPSHOT.
The source code of sample applications presented in this article is available on GitHub in repository https://github.com/piomin/sample-spring-microservices-kubernetes.git.
Pre-requirements
In order to be able to deploy and test our sample microservices we need to prepare a development environment. We can realize that in the following steps:
- You need at least a single node cluster instance of Kubernetes (Minikube) or Openshift (Minishift) running on your local machine. You should start it and expose embedded Docker client provided by both of them. The detailed intruction for Minishift may be found there: Quick guide to deploying Java apps on OpenShift. You can also use that description to run Minikube – just replace word ‘minishift’ with ‘minikube’. In fact, it does not matter if you choose Kubernetes or Openshift – the next part of this tutorial would be applicable for both of them
- Spring Cloud Kubernetes requires access to Kubernetes API in order to be able to retrieve a list of address of pods running for a single service. If you use Kubernetes you should just execute the following command:
$ kubectl create clusterrolebinding admin --clusterrole=cluster-admin --serviceaccount=default:default
If you deploy your microservices on Minishift you should first enable admin-user addon, then login as a cluster admin, and grant required permissions.
$ minishift addons enable admin-user
$ oc login -u system:admin
$ oc policy add-role-to-user cluster-reader system:serviceaccount:myproject:default
- All our sample microservices use MongoDB as a backend store. So, you should first run an instance of this database on your node. With Minishift it is quite simple, as you can use predefined templates just by selecting service Mongo on the Catalog list. With Kubernetes the task is more difficult. You have to prepare deployment configuration files by yourself and apply it to the cluster. All the configuration files are available under kubernetes directory inside sample Git repository. To apply the following YAML definition to the cluster you should execute command
kubectl apply -f kubernetes\mongo-deployment.yaml. After it Mongo database would be available under the namemongodbinside Kubernetes cluster.
apiVersion: apps/v1
kind: Deployment
metadata:
  name: mongodb
  labels:
    app: mongodb
spec:
  replicas: 1
  selector:
    matchLabels:
      app: mongodb
  template:
    metadata:
      labels:
        app: mongodb
    spec:
      containers:
      - name: mongodb
        image: mongo:latest
        ports:
        - containerPort: 27017
        env:
        - name: MONGO_INITDB_DATABASE
          valueFrom:
            configMapKeyRef:
              name: mongodb
              key: database-name
        - name: MONGO_INITDB_ROOT_USERNAME
          valueFrom:
            secretKeyRef:
              name: mongodb
              key: database-user
        - name: MONGO_INITDB_ROOT_PASSWORD
          valueFrom:
            secretKeyRef:
              name: mongodb
              key: database-password
---
apiVersion: v1
kind: Service
metadata:
  name: mongodb
  labels:
    app: mongodb
spec:
  ports:
  - port: 27017
    protocol: TCP
  selector:
    app: mongodb
1. Inject configuration with Config Maps and Secrets
When using Spring Cloud the most obvious choice for realizing distributed configuration in your system is Spring Cloud Config. With Kubernetes you can use Config Map. It holds key-value pairs of configuration data that can be consumed in pods or used to store configuration data. It is used for storing and sharing non-sensitive, unencrypted configuration information. To use sensitive information in your clusters, you must use Secrets. An usage of both these Kubernetes objects can be perfectly demonstrated basing on the example of MongoDB connection settings. Inside Spring Boot application we can easily inject it using environment variables. Here’s fragment of application.yml file with URI configuration.
spring:
  data:
    mongodb:
      uri: mongodb://${MONGO_USERNAME}:${MONGO_PASSWORD}@mongodb/${MONGO_DATABASE}
While username or password are a sensitive fields, a database name is not. So we can place it inside config map.
apiVersion: v1
kind: ConfigMap
metadata:
  name: mongodb
data:
  database-name: microservices
Of course, username and password are defined as secrets.
apiVersion: v1
kind: Secret
metadata:
  name: mongodb
type: Opaque
data:
  database-password: MTIzNDU2
  database-user: cGlvdHI=
To apply the configuration to Kubernetes cluster we run the following commands.
$ kubectl apply -f kubernetes/mongodb-configmap.yaml
$ kubectl apply -f kubernetes/mongodb-secret.yaml
After it we should inject the configuration properties into application’s pods. When defining container configuration inside Deployment YAML file we have to include references to environment variables and secrets as shown below
apiVersion: apps/v1
kind: Deployment
metadata:
  name: employee
  labels:
    app: employee
spec:
  replicas: 1
  selector:
    matchLabels:
      app: employee
  template:
    metadata:
      labels:
        app: employee
    spec:
      containers:
      - name: employee
        image: piomin/employee:1.0
        ports:
        - containerPort: 8080
        env:
        - name: MONGO_DATABASE
          valueFrom:
            configMapKeyRef:
              name: mongodb
              key: database-name
        - name: MONGO_USERNAME
          valueFrom:
            secretKeyRef:
              name: mongodb
              key: database-user
        - name: MONGO_PASSWORD
          valueFrom:
            secretKeyRef:
              name: mongodb
              key: database-password
2. Building service discovery with Kubernetes
We usually running microservices on Kubernetes using Docker containers. One or more containers are grouped by pods, which are the smallest deployable units created and managed in Kubernetes. A good practice is to run only one container inside a single pod. If you would like to scale up your microservice you would just have to increase a number of running pods. All running pods that belong to a single microservice are logically grouped by Kubernetes Service. This service may be visible outside the cluster, and is able to load balance incoming requests between all running pods. The following service definition groups all pods labelled with field app equaled to employee.
apiVersion: v1
kind: Service
metadata:
  name: employee
  labels:
    app: employee
spec:
  ports:
  - port: 8080
    protocol: TCP
  selector:
    app: employee
Service can be used for accessing application outside Kubernetes cluster or for inter-service communication inside a cluster. However, the communication between microservices can be implemented more comfortable with Spring Cloud Kubernetes. First we need to include the following dependency to project pom.xml.
<dependency>
	<groupId>org.springframework.cloud</groupId>
	<artifactId>spring-cloud-starter-kubernetes</artifactId>
	<version>0.3.0.BUILD-SNAPSHOT</version>
</dependency>
Then we should enable discovery client for an application – the same as we have always done for discovery Spring Cloud Netflix Eureka. This allows you to query Kubernetes endpoints (services) by name. This discovery feature is also used by the Spring Cloud Kubernetes Ribbon or Zipkin projects to fetch respectively the list of the pods defined for a microservice to be load balanced or the Zipkin servers available to send the traces or spans.
@SpringBootApplication
@EnableDiscoveryClient
@EnableMongoRepositories
@EnableSwagger2
public class EmployeeApplication {

	public static void main(String[] args) {
		SpringApplication.run(EmployeeApplication.class, args);
	}

	// ...
}
The last important thing in this section is to guarantee that Spring application name would be exactly the same as Kubernetes service name for the application. For application employee-service it is employee.
spring:
  application:
    name: employee
3. Building microservice using Docker and deploying on Kubernetes
There is nothing unusual in our sample microservices. We have included some standard Spring dependencies for building REST-based microservices, integrating with MongoDB and generating API documentation using Swagger2.
<dependency>
	<groupId>org.springframework.boot</groupId>
	<artifactId>spring-boot-starter-web</artifactId>
</dependency>
<dependency>
	<groupId>org.springframework.boot</groupId>
	<artifactId>spring-boot-starter-actuator</artifactId>
</dependency>
<dependency>
	<groupId>io.springfox</groupId>
	<artifactId>springfox-swagger2</artifactId>
	<version>2.9.2</version>
</dependency>
<dependency>
	<groupId>org.springframework.boot</groupId>
	<artifactId>spring-boot-starter-data-mongodb</artifactId>
</dependency>
In order to integrate with MongoDB we should create interface that extends standard Spring Data CrudRepository.
public interface EmployeeRepository extends CrudRepository {

	List findByDepartmentId(Long departmentId);
	List findByOrganizationId(Long organizationId);

}
Entity class should be annotated with Mongo @Document and a primary key field with @Id.
@Document(collection = "employee")
public class Employee {

	@Id
	private String id;
	private Long organizationId;
	private Long departmentId;
	private String name;
	private int age;
	private String position;

	// ...

}
The repository bean has been injected to the controller class. Here’s the full implementation of our REST API inside employee-service.
@RestController
public class EmployeeController {

	private static final Logger LOGGER = LoggerFactory.getLogger(EmployeeController.class);

	@Autowired
	EmployeeRepository repository;

	@PostMapping("/")
	public Employee add(@RequestBody Employee employee) {
		LOGGER.info("Employee add: {}", employee);
		return repository.save(employee);
	}

	@GetMapping("/{id}")
	public Employee findById(@PathVariable("id") String id) {
		LOGGER.info("Employee find: id={}", id);
		return repository.findById(id).get();
	}

	@GetMapping("/")
	public Iterable findAll() {
		LOGGER.info("Employee find");
		return repository.findAll();
	}

	@GetMapping("/department/{departmentId}")
	public List findByDepartment(@PathVariable("departmentId") Long departmentId) {
		LOGGER.info("Employee find: departmentId={}", departmentId);
		return repository.findByDepartmentId(departmentId);
	}

	@GetMapping("/organization/{organizationId}")
	public List findByOrganization(@PathVariable("organizationId") Long organizationId) {
		LOGGER.info("Employee find: organizationId={}", organizationId);
		return repository.findByOrganizationId(organizationId);
	}

}
In order to run our microservices on Kubernetes we should first build the whole Maven project with mvn clean install command. Each microservice has Dockerfile placed in the root directory. Here’s Dockerfile definition for employee-service.
FROM openjdk:8-jre-alpine
ENV APP_FILE employee-service-1.0-SNAPSHOT.jar
ENV APP_HOME /usr/apps
EXPOSE 8080
COPY target/$APP_FILE $APP_HOME/
WORKDIR $APP_HOME
ENTRYPOINT ["sh", "-c"]
CMD ["exec java -jar $APP_FILE"]
Let’s build Docker images for all three sample microservices.
$ cd employee-service
$ docker build -t piomin/employee:1.0 .
$ cd department-service
$ docker build -t piomin/department:1.0 .
$ cd organization-service
$ docker build -t piomin/organization:1.0 .
The last step is to deploy Docker containers with applications on Kubernetes. To do that just execute commands kubectl apply on YAML configuration files. The sample deployment file for employee-service has been demonstrated in step 1. All required deployment fields are available inside project repository in kubernetes directory.
$ kubectl apply -f kubernetes\employee-deployment.yaml
$ kubectl apply -f kubernetes\department-deployment.yaml
$ kubectl apply -f kubernetes\organization-deployment.yaml
4. Communication between microservices with Spring Cloud Kubernetes Ribbon
All the microservice are deployed on Kubernetes. Now, it’s worth to discuss some aspects related to inter-service communication. Application employee-service in contrast to other microservices did not invoke any other microservices. Let’s take a look on to other microservices that calls API exposed by employee-service and communicates between each other (organization-service calls department-service API).
First we need to include some additional dependencies to the project. We use Spring Cloud Ribbon and OpenFeign. Alternatively you can also use Spring @LoadBalanced RestTemplate.
<dependency>
	<groupId>org.springframework.cloud</groupId>
	<artifactId>spring-cloud-starter-netflix-ribbon</artifactId>
</dependency>
<dependency>
	<groupId>org.springframework.cloud</groupId>
	<artifactId>spring-cloud-starter-kubernetes-ribbon</artifactId>
	<version>0.3.0.BUILD-SNAPSHOT</version>
</dependency>
<dependency>
	<groupId>org.springframework.cloud</groupId>
	<artifactId>spring-cloud-starter-openfeign</artifactId>
</dependency>
Here’s the main class of department-service. It enables Feign client using @EnableFeignClients annotation. It works the same as with discovery based on Spring Cloud Netflix Eureka. OpenFeign uses Ribbon for client-side load balancing. Spring Cloud Kubernetes Ribbon provides some beans that forces Ribbon to communicate with Kubernetes API through Fabric8 KubernetesClient.
@SpringBootApplication
@EnableDiscoveryClient
@EnableFeignClients
@EnableMongoRepositories
@EnableSwagger2
public class DepartmentApplication {

	public static void main(String[] args) {
		SpringApplication.run(DepartmentApplication.class, args);
	}

	// ...

}
Here’s implementation of Feign client for calling method exposed by employee-service.
@FeignClient(name = "employee")
public interface EmployeeClient {

	@GetMapping("/department/{departmentId}")
	List findByDepartment(@PathVariable("departmentId") String departmentId);

}
Finally, we have to inject Feign client’s beans to the REST controller. Now, we may call the method defined inside EmployeeClient, which is equivalent to calling REST endpoints.
@RestController
public class DepartmentController {

	private static final Logger LOGGER = LoggerFactory.getLogger(DepartmentController.class);

	@Autowired
	DepartmentRepository repository;
	@Autowired
	EmployeeClient employeeClient;

	// ...

	@GetMapping("/organization/{organizationId}/with-employees")
	public List findByOrganizationWithEmployees(@PathVariable("organizationId") Long organizationId) {
		LOGGER.info("Department find: organizationId={}", organizationId);
		List departments = repository.findByOrganizationId(organizationId);
		departments.forEach(d -> d.setEmployees(employeeClient.findByDepartment(d.getId())));
		return departments;
	}

}
5. Building API gateway using Kubernetes Ingress
An Ingress is a collection of rules that allow incoming requests to reach the downstream services. In our microservices architecture ingress is playing a role of an API gateway. To create it we should first prepare YAML description file. The descriptor file should contain the hostname under which the gateway will be available and mapping rules to the downstream services.
apiVersion: extensions/v1beta1
kind: Ingress
metadata:
  name: gateway-ingress
  annotations:
    nginx.ingress.kubernetes.io/rewrite-target: /
spec:
  backend:
    serviceName: default-http-backend
    servicePort: 80
  rules:
  - host: microservices.info
    http:
      paths:
      - path: /employee
        backend:
          serviceName: employee
          servicePort: 8080
      - path: /department
        backend:
          serviceName: department
          servicePort: 8080
      - path: /organization
        backend:
          serviceName: organization
          servicePort: 8080
You have to execute the following command to apply the configuration visible above to the Kubernetes cluster.
$ kubectl apply -f kubernetes\ingress.yaml
For testing this solution locally we have to insert the mapping between IP address and hostname set in ingress definition inside hosts file as shown below. After it we can services through ingress using defined hostname just like that: http://microservices.info/employee.
192.168.99.100 microservices.info
You can check the details of created ingress just by executing command kubectl describe ing gateway-ingress.

6. Enabling API specification on gateway using Swagger2
Ok, what if we would like to expose single swagger documentation for all microservices deployed on Kubernetes? Well, here the things are getting complicated… We can run container with Swagger UI, and map all paths exposed by the ingress manually, but it is rather not a good solution…
In that case we can use Spring Cloud Kubernetes Ribbon one more time – this time together with Spring Cloud Netflix Zuul. Zuul will act as gateway only for serving Swagger API.
Here’s the list of dependencies used in my gateway-service project.
<dependency>
	<groupId>org.springframework.cloud</groupId>
	<artifactId>spring-cloud-starter-netflix-zuul</artifactId>
</dependency>
<dependency>
	<groupId>org.springframework.cloud</groupId>
	<artifactId>spring-cloud-starter-kubernetes</artifactId>
	<version>0.3.0.BUILD-SNAPSHOT</version>
</dependency>
<dependency>
	<groupId>org.springframework.cloud</groupId>
	<artifactId>spring-cloud-starter-netflix-ribbon</artifactId>
</dependency>
<dependency>
	<groupId>org.springframework.cloud</groupId>
	<artifactId>spring-cloud-starter-kubernetes-ribbon</artifactId>
	<version>0.3.0.BUILD-SNAPSHOT</version>
</dependency>
<dependency>
	<groupId>io.springfox</groupId>
	<artifactId>springfox-swagger-ui</artifactId>
	<version>2.9.2</version>
</dependency>
<dependency>
	<groupId>io.springfox</groupId>
	<artifactId>springfox-swagger2</artifactId>
	<version>2.9.2</version>
</dependency>
Kubernetes discovery client will detect all services exposed on cluster. We would like to display documentation only for our three microservices. That’s why I defined the following routes for Zuul.
zuul:
  routes:
    department:
      path: /department/**
    employee:
      path: /employee/**
    organization:
      path: /organization/**
Now we can use ZuulProperties bean to get routes addresses from Kubernetes discovery, and configure them as Swagger resources as shown below.
@Configuration
public class GatewayApi {

	@Autowired
	ZuulProperties properties;

	@Primary
	@Bean
	public SwaggerResourcesProvider swaggerResourcesProvider() {
		return () -> {
			List resources = new ArrayList();
			properties.getRoutes().values().stream()
					.forEach(route -> resources.add(createResource(route.getId(), "2.0")));
			return resources;
		};
	}

	private SwaggerResource createResource(String location, String version) {
		SwaggerResource swaggerResource = new SwaggerResource();
		swaggerResource.setName(location);
		swaggerResource.setLocation("/" + location + "/v2/api-docs");
		swaggerResource.setSwaggerVersion(version);
		return swaggerResource;
	}

}
Application gateway-service should be deployed on cluster the same as other applications. You can the list of running service by executing command kubectl get svc. Swagger documentation is available under address http://192.168.99.100:31237/swagger-ui.html.

Conclusion
I’m actually rooting for Spring Cloud Kubernetes project, which is still at the incubation stage. Kubernetes popularity as a platform is rapidly growing during some last months, but it still has some weaknesses. One of them is inter-service communication. Kubernetes doesn’t give us many mechanisms out-of-the-box, which allows configure more advanced rules. This a reason for creating frameworks for service mesh on Kubernetes like Istio or Linkerd. While these projects are still relatively new solutions, Spring Cloud is stable, opinionated framework. Why not to use to provide service discovery, inter-service communication or load balancing? Thanks to Spring Cloud Kubernetes it is possible.
Continuous Integration with Jenkins, Artifactory and Spring Cloud Contract
Consumer Driven Contract (CDC) testing is one of the method that allows you to verify integration between applications within your system. The number of such interactions may be really large especially if you maintain microservices-based architecture. Assuming that every microservice is developed by different teams or sometimes even different vendors, it is important to automate the whole testing process. As usual, we can use Jenkins server for running contract tests within our Continuous Integration (CI) process.
The sample scenario has been visualized on the picture below. We have one application (person-service) that exposes API leveraged by three different applications. Each application is implementing by a different development team. Consequently, every application is stored in the separated Git repository and has dedicated pipeline in Jenkins for building, testing and deploying.
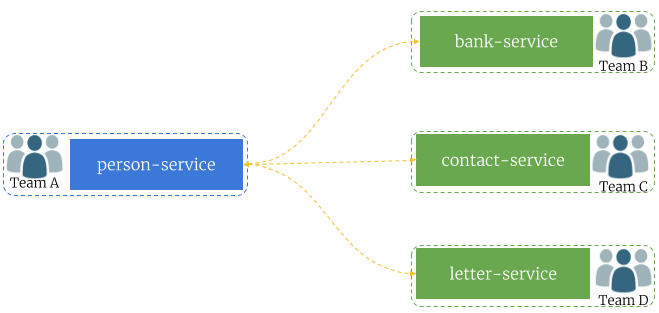
The source code of sample applications is available on GitHub in the repository sample-spring-cloud-contract-ci (https://github.com/piomin/sample-spring-cloud-contract-ci.git). I placed all the sample microservices in the single Git repository only for our demo simplification. We will still treat them as a separated microservices, developed and built independently.
In this article I used Spring Cloud Contract for CDC implementation. It is the first choice solution for JVM applications written in Spring Boot. Contracts can be defined using Groovy or YAML notation. After building on the producer side Spring Cloud Contract generate special JAR file with stubs suffix, that contains all defined contracts and JSON mappings. Such a JAR file can be build on Jenkins and then published on Artifactory. Contract consumer also use the same Artifactory server, so they can use the latest version of stubs file. Because every application expects different response from person-service, we have to define three different contracts between person-service and a target consumer.
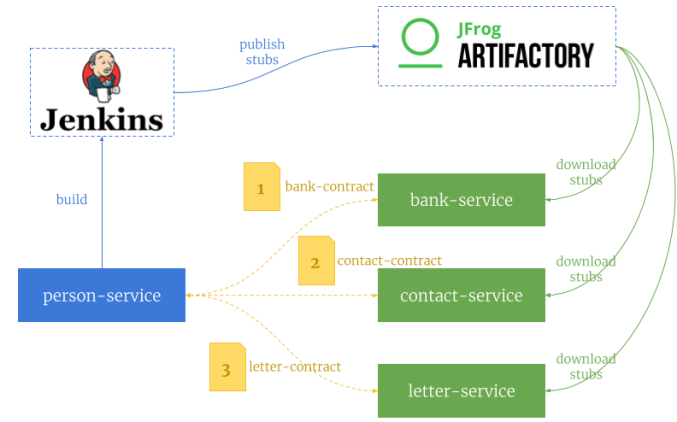
Let’s analyze the sample scenario. Assuming we have performed some changes in the API exposed by person-service and we have modified contracts on the producer side, we would like to publish them on shared server. First, we need to verify contracts against producer (1), and in case of success publish artifact with stubs to Artifactory (2). All the pipelines defined for applications that use this contract are able to trigger the build on a new version of JAR file with stubs (3). Then, the newest version contract is verifying against consumer (4). If contract testing fails, pipeline is able to notify the responsible team about this failure.
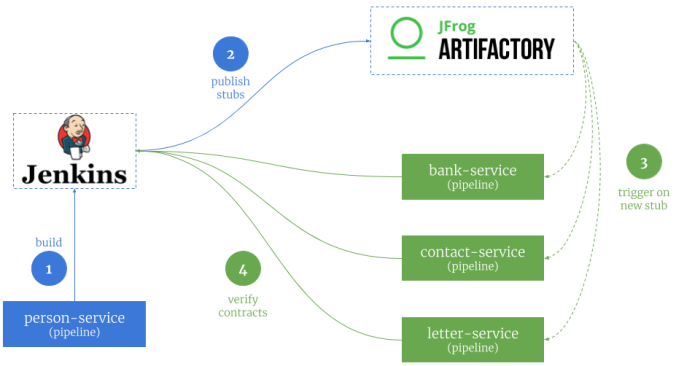
1. Pre-requirements
Before implementing and running any sample we need to prepare our environment. We need to launch Jenkins and Artifactory servers on the local machine. The most suitable way for this is through a Docker containers. Here are the commands required for run these containers.
$ docker run --name artifactory -d -p 8081:8081 docker.bintray.io/jfrog/artifactory-oss:latest
$ docker run --name jenkins -d -p 8080:8080 -p 50000:50000 jenkins/jenkins:lts
I don’t know if you are familiar with such tools like Artifactory and Jenkins. But after starting them we need to configure some things. First you need to initialize Maven repositories for Artifactory. You will be prompt for that just after a first launch. It also automatically add one remote repository: JCenter Bintray (https://bintray.com/bintray/jcenter), which is enough for our build. Jenkins also comes with default set of plugins, which you can install just after first launch (Install suggested plugins). For this demo, you will also have to install plugin for integration with Artifactory (https://wiki.jenkins.io/display/JENKINS/Artifactory+Plugin). If you need more details about Jenkins and Artifactory configuration you can refer to my older article How to setup Continuous Delivery environment.
2. Building contracts
We are beginning contract definition from the producer side application. Producer exposes only one GET /persons/{id} method that returns Person object. Here are the fields contained by Person class.
public class Person {

	private Integer id;
	private String firstName;
	private String lastName;
	@JsonFormat(pattern = "yyyy-MM-dd")
	private Date birthDate;
	private Gender gender;
	private Contact contact;
	private Address address;
	private String accountNo;

	// ...
}
The following picture illustrates, which fields of Person object are used by consumers. As you see, some of the fields are shared between consumers, while some other are required only by single consuming application.
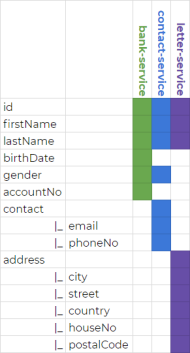
Now we can take a look on contract definition between person-service and bank-service.
import org.springframework.cloud.contract.spec.Contract

Contract.make {
	request {
		method 'GET'
		urlPath('/persons/1')
	}
	response {
		status OK()
		body([
			id: 1,
			firstName: 'Piotr',
			lastName: 'Minkowski',
			gender: $(regex('(MALE|FEMALE)')),
			contact: ([
				email: $(regex(email())),
				phoneNo: $(regex('[0-9]{9}$'))
			])
		])
		headers {
			contentType(applicationJson())
		}
	}
}
For comparison, here’s definition of contract between person-service and letter-service.
import org.springframework.cloud.contract.spec.Contract

Contract.make {
	request {
		method 'GET'
		urlPath('/persons/1')
	}
	response {
		status OK()
		body([
			id: 1,
			firstName: 'Piotr',
			lastName: 'Minkowski',
			address: ([
				city: $(regex(alphaNumeric())),
				country: $(regex(alphaNumeric())),
				postalCode: $(regex('[0-9]{2}-[0-9]{3}')),
				houseNo: $(regex(positiveInt())),
				street: $(regex(nonEmpty()))
			])
		])
		headers {
			contentType(applicationJson())
		}
	}
}
3. Implementing tests on the producer side
Ok, we have three different contracts assigned to the single endpoint exposed by person-service. We need to publish them in such a way to that they are easily available for consumers. In that case Spring Cloud Contract comes with a handy solution. We may define contracts with different response for the same request, and than choose the appropriate definition on the consumer side. All those contract definitions will be published within the same JAR file. Because we have three consumers we define three different contracts placed in directories bank-consumer, contact-consumer and letter-consumer.
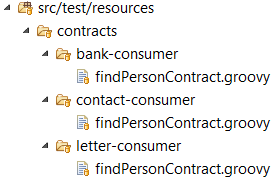
All the contracts will use a single base test class. To achieve it we need to provide a fully qualified name of that class for Spring Cloud Contract Verifier plugin in pom.xml.
<plugin>
	<groupId>org.springframework.cloud</groupId>
	<artifactId>spring-cloud-contract-maven-plugin</artifactId>
	<extensions>true</extensions>
	<configuration>
		<baseClassForTests>pl.piomin.services.person.BasePersonContractTest</baseClassForTests>
	</configuration>
</plugin>
Here’s the full definition of base class for our contract tests. We will mock the repository bean with the answer matching to the rules created inside contract files.
@RunWith(SpringRunner.class)
@SpringBootTest(webEnvironment = WebEnvironment.DEFINED_PORT)
public abstract class BasePersonContractTest {

	@Autowired
	WebApplicationContext context;
	@MockBean
	PersonRepository repository;

	@Before
	public void setup() {
		RestAssuredMockMvc.webAppContextSetup(this.context);
		PersonBuilder builder = new PersonBuilder()
			.withId(1)
			.withFirstName("Piotr")
			.withLastName("Minkowski")
			.withBirthDate(new Date())
			.withAccountNo("1234567890")
			.withGender(Gender.MALE)
			.withPhoneNo("500070935")
			.withCity("Warsaw")
			.withCountry("Poland")
			.withHouseNo(200)
			.withStreet("Al. Jerozolimskie")
			.withEmail("piotr.minkowski@gmail.com")
			.withPostalCode("02-660");
		when(repository.findById(1)).thenReturn(builder.build());
	}

}
Spring Cloud Contract Maven plugin visible above is responsible for generating stubs from contract definitions. It is executed during Maven build after running mvn clean install command. The build is performed on Jenkins CI. Jenkins pipeline is responsible for updating remote Git repository, build binaries from source code, running automated tests and finally publishing JAR file containing stubs on a remote artifact repository – Artifactory. Here’s Jenkins pipeline created for the contract producer side (person-service).
node {
  withMaven(maven:'M3') {
    stage('Checkout') {
      git url: 'https://github.com/piomin/sample-spring-cloud-contract-ci.git', credentialsId: 'piomin-github', branch: 'master'
    }
    stage('Publish') {
      def server = Artifactory.server 'artifactory'
      def rtMaven = Artifactory.newMavenBuild()
      rtMaven.tool = 'M3'
      rtMaven.resolver server: server, releaseRepo: 'libs-release', snapshotRepo: 'libs-snapshot'
      rtMaven.deployer server: server, releaseRepo: 'libs-release-local', snapshotRepo: 'libs-snapshot-local'
      rtMaven.deployer.artifactDeploymentPatterns.addInclude("*stubs*")
      def buildInfo = rtMaven.run pom: 'person-service/pom.xml', goals: 'clean install'
      rtMaven.deployer.deployArtifacts buildInfo
      server.publishBuildInfo buildInfo
    }
  }
}
We also need to include dependency spring-cloud-starter-contract-verifier to the producer app to enable Spring Cloud Contract Verifier.
<dependency>
	<groupId>org.springframework.cloud</groupId>
	<artifactId>spring-cloud-starter-contract-verifier</artifactId>
	<scope>test</scope>
</dependency>
4. Implementing tests on the consumer side
To enable Spring Cloud Contract on the consumer side we need to include artifact spring-cloud-starter-contract-stub-runner to the project dependencies.
<dependency>
	<groupId>org.springframework.cloud</groupId>
	<artifactId>spring-cloud-starter-contract-stub-runner</artifactId>
	<scope>test</scope>
</dependency>
Then, the only thing left is to build JUnit test, which verifies our contract by calling it through OpenFeign client. The configuration of that test is provided inside annotation @AutoConfigureStubRunner. We select the latest version of person-service stubs artifact by setting + in the version section of ids parameter. Because, we have multiple contracts defined inside person-service we need to choose the right for current service by setting consumer-name parameter. All the contract definitions are downloaded from Artifactory server, so we set stubsMode parameter to REMOTE. The address of Artifactory server has to be set using repositoryRoot property.
@RunWith(SpringRunner.class)
@SpringBootTest(webEnvironment = WebEnvironment.NONE)
@AutoConfigureStubRunner(ids = {"pl.piomin.services:person-service:+:stubs:8090"}, consumerName = "letter-consumer",  stubsPerConsumer = true, stubsMode = StubsMode.REMOTE, repositoryRoot = "http://192.168.99.100:8081/artifactory/libs-snapshot-local")
@DirtiesContext
public class PersonConsumerContractTest {

	@Autowired
	private PersonClient personClient;

	@Test
	public void verifyPerson() {
		Person p = personClient.findPersonById(1);
		Assert.assertNotNull(p);
		Assert.assertEquals(1, p.getId().intValue());
		Assert.assertNotNull(p.getFirstName());
		Assert.assertNotNull(p.getLastName());
		Assert.assertNotNull(p.getAddress());
		Assert.assertNotNull(p.getAddress().getCity());
		Assert.assertNotNull(p.getAddress().getCountry());
		Assert.assertNotNull(p.getAddress().getPostalCode());
		Assert.assertNotNull(p.getAddress().getStreet());
		Assert.assertNotEquals(0, p.getAddress().getHouseNo());
	}

}
Here’s Feign client implementation responsible for calling endpoint exposed by person-service
@FeignClient("person-service")
public interface PersonClient {

	@GetMapping("/persons/{id}")
	Person findPersonById(@PathVariable("id") Integer id);

}
5. Setup of Continuous Integration process
Ok, we have already defined all the contracts required for our exercise. We have also build a pipeline responsible for building and publishing stubs with contracts on the producer side (person-service). It always publish the newest version of stubs generated from source code. Now, our goal is to launch pipelines defined for three consumer applications, each time when new stubs would be published to Artifactory server by producer pipeline.
The best solution for that would be to trigger a Jenkins build when you deploy an artifact. To achieve it we use Jenkins plugin called URLTrigger, that can be configured to watch for changes on a certain URL, in that case REST API endpoint exposed by Artifactory for selected repository path.
After installing URLTrigger plugin we have to enable it for all consumer pipelines. You can configure it to watch for changes in the returned JSON file from the Artifactory File List REST API, that is accessed via the following URI: http://192.168.99.100:8081/artifactory/api/storage/[PATH_TO_FOLDER_OR_REPO]/. The file maven-metadata.xml will change every time you deploy a new version of application to Artifactory. We can monitor the change of response’s content between the last two polls. The last field that has to be filled is Schedule. If you set it to * * * * * it will poll for a change every minute.
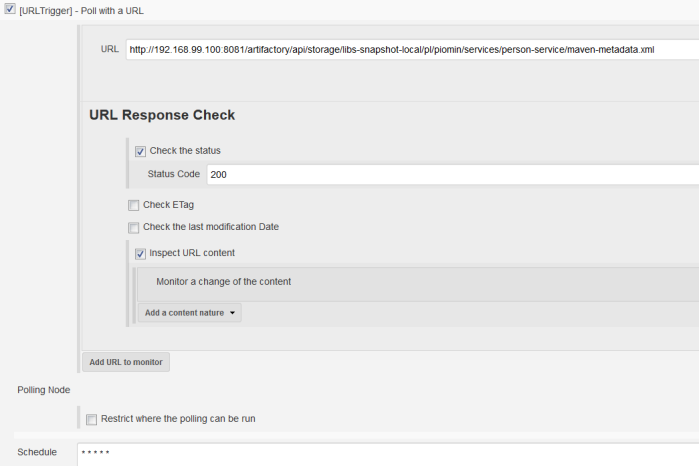
Our three pipelines for consumer applications are ready. The first run was finished with success.

If you have already build person-service application and publish stubs to Artifactory you will see the following structure in libs-snapshot-local repository. I have deployed three different versions of API exposed by person-service. Each time I publish new version of contract all the dependent pipelines are triggered to verify it.
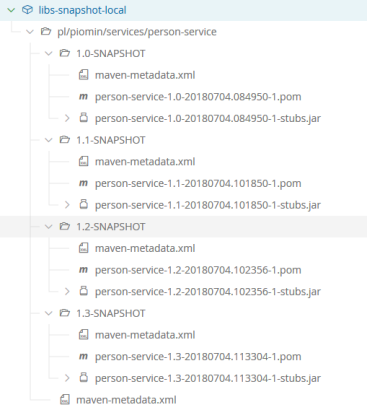
The JAR file with contracts is published under classifier stubs.
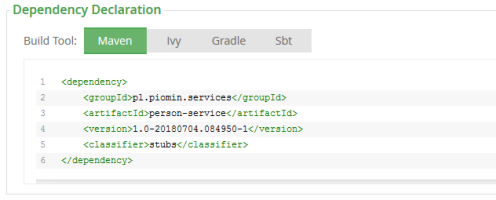
Spring Cloud Contract Stub Runner tries to find the latest version of contracts.
2018-07-04 11:46:53.273  INFO 4185 --- [           main] o.s.c.c.stubrunner.AetherStubDownloader  : Desired version is [+] - will try to resolve the latest version
2018-07-04 11:46:54.752  INFO 4185 --- [           main] o.s.c.c.stubrunner.AetherStubDownloader  : Resolved version is [1.3-SNAPSHOT]
2018-07-04 11:46:54.823  INFO 4185 --- [           main] o.s.c.c.stubrunner.AetherStubDownloader  : Resolved artifact [pl.piomin.services:person-service:jar:stubs:1.3-SNAPSHOT] to /var/jenkins_home/.m2/repository/pl/piomin/services/person-service/1.3-SNAPSHOT/person-service-1.3-SNAPSHOT-stubs.jar
6. Testing change in contract
Ok, we have already prepared contracts and configured our CI environment. Now, let’s perform change in the API exposed by person-service. We will just change the name of one field: accountNo to accountNumber.

This changes requires a change in contract definition created on the producer side. If you modify the field name there person-service will build successfully and new version of contract will be published to Artifactory. Because all other pipelines listens for changes in the latest version of JAR files with stubs, the build will be started automatically. Microservices letter-service and contact-service do not use field accountNo, so their pipelines will not fail. Only bank-service pipeline report error in contract as shown on the picture below.

Now, if you were notified about failed verification of the newest contract version between person-service and bank-service, you can perform required change on the consumer side.
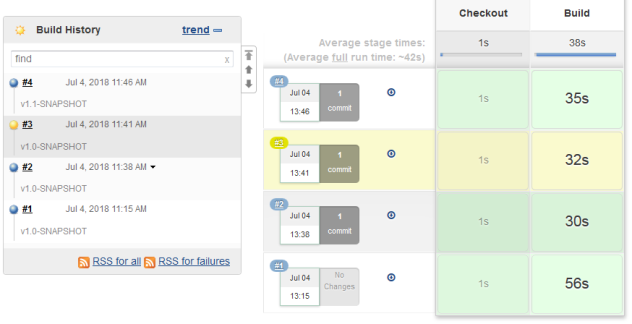
Secure Discovery with Spring Cloud Netflix Eureka
Building standard discovery mechanism basing on Spring Cloud Netflix Eureka is rather an easy thing to do. The same solution built over secure SSL communication between discovery client and server may be slightly more advanced challenge. I haven’t find any any complete example of such an application on web. Let’s try to implement it beginning from the server-side application.
1. Generate certificates
If you develop Java applications for some years you have probably heard about keytool. This tool is available in your ${JAVA_HOME}\bin directory, and is designed for managing keys and certificates. We begin from generating keystore for server-side Spring Boot application. Here’s the appropriate keytool command that generates certficate stored inside JKS keystore file named eureka.jks.
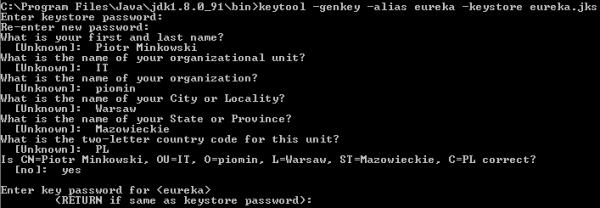
2. Setting up a secure discovery server
Since Eureka server is embedded to Spring Boot application, we need to secure it using standard Spring Boot properties. I placed generated keystore file eureka.jks on the application’s classpath. Now, the only thing that has to be done is to prepare some configuration settings inside application.yml that point to keystore file location, type, and access password.
server:
  port: 8761
  ssl:
    enabled: true
    key-store: classpath:eureka.jks
    key-store-password: 123456
    trust-store: classpath:eureka.jks
    trust-store-password: 123456
    key-alias: eureka
3. Setting up two-way SSL authentication
We will complicate our example a little. A standard SSL configuration assumes that only the client verifies the server certificate. We will force client’s certificate authentication on the server-side. It can be achieved by setting the property server.ssl.client-auth to need.
server:
  ssl:
    client-auth: need
It’s not all, because we also have to add client’s certficate to the list of trusted certificates on the server-side. So, first let’s generate client’s keystore using the same keytool command as for server’s keystore.

Now, we need to export certficates from generated keystores for both client and server sides.

Finally, we import client’s certficate to server’s keystore and server’s certficate to client’s keystore.
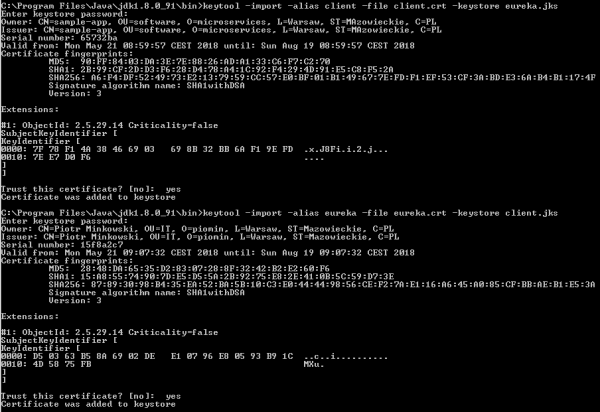
4. Running secure Eureka server
The sample applications are available on GitHub in repository sample-secure-eureka-discovery (https://github.com/piomin/sample-secure-eureka-discovery.git). After running discovery-service application, Eureka is available under address https://localhost:8761. If you try to visit its web dashboard you get the following exception in your web browser. It means Eureka server is secured.

Well, Eureka dashboard is sometimes an useful tool, so let’s import client’s keystore to our web browser to be able to access it. We have to convert client’s keystore from JKS to PKCS12 format. Here’s the command that performs mentioned operation.
$ keytool -importkeystore -srckeystore client.jks -destkeystore client.p12 -srcstoretype JKS -deststoretype PKCS12 -srcstorepass 123456 -deststorepass 123456 -srcalias client -destalias client -srckeypass 123456 -destkeypass 123456 -noprompt
5. Client’s application configuration
When implementing secure connection on the client side, we generally need to do the same as in the previous step – import a keystore. However, it is not very simple thing to do, because Spring Cloud does not provide any configuration property that allows you to pass the location of SSL keystore to a discovery client. What’s worth mentioning Eureka client leverages Jersey client to communicate with server-side application. It may be surprising a little it is not Spring RestTemplate, but we should remember that Spring Cloud Eureka is built on top of Netflix OSS Eureka client, which does not use Spring libraries.
HTTP basic authentication is automatically added to your eureka client if you include security credentials to connection URL, for example http://piotrm:12345@localhost:8761/eureka. For more advanced configuration, like passing SSL keystore to HTTP client we need to provide @Bean of type DiscoveryClientOptionalArgs.
The following fragment of code shows how to enable SSL connection for discovery client. First, we set location of keystore and truststore files using javax.net.ssl.* Java system property. Then, we provide custom implementation of Jersey client based on Java SSL settings, and set it for DiscoveryClientOptionalArgs bean.
@Bean
public DiscoveryClient.DiscoveryClientOptionalArgs discoveryClientOptionalArgs() throws NoSuchAlgorithmException {
	DiscoveryClient.DiscoveryClientOptionalArgs args = new DiscoveryClient.DiscoveryClientOptionalArgs();
	System.setProperty("javax.net.ssl.keyStore", "src/main/resources/client.jks");
	System.setProperty("javax.net.ssl.keyStorePassword", "123456");
	System.setProperty("javax.net.ssl.trustStore", "src/main/resources/client.jks");
	System.setProperty("javax.net.ssl.trustStorePassword", "123456");
	EurekaJerseyClientBuilder builder = new EurekaJerseyClientBuilder();
	builder.withClientName("account-client");
	builder.withSystemSSLConfiguration();
	builder.withMaxTotalConnections(10);
	builder.withMaxConnectionsPerHost(10);
	args.setEurekaJerseyClient(builder.build());
	return args;
}
6. Enabling HTTPS on the client side
The configuration provided in the previous step applies only to communication between discovery client and Eureka server. What if we also would like to secure HTTP endpoints exposed by the client-side application? The first step is pretty the same as for the discovery server: we need to generate keystore and set it using Spring Boot properties inside application.yml.
server:
  port: ${PORT:8090}
  ssl:
    enabled: true
    key-store: classpath:client.jks
    key-store-password: 123456
    key-alias: client
During registration we need to “inform” Eureka server that our application’s endpoints are secured. To achieve it we should set property eureka.instance.securePortEnabled to true, and also disable non secure port, which is enabled by default.with nonSecurePortEnabled property.
eureka:
  instance:
    nonSecurePortEnabled: false
    securePortEnabled: true
    securePort: ${server.port}
    statusPageUrl: https://localhost:${server.port}/info
    healthCheckUrl: https://localhost:${server.port}/health
    homePageUrl: https://localhost:${server.port}
  client:
    securePortEnabled: true
    serviceUrl:
      defaultZone: https://localhost:8761/eureka/
7. Running client’s application
Finally, we can run client-side application. After launching the application should be visible in Eureka Dashboard.

All the client application’s endpoints are registred in Eureka under HTTPS protocol. I have also override default implementation of actuator endpoint /info, as shown on the code fragment below.
@Component
public class SecureInfoContributor implements InfoContributor {

	@Override
	public void contribute(Builder builder) {
		builder.withDetail("hello", "I'm secure app!");
	}

}
Now, we can try to visit /info endpoint one more time. You should see the same information as below.

Alternatively, if you try to set on the client-side the certificate, which is not trusted by server-side, you will see the following exception while starting your client application.

Conclusion
Securing connection between microservices and Eureka server is only the first step of securing the whole system. We need to thing about secure connection between microservices and config server, and also between all microservices during inter-service communication with @LoadBalanced RestTemplate or OpenFeign client. You can find the examples of such implementations and many more in my book “Mastering Spring Cloud” (https://www.packtpub.com/application-development/mastering-spring-cloud).
Mastering Spring Cloud
Let me share with you the result of my last couple months of work – the book published on 26th April by Packt. The book Mastering Spring Cloud is strictly linked to the topics frequently published in this blog – it describes how to build microservices using Spring Cloud framework. I tried to create this book in well-known style of writing from this blog, where I focus on giving you the practical samples of working code without unnecessary small-talk and scribbles 🙂 If you like my style of writing, and in addition you are interested in Spring Cloud framework and microservices, this book is just for you 🙂
The book consists of fifteen chapters, where I have guided you from the basic to the most advanced examples illustrating use cases for almost all projects being a part of Spring Cloud. While creating a blog posts I not always have time to go into all the details related to Spring Cloud. I’m trying to describe a lot of different, interesting trends and solutions in the area of Java development. The book describes many details related to the most important projects of Spring Cloud like service discovery, distributed configuration, inter-service communication, security, logging, testing or continuous delivery. It is available on http://www.packtpub.com site: https://www.packtpub.com/application-development/mastering-spring-cloud. The detailed description of all the topics raised in that book is available on that site.
Personally, I particulary recommend to read the following more advanced subjects described in the book:
- Peer-to-peer replication between multiple instances of Eureka servers, and using zoning mechanism in inter-service communication
- Automatically reloading configuration after changes with Spring Cloud Config push notifications mechanism based on Spring Cloud Bus
- Advanced configuration of inter-service communication with Ribbon client-side load balancer and Feign client
- Enabling SSL secure communication between microservices and basic elements of microservices-based architecture like service discovery or configuration server
- Building messaging microservices based on publish/subscribe communication model including cunsumer grouping, partitioning and scaling with Spring Cloud Stream and message brokers (Apache Kafka, RabbitMQ)
- Setting up continuous delivery for Spring Cloud microservices with Jenkins and Docker
- Using Docker for running Spring Cloud microservices on Kubernetes platform simulated locally by Minikube
- Deploying Spring Cloud microservices on cloud platforms like Pivotal Web Services (Pivotal Cloud Foundry hosted cloud solution) and Heroku
Those examples and many others are available together with this book. At the end, a short description taken from packtpub.com site:
Developing, deploying, and operating cloud applications should be as easy as local applications. This should be the governing principle behind any cloud platform, library, or tool. Spring Cloud–an open-source library–makes it easy to develop JVM applications for the cloud. In this book, you will be introduced to Spring Cloud and will master its features from the application developer’s point of view.
Quick Guide to Microservices with Spring Boot 2.0, Eureka and Spring Cloud
There are many articles on my blog about microservices with Spring Boot and Spring Cloud. The main purpose of this article is to provide a brief summary of the most important components provided by these frameworks that help you in creating microservices and in fact explain you what is Spring Cloud for microservices architecture. The topics covered in this article are:
- Using Spring Boot 2 in cloud-native development
- Providing service discovery for all microservices with Spring Cloud Netflix Eureka
- Distributed configuration with Spring Cloud Config
- API Gateway pattern using a new project inside Spring Cloud: Spring Cloud Gateway
- Correlating logs with Spring Cloud Sleuth
Before we proceed to the source code, let’s take a look on the following diagram. It illustrates the architecture of our sample system. We have three independent microservices, which register themself in service discovery, fetch properties from configuration service and communicate with each other. The whole system is hidden behind API gateway.
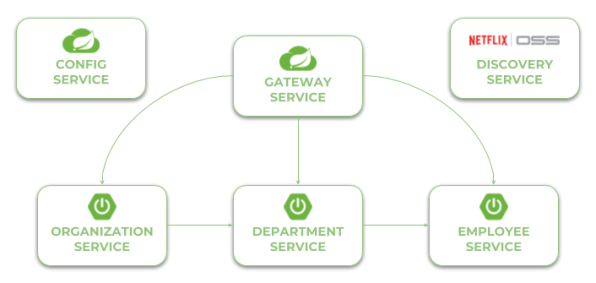
Currently, the newest version of Spring Cloud is Finchley.M9. This version of spring-cloud-dependencies should be declared as a BOM for dependency management.
<dependencyManagement>
	<dependencies>
		<dependency>
			<groupId>org.springframework.cloud</groupId>
			<artifactId>spring-cloud-dependencies</artifactId>
			<version>Finchley.M9</version>
			<type>pom</type>
			<scope>import</scope>
		</dependency>
	</dependencies>
</dependencyManagement>
Now, let’s consider the further steps to be taken in order to create working microservices-based system using Spring Cloud. We will begin from Configuration Server.
The source code of sample applications presented in this article is available on GitHub in repository https://github.com/piomin/sample-spring-microservices-new.git.
Step 1. Building configuration server with Spring Cloud Config
To enable Spring Cloud Config feature for an application, first include spring-cloud-config-server to your project dependencies.
<dependency>
	<groupId>org.springframework.cloud</groupId>
	<artifactId>spring-cloud-config-server</artifactId>
</dependency>
Then enable running embedded configuration server during application boot use @EnableConfigServer annotation.
@SpringBootApplication
@EnableConfigServer
public class ConfigApplication {

	public static void main(String[] args) {
		new SpringApplicationBuilder(ConfigApplication.class).run(args);
	}

}
By default Spring Cloud Config Server store the configuration data inside Git repository. This is very good choice in production mode, but for the sample purpose file system backend will be enough. It is really easy to start with config server, because we can place all the properties in the classpath. Spring Cloud Config by default search for property sources inside the following locations: classpath:/, classpath:/config, file:./, file:./config.
We place all the property sources inside src/main/resources/config. The YAML filename will be the same as the name of service. For example, YAML file for discovery-service will be located here: src/main/resources/config/discovery-service.yml.
And last two important things. If you would like to start config server with file system backend you have activate Spring Boot profile native. It may be achieved by setting parameter --spring.profiles.active=native during application boot. I have also changed the default config server port (8888) to 8061 by setting property server.port in bootstrap.yml file.
Step 2. Building service discovery with Spring Cloud Netflix Eureka
More to the point of configuration server. Now, all other applications, including discovery-service, need to add spring-cloud-starter-config dependency in order to enable config client. We also have to include dependency to spring-cloud-starter-netflix-eureka-server.
<dependency>
	<groupId>org.springframework.cloud</groupId>
	<artifactId>spring-cloud-starter-netflix-eureka-server</artifactId>
</dependency>
Then you should enable running embedded discovery server during application boot by setting @EnableEurekaServer annotation on the main class.
@SpringBootApplication
@EnableEurekaServer
public class DiscoveryApplication {

	public static void main(String[] args) {
		new SpringApplicationBuilder(DiscoveryApplication.class).run(args);
	}

}
Application has to fetch property source from configuration server. The minimal configuration required on the client side is an application name and config server’s connection settings.
spring:
  application:
    name: discovery-service
  cloud:
    config:
      uri: http://localhost:8088
As I have already mentioned, the configuration file discovery-service.yml should be placed inside config-service module. However, it is required to say a few words about the configuration visible below. We have changed Eureka running port from default value (8761) to 8061. For standalone Eureka instance we have to disable registration and fetching registry.
server:
  port: 8061

eureka:
  instance:
    hostname: localhost
  client:
    registerWithEureka: false
    fetchRegistry: false
    serviceUrl:
      defaultZone: http://${eureka.instance.hostname}:${server.port}/eureka/
Now, when you are starting your application with embedded Eureka server you should see the following logs.

Once you have succesfully started application you may visit Eureka Dashboard available under address http://localhost:8061/.
Step 3. Building microservice using Spring Boot and Spring Cloud
Our microservice has te perform some operations during boot. It needs to fetch configuration from config-service, register itself in discovery-service, expose HTTP API and automatically generate API documentation. To enable all these mechanisms we need to include some dependencies in pom.xml. To enable config client we should include starter spring-cloud-starter-config. Discovery client will be enabled for microservice after including spring-cloud-starter-netflix-eureka-client and annotating the main class with @EnableDiscoveryClient. To force Spring Boot application generating API documentation we should include springfox-swagger2 dependency and add annotation @EnableSwagger2.
Here is the full list of dependencies defined for my sample microservice.
<dependency>
	<groupId>org.springframework.cloud</groupId>
	<artifactId>spring-cloud-starter-netflix-eureka-client</artifactId>
</dependency>
<dependency>
	<groupId>org.springframework.cloud</groupId>
	<artifactId>spring-cloud-starter-config</artifactId>
</dependency>
<dependency>
	<groupId>org.springframework.boot</groupId>
	<artifactId>spring-boot-starter-web</artifactId>
</dependency>
<dependency>
	<groupId>io.springfox</groupId>
	<artifactId>springfox-swagger2</artifactId>
	<version>2.8.0</version>
</dependency>
And here is the main class of application that enables Discovery Client and Swagger2 for the microservice.
@SpringBootApplication
@EnableDiscoveryClient
@EnableSwagger2
public class EmployeeApplication {

	public static void main(String[] args) {
		SpringApplication.run(EmployeeApplication.class, args);
	}

	@Bean
	public Docket swaggerApi() {
		return new Docket(DocumentationType.SWAGGER_2)
			.select()
				.apis(RequestHandlerSelectors.basePackage("pl.piomin.services.employee.controller"))
				.paths(PathSelectors.any())
			.build()
			.apiInfo(new ApiInfoBuilder().version("1.0").title("Employee API").description("Documentation Employee API v1.0").build());
	}

	...

}
Application has to fetch configuration from a remote server, so we should only provide bootstrap.yml file with service name and server URL. In fact, this is the example of Config First Bootstrap approach, when an application first connects to a config server and takes a discovery server address from a remote property source. There is also Discovery First Bootstrap, where a config server address is fetched from a discovery server.
spring:
  application:
    name: employee-service
  cloud:
    config:
      uri: http://localhost:8088
There is no much configuration settings. Here’s application’s configuration file stored on a remote server. It stores only HTTP running port and Eureka URL. However, I also placed file employee-service-instance2.yml on remote config server. It sets different HTTP port for application, so you can esily run two instances of the same service locally basing on remote properties. Now, you may run the second instance of employee-service on port 9090 after passing argument spring.profiles.active=instance2 during an application startup. With default settings you will start the microservice on port 8090.
server:
  port: 9090

eureka:
  client:
    serviceUrl:
      defaultZone: http://localhost:8061/eureka/
Here’s the code with implementation of REST controller class. It provides an implementation for adding new employee and searching for employee using different filters.
@RestController
public class EmployeeController {

	private static final Logger LOGGER = LoggerFactory.getLogger(EmployeeController.class);

	@Autowired
	EmployeeRepository repository;

	@PostMapping
	public Employee add(@RequestBody Employee employee) {
		LOGGER.info("Employee add: {}", employee);
		return repository.add(employee);
	}

	@GetMapping("/{id}")
	public Employee findById(@PathVariable("id") Long id) {
		LOGGER.info("Employee find: id={}", id);
		return repository.findById(id);
	}

	@GetMapping
	public List findAll() {
		LOGGER.info("Employee find");
		return repository.findAll();
	}

	@GetMapping("/department/{departmentId}")
	public List findByDepartment(@PathVariable("departmentId") Long departmentId) {
		LOGGER.info("Employee find: departmentId={}", departmentId);
		return repository.findByDepartment(departmentId);
	}

	@GetMapping("/organization/{organizationId}")
	public List findByOrganization(@PathVariable("organizationId") Long organizationId) {
		LOGGER.info("Employee find: organizationId={}", organizationId);
		return repository.findByOrganization(organizationId);
	}

}
Step 4. Communication between microservice with Spring Cloud Open Feign
Our first microservice has been created and started. Now, we will add other microservices that communicate with each other. The following diagram illustrates the communication flow between three sample microservices: organization-service, department-service and employee-service. Microservice organization-service collect list of departments with (GET /organization/{organizationId}/with-employees) or without employees (GET /organization/{organizationId}) from department-service, and list of employees without dividing them into different departments directly from employee-service. Microservice department-service is able to collect list of employees assigned to the particular department.
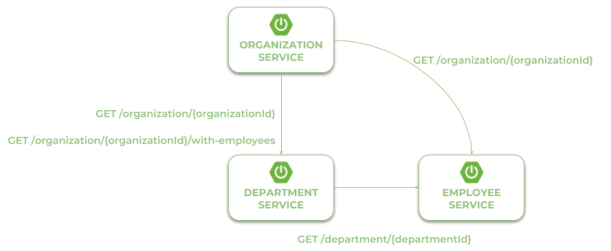
In the scenario described above both organization-service and department-service have to localize other microservices and communicate with them. That’s why we need to include additional dependency for those modules: spring-cloud-starter-openfeign. Spring Cloud Open Feign is a declarative REST client that used Ribbon client-side load balancer in order to communicate with other microservice.
<dependency>
	<groupId>org.springframework.cloud</groupId>
	<artifactId>spring-cloud-starter-openfeign</artifactId>
</dependency>
The alternative solution to Open Feign is Spring RestTemplate with @LoadBalanced. However, Feign provides more ellegant way of defining client, so I prefer it instead of RestTemplate. After including the required dependency we should also enable Feign clients using @EnableFeignClients annotation.
@SpringBootApplication
@EnableDiscoveryClient
@EnableFeignClients
@EnableSwagger2
public class OrganizationApplication {

	public static void main(String[] args) {
		SpringApplication.run(OrganizationApplication.class, args);
	}

	...

}
Now, we need to define client’s interfaces. Because organization-service communicates with two other microservices we should create two interfaces, one per single microservice. Every client’s interface should be annotated with @FeignClient. One field inside annotation is required – name. This name should be the same as the name of target service registered in service discovery. Here’s the interface of the client that calls endpoint GET /organization/{organizationId} exposed by employee-service.
@FeignClient(name = "employee-service")
public interface EmployeeClient {

	@GetMapping("/organization/{organizationId}")
	List findByOrganization(@PathVariable("organizationId") Long organizationId);

}
The second client’s interface available inside organization-service calls two endpoints from department-service. First of them GET /organization/{organizationId} returns organization only with the list of available departments, while the second GET /organization/{organizationId}/with-employees return the same set of data including the list employees assigned to every department.
@FeignClient(name = "department-service")
public interface DepartmentClient {

	@GetMapping("/organization/{organizationId}")
	public List findByOrganization(@PathVariable("organizationId") Long organizationId);

	@GetMapping("/organization/{organizationId}/with-employees")
	public List findByOrganizationWithEmployees(@PathVariable("organizationId") Long organizationId);

}
Finally, we have to inject Feign client’s beans to the REST controller. Now, we may call the methods defined inside DepartmentClient and EmployeeClient, which is equivalent to calling REST endpoints.
@RestController
public class OrganizationController {

	private static final Logger LOGGER = LoggerFactory.getLogger(OrganizationController.class);

	@Autowired
	OrganizationRepository repository;
	@Autowired
	DepartmentClient departmentClient;
	@Autowired
	EmployeeClient employeeClient;

	...

	@GetMapping("/{id}")
	public Organization findById(@PathVariable("id") Long id) {
		LOGGER.info("Organization find: id={}", id);
		return repository.findById(id);
	}

	@GetMapping("/{id}/with-departments")
	public Organization findByIdWithDepartments(@PathVariable("id") Long id) {
		LOGGER.info("Organization find: id={}", id);
		Organization organization = repository.findById(id);
		organization.setDepartments(departmentClient.findByOrganization(organization.getId()));
		return organization;
	}

	@GetMapping("/{id}/with-departments-and-employees")
	public Organization findByIdWithDepartmentsAndEmployees(@PathVariable("id") Long id) {
		LOGGER.info("Organization find: id={}", id);
		Organization organization = repository.findById(id);
		organization.setDepartments(departmentClient.findByOrganizationWithEmployees(organization.getId()));
		return organization;
	}

	@GetMapping("/{id}/with-employees")
	public Organization findByIdWithEmployees(@PathVariable("id") Long id) {
		LOGGER.info("Organization find: id={}", id);
		Organization organization = repository.findById(id);
		organization.setEmployees(employeeClient.findByOrganization(organization.getId()));
		return organization;
	}

}
Step 5. Building API gateway using Spring Cloud Gateway
Spring Cloud Gateway is relatively new Spring Cloud project. It is built on top of Spring Framework 5, Project Reactor and Spring Boot 2.0. It requires the Netty runtime provided by Spring Boot and Spring Webflux. This is really nice alternative to Spring Cloud Netflix Zuul, which has been the only one Spring Cloud project providing API gateway for microservices until now.
API gateway is implemented inside module gateway-service. First, we should include starter spring-cloud-starter-gateway to the project dependencies.
<dependency>
	<groupId>org.springframework.cloud</groupId>
	<artifactId>spring-cloud-starter-gateway</artifactId>
</dependency>
We also need to have discovery client enabled, because gateway-service integrates with Eureka in order to be able to perform routing to the downstream services. Gateway will also expose API specification of all the endpoints exposed by our sample microservices. That’s why we enabled Swagger2 also on the gateway.
@SpringBootApplication
@EnableDiscoveryClient
@EnableSwagger2
public class GatewayApplication {

	public static void main(String[] args) {
		SpringApplication.run(GatewayApplication.class, args);
	}

}
Spring Cloud Gateway provides three basic components used for configuration: routes, predicates and filters. Route is the basic building block of the gateway. It contains destination URI and list of defined predicates and filters. Predicate is responsible for matching on anything from the incoming HTTP request, such as headers or parameters. Filter may modify request and response before and after sending it to downstream services. All these components may be set using configuration properties. We will create and place on the confiration server file gateway-service.yml with the routes defined for our sample microservices.
But first, we should enable integration with discovery server for the routes by setting property spring.cloud.gateway.discovery.locator.enabled to true. Then we may proceed to defining the route rules. We use the Path Route Predicate Factory for matching the incoming requests, and the RewritePath GatewayFilter Factory for modifying the requested path to adapt it to the format exposed by downstream services. The uri parameter specifies the name of target service registered in discovery server. Let’s take a look on the following routes definition. For example, in order to make organization-service available on gateway under path /organization/**, we should define predicate Path=/organization/**, and then strip prefix /organization from the path, because the target service is exposed under path /**. The address of target service is fetched for Eureka basing uri value lb://organization-service.
spring:
  cloud:
    gateway:
      discovery:
        locator:
          enabled: true
      routes:
      - id: employee-service
        uri: lb://employee-service
        predicates:
        - Path=/employee/**
        filters:
        - RewritePath=/employee/(?.*), /$\{path}
      - id: department-service
        uri: lb://department-service
        predicates:
        - Path=/department/**
        filters:
        - RewritePath=/department/(?.*), /$\{path}
      - id: organization-service
        uri: lb://organization-service
        predicates:
        - Path=/organization/**
        filters:
        - RewritePath=/organization/(?.*), /$\{path}
Step 6. Enabling API specification on gateway using Swagger2
Every Spring Boot microservice that is annotated with @EnableSwagger2 exposes Swagger API documentation under path /v2/api-docs. However, we would like to have that documentation located in the single place – on API gateway. To achieve it we need to provide bean implementing SwaggerResourcesProvider interface inside gateway-service module. That bean is responsible for defining list storing locations of Swagger resources, which should be displayed by the application. Here’s the implementation of SwaggerResourcesProvider that takes the required locations from service discovery basing on the Spring Cloud Gateway configuration properties.
Unfortunately, SpringFox Swagger still does not provide support for Spring WebFlux. It means that if you include SpringFox Swagger dependencies to the project application will fail to start… I hope the support for WebFlux will be available soon, but now we have to use Spring Cloud Netflix Zuul as a gateway, if we would like to run embedded Swagger2 on it.
I created module proxy-service that is an alternative API gateway based on Netflix Zuul to gateway-service based on Spring Cloud Gateway. Here’s a bean with SwaggerResourcesProvider implementation available inside proxy-service. It uses ZuulProperties bean to dynamically load routes definition into the bean.
@Configuration
public class ProxyApi {

	@Autowired
	ZuulProperties properties;

	@Primary
	@Bean
	public SwaggerResourcesProvider swaggerResourcesProvider() {
		return () -> {
			List resources = new ArrayList();
			properties.getRoutes().values().stream()
					.forEach(route -> resources.add(createResource(route.getServiceId(), route.getId(), "2.0")));
			return resources;
		};
	}

	private SwaggerResource createResource(String name, String location, String version) {
		SwaggerResource swaggerResource = new SwaggerResource();
		swaggerResource.setName(name);
		swaggerResource.setLocation("/" + location + "/v2/api-docs");
		swaggerResource.setSwaggerVersion(version);
		return swaggerResource;
	}

}
Here’s Swagger UI for our sample microservices system available under address http://localhost:8060/swagger-ui.html.
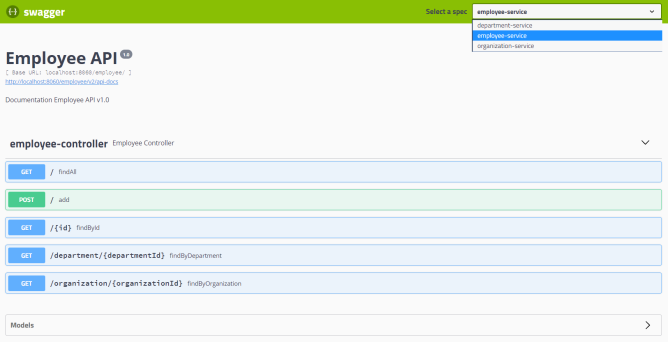
Step 7. Running applications
Let’s take a look on the architecture of our system visible on the following diagram. We will discuss it from the organization-service point of view. After starting organization-service connects to config-service available under address localhost:8088 (1). Basing on remote configuration settings it is able to register itself in Eureka (2). When the endpoint of organization-service is invoked by external client via gateway (3) available under address localhost:8060, the request is forwarded to instance of organization-service basing on entries from service discovery (4). Then organization-service lookup for address of department-service in Eureka (5), and call its endpoint (6). Finally department-service calls endpont from employee-service. The request as load balanced between two available instance of employee-service by Ribbon (7).
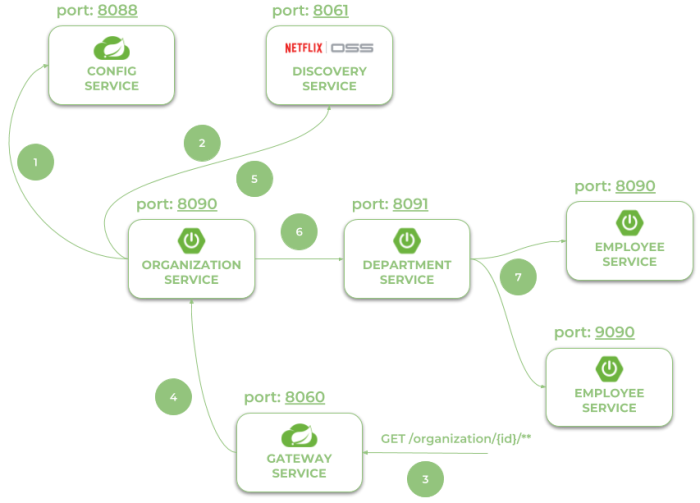
Let’s take a look on the Eureka Dashboard available under address http://localhost:8061. There are four instances of microservices registered there: a single instance of organization-service and department-service, and two instances of employee-service.

Now, let’s call endpoint http://localhost:8060/organization/1/with-departments-and-employees.
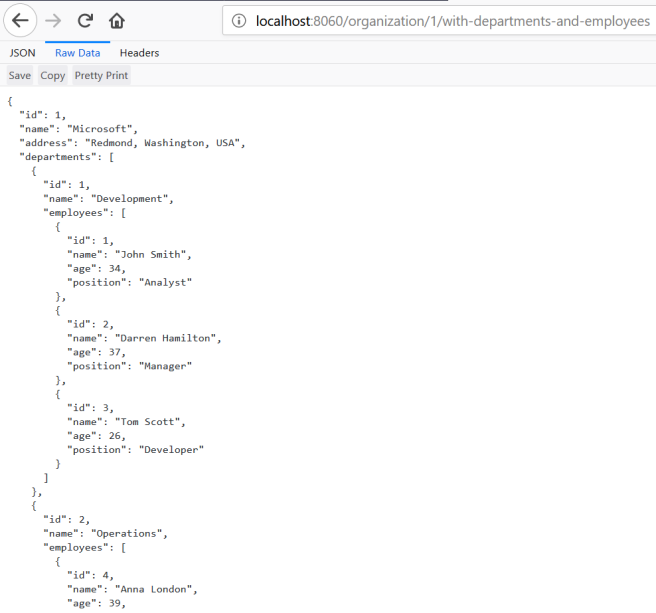
Step 8. Correlating logs between independent microservices using Spring Cloud Sleuth
Correlating logs between different microservice using Spring Cloud Sleuth is very easy. In fact, the only thing you have to do is to add starter spring-cloud-starter-sleuth to the dependencies of every single microservice and gateway.
<dependency>
	<groupId>org.springframework.cloud</groupId>
	<artifactId>spring-cloud-starter-sleuth</artifactId>
</dependency>
For clarification we will change default log format a little to: %d{yyyy-MM-dd HH:mm:ss} ${LOG_LEVEL_PATTERN:-%5p} %m%n. Here are the logs generated by our three sample miccroservices. There are four entries inside braces [] generated by Spring Cloud Stream. The most important for us is the second entry, which indicates on traceId, that is set once per incoming HTTP request on the edge of the system.


Deploying Spring Cloud Microservices on Hashicorp’s Nomad
Nomad is a little less popular HashiCorp’s cloud product than Consul, Terraform or Vault. It is also not as popular as a competitive software like Kubernetes and Docker Swarm. However, it has its advantages. While Kubernetes is specifically focused on Docker, Nomad is more general purpose. It supports containerized Docker applications as well as simple applications delivered as an executable JAR files. Besides that, Nomad is architecturally much simpler. It is a single binary, both for clients and servers, and does not require any services for coordination or storage.
In this article I’m going to show you how to install, configure and use Nomad in order to run on it some microservices created in Spring Boot and Spring Cloud frameworks. Let’s move on.
Step 1. Installing and running Nomad
HashiCorp’s Nomad can be easily started on Windows. You just have to download it from the following site https://www.nomadproject.io/downloads.html, and then add nomad.exe file to your PATH. Now you are able to run Nomad commands from your command-line. Let’s begin from starting Nomad agent. For simplicity, we will run it in development mode (-dev). With this option it is acting both as a client and a server. Here’s command that starts Nomad agent on my local machine.
nomad agent -dev -network-interface="WiFi" -consul-address=192.168.99.100:8500
Sometimes you could be required to pass selected network interface as a parameter. We also need to integrate agent node with Consul discovery for the purpose of inter-service communication discussed in the next part of this article. The most suitable way to run Consul on your local machine is through a Docker container. Here’s the command that launches single node Consul discovery server and exposes it on port 8500. If you run Docker on Windows it is probably available under address 192.168.99.100.
docker run -d --name consul -p 8500:8500 consul
Step 2. Creating job
Nomad is a tool for managing a cluster of machines and running applications on them. To run the application there we should first create job. Job is the primary configuration unit that users interact with when using Nomad. Job is a specification of tasks that should be ran by Nomad. The job consists of multiple groups, and each group may have multiple tasks.
There are some properties that has to be provided, for example datacenters. You should also set type parameter that indicates scheduler type. I set type service, which is designed for scheduling long lived services that should never go down, like an application exposing HTTP API.
Let’s take a look on Nomad’s job descriptor file. The most important elements of that configuration has been marked by the sequence numbers:
- Property
countspecifies the number of the task groups that should be running under this group. In practice it scales up number of instances of the service started by the task. Here, it has been set to2. - Property
driverspecifies the driver that should be used by Nomad clients to run the task. The driver name corresponds to a technology used for running the application. For example we can setdocker,rktfor containerization solutions orjavafor executing Java applications packaged into a Java JAR file. Here, the property has been set tojava. - After settings the driver we should provide some configuration for this driver in the job spec. There are some options available for
javadriver. But I decided to set the absolute path to the downloaded JAR and some JVM options related to the memory limits. - We may set some requirements for the task including memory, network, CPU, and more. Our task requires max 300 MB or RAM, and enables dynamic port allocation for the port labeled “http”.
- Now, it is required to point out very important thing. When the task is started, it is passed an additional environment variable named
NOMAD_HOST_PORT_httpwhich indicates the host port that the HTTP service is bound to. The suffixhttprelates to the label set for the port. - Property
serviceinside task specifies integrations with Consul for service discovery. Now, Nomad automatically registers a task with the provided name when a task is started and de-registers it when the task dies. As you probably remember, the port number is generated automatically by Nomad. However, I passed the label http to force Nomad to register in Consul with automatically generated port.
job "caller-service" {
	datacenters = ["dc1"]
	type = "service"
	group "caller" {
		count = 2 # (1)
		task "api" {
			driver = "java" # (2)
			config { # (3)
				jar_path    = "C:\\Users\\minkowp\\git\\sample-nomad-java-services\\caller-service\\target\\caller-service-1.0.0-SNAPSHOT.jar"
				jvm_options = ["-Xmx256m", "-Xms128m"]
			}
			resources { # (4)
				cpu    = 500
				memory = 300
				network {
					port "http" {} # (5)
				}
			}
			service { # (6)
				name = "caller-service"
				port = "http"
			}
		}
		restart {
			attempts = 1
		}
	}
}
Once we saved the content visible above as job.nomad file, we may apply it to the Nomad node by executing the following command.
nomad job run job.nomad
Step 3. Building sample microservices
Source code of sample applications is available on GitHub in my repository sample-nomad-java-services. There are two simple microservices callme-service and caller-service. I have already use that sample for in the previous articles for showing inter-service communication mechanism. Microservice callme-service does nothing more than exposing endpoint GET /callme/ping that displays service’s name and version.
@RestController
@RequestMapping("/callme")
public class CallmeController {

	private static final Logger LOGGER = LoggerFactory.getLogger(CallmeController.class);

	@Autowired
	BuildProperties buildProperties;

	@GetMapping("/ping")
	public String ping() {
		LOGGER.info("Ping: name={}, version={}", buildProperties.getName(), buildProperties.getVersion());
		return buildProperties.getName() + ":" + buildProperties.getVersion();
	}

}
Implementation of caller-service endpoint is a little bit more complicated. First we have to connect our service with Consul in order to fetch list of registered instances of callme-service. Because we use Spring Boot for creating sample microservices, the most suitable way to enable Consul client is through Spring Cloud Consul library.
<dependency>
	<groupId>org.springframework.cloud</groupId>
	<artifactId>spring-cloud-starter-consul-discovery</artifactId>
</dependency>
We should override auto-configured connection settings in application.yml. In addition to host and property we have also set spring.cloud.consul.discovery.register property to false. We don’t want discovery client to register application in Consul after startup, because it has been already performed by Nomad.
spring:
  application:
    name: caller-service
  cloud:
    consul:
      host: 192.168.99.100
      port: 8500
      discovery:
        register: false
Then we should enable Spring Cloud discovery client and RestTemplate load balancer in the main class of application.
@SpringBootApplication
@EnableDiscoveryClient
public class CallerApplication {

	public static void main(String[] args) {
		SpringApplication.run(CallerApplication.class, args);
	}

	@Bean
	@LoadBalanced
	RestTemplate restTemplate() {
		return new RestTemplate();
	}

}
Finally, we can implement method GET /caller/ping that call endpoint exposed by callme-service.
@RestController
@RequestMapping("/caller")
public class CallerController {

	private static final Logger LOGGER = LoggerFactory.getLogger(CallerController.class);

	@Autowired
	BuildProperties buildProperties;
	@Autowired
	RestTemplate restTemplate;

	@GetMapping("/ping")
	public String ping() {
		LOGGER.info("Ping: name={}, version={}", buildProperties.getName(), buildProperties.getVersion());
		String response = restTemplate.getForObject("http://callme-service/callme/ping", String.class);
		LOGGER.info("Calling: response={}", response);
		return buildProperties.getName() + ":" + buildProperties.getVersion() + ". Calling... " + response;
	}

}
As you probably remember the port of application is automatically generated by Nomad during task execution. It passes an additional environment variable named NOMAD_HOST_PORT_http to the application. Now, this environment variable should be configured inside application.yml file as the value of server.port property.
server:
  port: ${NOMAD_HOST_PORT_http:8090}
The last step is to build the whole project sample-nomad-java-services with mvn clean install command.
Step 4. Using Nomad web console
During two previous steps we have created, build and deployed our sample applications on Nomad. Now, we should verify the installation. We can do it using CLI or by visiting web console provided by nomad. Web console is available under address http://localhost:4646.
In the main site of web console we may see the summery of existing jobs. If everything goes fine field status is equal to RUNNING and bar Summary is green.

We can display the details of every job in the list. The next screen shows the history of the job, reserved resources and number of running instances (tasks).
If you would like to check out the details related to the single task, you should navigate to Task Group details.
We may also display the details related to the client node.
To display the details of allocation select the row in the table. You would be redirected to the following site. You may check out there an IP address of the application instance.

Step 5. Testing a sample system
Assuming you have succesfully deployed the applications on Nomad you should see the following services registered in Consul.
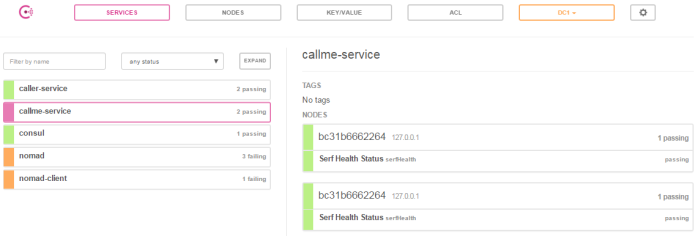
Now, if you call one of two available instances of caller-service, you should see the following response. The address of callme-service instance has been succesfully fetched from Consul through Spring Cloud Consul Client.

Spring Cloud Apps Memory Management
Today’s topic is about memory management in Java as well as about microservices architecture. The inspiration to write this post was the situation when our available memory on test environment for the Spring Cloud based applications was exhausted. Without going into the details what was the cause of such a situation, the problem related with memory consumption by monolith based architecture in comparison with microservices is obvious. For example, supposing we have quite a large monolithic application, often 1GB or 2 GB of RAM will be enough for it, especially if we are talking about not a production environment. If we divide this application into 20 or 30 independent microservices it is hard to expect that the RAM will still remain around 1GB or 2GB. Especially if we use Spring Cloud 🙂
When running sample microservices I will use an earlier example prepared for the purpose of the one of previous articles, which is available on GitHub. I’m going to launch three microservices. First, for service discovery which uses Netflix Eureka server and two simple microservices which provide REST API, communicate with each other and register themselves in discovery server. I will not limit in any way the memory usage by those applications.
Like you see in the figure below those three running microservices have occupied about 1.5GB RAM memory on my computer. This is not the best message considering that we are dealing with very simple applications which do not even have a data persistence layer. The lowest RAM usage is for discovery service and the biggest for customer service which initializes declarative feign client for invoking account service API. Before making that screen I send some test requests to every microservice and run Eureka web console.

A lot about memory usage is shown on the charts visible below made using JProfiler. As we see most of such a memory usage is affected by heap, in comparison to non-heap it does take up much space.
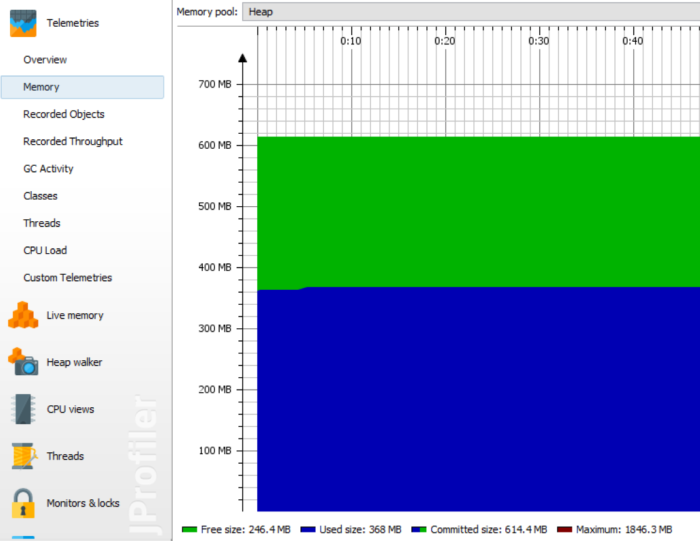
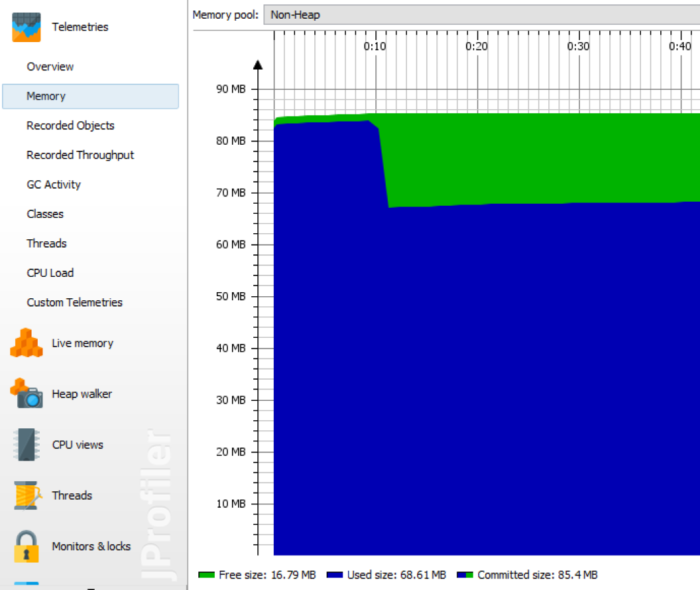
Of course, the first obvious question is whether we need as much space on the heap to run our microservice application. The answer is no, we do not. Now, let’s take a brief look at how the memory management process takes place in Java 8.
We can devide JVM memory into two different parts: Heap and Non-Heap. I have already mentioned a little about Heap. As you could see on the graphs above the heap commited size for our microservices was really big (~600MB). In turn, JVM Memory consists of Young Generation and Old Generation. All the newly created objects are located in the Young Generation. When young generation is filled, garbage collection (Minor GC) is performed. To be more precise, those objects are located in the part of Young Generation which is called Eden Space. Minor GC moves all still used objects from Eden Space into Survivor 0. The same process is performed for Survivor 0 and Survivor 1 spaces. All objects that survived many cycles of GC, are moved to the Old Generation memory space. For removing objects from there is Major GC process is responsible. So, these are the most important information about Java Heap. In order to better understand the figure below. The memory limits for Java Heap can be set with the following parameters during running java -jar command:
- -Xms – initial heap size when JVM starts
- -Xmx – maximum heap size
- -Xmn – size of the Young Generation, rest of the space goes for Old Generation

The second part of the JVM Memory, looking at the graphs above slightly less important from our point of view, is Non-Heap. Non-Heap consists of the following parts:
- Thread Stacks – space for all running threads. The maximum thread size can be set using -Xss parameter.
- Metaspace – it replaced PermGem, which was in Java 7 the part of JVM Heap. In Metaspace there are located all classes and methods load by application. Looking at the number of libraries included for Spring Cloud we won’t save much memory here. Metaspace size can be managed by setting -XX:MetaspaceSize and -XX:MaxMetaspaceSize parameters.
- Code Cache – this is the space for native code (like JNI) or Java methods that are compiled into native code by JIT (just-in-time) compiler. The maximum size is determined by setting -XX:ReservedCodeCacheSize parameter.
- Compressed Class Space – the maximum memory reserved for compressed class space is set with -XX:CompressedClassSpaceSize
- Direct NIO Buffers
To put it more simply, Heap is for objects and Non-Heap is for classes. As you can imagine we can end up with the situation when non-heap is larger than heap for our application. First, let’s run our service discovery with the parameters below. In my opinion these are the lowest values if you are starting Eureka with embedded Tomcat on Spring Boot.
-Xms16m -Xmx32m -XX:MaxMetaspaceSize=48m -XX:CompressedClassSpaceSize=8m -Xss256k -Xmn8m -XX:InitialCodeCacheSize=4m -XX:ReservedCodeCacheSize=8m -XX:MaxDirectMemorySize=16m
If we are running microservice with REST API and Eureka, Feign and Ribbon clients we need to increase values a little.
-Xms16m -Xmx48m -XX:MaxMetaspaceSize=64m -XX:CompressedClassSpaceSize=8m -Xss256k -Xmn8m -XX:InitialCodeCacheSize=4m -XX:ReservedCodeCacheSize=8m -XX:MaxDirectMemorySize=16m
Here are charts from JProfiler for the settings above and Customer service. The difference is in starting and requests processing time. The application is working slower in comparison with earlier settings (or rather lack of them :)). Well, I wouldn’t set such a parameters in production mode. Treat them rather as a minimum requirements for service discovery and microservice apps.
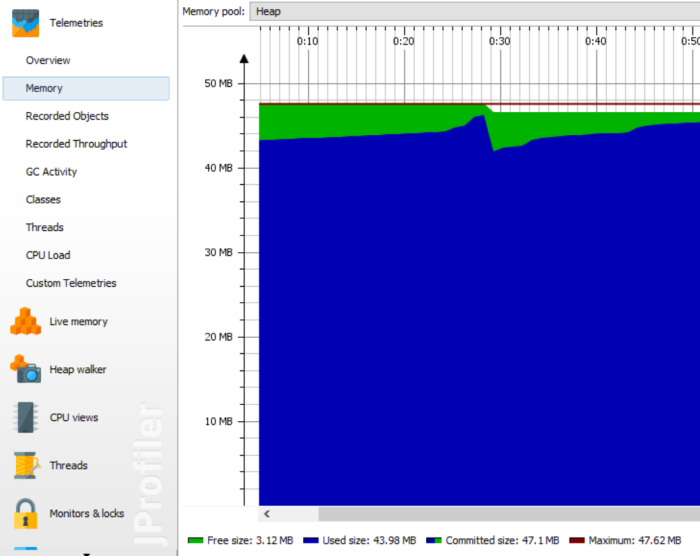
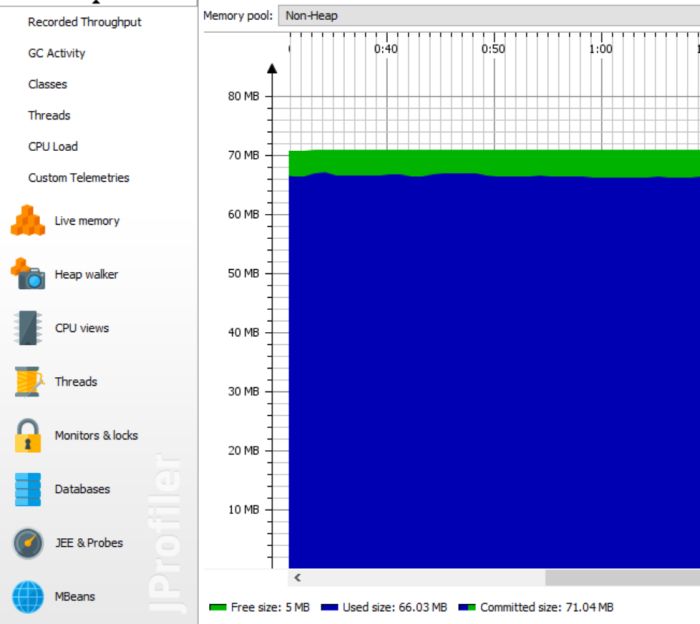
The current total memory usage is as follows. It is still the biggest for Customer service and the lowest for Discovery.

I have also tried to run Discovery application using different web containers. You can easily change web container by including in your pom.xml file the dependencies visible below.
For Jetty.
<dependency>
	<groupId>org.springframework.boot</groupId>
	<artifactId>spring-boot-starter-jetty</artifactId>
</dependency>
For Undertow.
<dependency>
	<groupId>org.springframework.boot</groupId>
	<artifactId>spring-boot-starter-undertow</artifactId>
</dependency>
The best result was for Undertow (116MB), second place for Tomcat (122MB) and third for Jetty (128MB). This tests were performed only for Eureka server without registering there any microservices.
Microservices Configuration With Spring Cloud Config
Preface
Although every microservice instance is an independent unit, we usually manage them from one central location. We are talking about watching the application logs (Kibana), metrics ans statistics (Zipkin, Grafana), instance monitoring and configuration management. I’m going to say a little more about configuration management with Spring Cloud Config framework.
Spring Cloud Config provides server and client-side support for externalized configuration in a distributed system. With the Config Server you have a central place to manage external properties for applications across all environments.
The concept of using configuration server inside microservices architecture is visualized on the figure below. The configuration is stored in the version control system (in the most cases it is Git) as a YAML or properties files. Spring Cloud Config Server pulls configuration from VCS and exposes it as RESTful endpoints. Configuration server registers itself at a discovery service. Every microservice application connects to registration service to discover an address of configuration server using its name. Then it invokes REST endpoint to download the newest configuration settings on startup.

Sample application
Sample application source code is available on GitHub. For the purpose of this example, I also created a repository for storing configuration files, which is available here. Let’s begin from configuration server. To enable configuration server and its registration in the discovery service we have to add following dependencies into pom.xml.
<dependency>
	<groupId>org.springframework.cloud</groupId>
	<artifactId>spring-cloud-config-server</artifactId>
</dependency>
<dependency>
	<groupId>org.springframework.cloud</groupId>
	<artifactId>spring-cloud-starter-eureka</artifactId>
</dependency>
In the application main class we should add the following annotations.
@SpringBootApplication
@EnableConfigServer
@EnableDiscoveryClient
public class ConfigServer {

	public static void main(String[] args) {
		SpringApplication.run(ConfigServer.class, args);
	}

}
The last thing to do is to define configuration in application.yml. I set default port, application name (for discovery) and Git repository address and credentials. Spring Cloud Config Server by default makes a clone of the remote git repository and if the local copy gets dirty it cannot update the local copy from remote repository. To solve this problem I set a force-pull property to force Spring Cloud Config Server pull from remote repository every time a new request is incoming.
server:
  port: ${PORT:9999}

spring:
  application:
    name: config-server
  cloud:
    config:
      server:
        git:
          uri: https://github.com/piomin/sample-config-repo.git
          force-pull: true
          username: ${github.username}
          password: ${github.password}
It’s everything that had to be done on the server side. If you run your Spring Boot application it should be visible in discovery service as config-server. To enable interaction with config server on the client side we should add one dependency in pom.xml.
<dependency>
	<groupId>org.springframework.cloud</groupId>
	<artifactId>spring-cloud-starter-config</artifactId>
</dependency>
According to theory we should not have basic configuration defined in application.yml file but in bootstrap.yml. Why we need have anything there? At least application has to know discovery server address to be able to invoke configuration server. In addition, we can override default parameters for configuration invoking, such as config server discovery name (the default is configserver), configuration name, profile and label. By default microservice tries to detect configuration with name equal to ${spring.application.name}, label equal to ‘master’ and profiles read from ${spring.profiles.active} property.
spring:
  application:
    name: account-service
  cloud:
    config:
      discovery:
        enabled: true
        serviceId: config-server
      name: account
      profile: development
      label: develop

eureka:
  client:
    serviceUrl:
      defaultZone: http://localhost:8761/eureka/
  instance:
    leaseRenewalIntervalInSeconds: 1
    leaseExpirationDurationInSeconds: 2
The further part of the application configuration is located in the dedicated repository in account-development.yml file. Application tries to find this file in ‘develop’ branch. Such a file is cloned by configuration server and exposed in all the following REST endpoints:
/{application}/{profile}[/{label}]
/{application}-{profile}.yml
/{label}/{application}-{profile}.yml
/{application}-{profile}.properties
/{label}/{application}-{profile}.properties
If you call in your web browser our example configuration available under first endpoint http://localhost:9999/account/development/develop you should see full configuration in JSON format, where properties are available inside propertySources. Let me say some words about account-service configuration. Here’s YAML file where I set server port, mongo database connection settings, ribbon client configuration and specific application settings – the list of test accounts.
server:
  port: ${PORT:2222}

spring:
  data:
    mongodb:
      host: 192.168.99.100
      port: 27017
      username: micro
      password: micro

ribbon:
  eureka:
    enabled: true

test:
  accounts:
    - id: 1
      number: '0654321789'
      balance: 2500
      customerId: 1
    - id: 2
      number: '0654321780'
      balance: 0
      customerId: 1
    - id: 3
      number: '0650981789'
      balance: 12000
      customerId: 2
Before running application you should start mongo database.
docker run -d --name mongo -p 27017:27017 mongodb
All the find endpoints can be switched to connect mongodb repository or test accounts repository read form remote configuration by passing parameter ‘true’ in the end of each REST path. Test data is read from configuration file which is stored under ‘test’ key.
@Repository
@ConfigurationProperties(prefix = "test")
public class TestAccountRepository {

	private List<Account> accounts;

	public List<Account> getAccounts() {
		return accounts;
	}

	public void setAccounts(List<Account> accounts) {
		this.accounts = accounts;
	}

	public Account findByNumber(String number) {
		return accounts.stream().filter(it -> it.getNumber().equals(number)).findFirst().get();
	}

}
Dynamic configuration reload
Ok, now our application configuration is loaded from server on startup. But let’s imagine we need to dynamically reload it without application restart. It is also possible with Spring Cloud Config. To enable this feature we need to add a dependency on the spring-cloud-config-monitor library and activate the Spring Cloud Bus. In the presented sample I used AMQP message broker RabbitMQ as cloud bus provider.
<dependency>
	<groupId>org.springframework.cloud</groupId>
	<artifactId>spring-cloud-config-monitor</artifactId>
</dependency>
<dependency>
	<groupId>org.springframework.cloud</groupId>
	<artifactId>spring-cloud-starter-bus-amqp</artifactId>
</dependency>
To enable monitor for configuration server set the following property in application.yml file.
spring:
  application:
    name: config-server
  cloud:
    config:
      server:
        monitor:
          github:
            enabled: true
Now we have /monitor endpoint available on config server. The library spring-cloud-starter-bus-amqp should also be added on the client side. Monitor endpoint can be invoked by webhook configured on Git repository manager like Github, Bitbucket or Gitlab. We can also easily simulate such a webhook by calling POST /monitor manually. For example GitHub command should has the header X-Github-Event: push and JSON body with changes information like {"commits": [{"modified": ["account-service.yml"]}]}.
Like I mentioned before for the sample we use RabbitMQ server. It can be launched using its docker image.
docker run -d --name rabbit -p 30000:5672 -p 30001:15672 rabbitmq:management
To override spring auto configuration for RabbitMQ put following lines in your configuration on the both client and server side.
spring:
  rabbitmq:
    host: 192.168.99.100
    port: 30000
    username: guest
    password: guest
I also have to modify a little client service configuration to make it works with push notifications. Now it looks like as you can see below. When I overrided default application name using spring.cloud.config.* properties the event RefreshRemoteApplicationEvent has not been reveived by account service.
spring:
  application:
    name: account-service
  cloud:
    config:
      discovery:
        enabled: true
        serviceId: config-server
      profile: default
To enable dynamic configuration refreshing add @RefreshScope annotation to Spring bean. I enabled refresh on the client’s side beans: AccountController and TestAccountRepository. Finally we can test our configuration.
1. I changed and committed one property inside account-service.yml, for example balance for test.accounts with id=1.
2. Then I called POST request on /monitor endpoint with payload {"commits": [{"modified": ["account-service.yml"]}]}
3. If account service received refresh event from configuration server you should see in your logs the following fragment:
Received remote refresh request. Keys refreshed [test.accounts[0].balance]
4. Now, you can invoke test endpoint for modified account number, for me it was http://localhost:2222/accounts/0654321789/true.
Conclusion
With the Config Server you have a central place to manage configuration for applications across all environments. You can take advantage of the benefits offered by VCS systems such as branching or versioning or define native support for local files. The configuration can be reloaded only at application startup or dynamically after each change committed in the VCS repository. Spring Cloud Config Server is available for discovery and can be autodetected by all microservices registered at register server like Eureka. There are several alternative mechanisms for automatic configuration management for Spring Boot applications like Spring Cloud Consul Config or Spring Cloud Zookeeper Config.
Spring Cloud Microservices at Pivotal Platform
Imagine you have multiple microservices running on different machines as multiple instances. It seems natural to think about the tools that helps you in the process of monitoring and managing all of them. If we add that our microservices are created based on the Spring Cloud framework obviously seems we should look at the Pivotal platform. Here is figure with platform’s architecture download from the main Pivotal’s site.

Although Pivotal Platform can run applications written in many languages it has the best support for Spring Cloud Services and Netflix OSS tools like you can see in the figure above. From the possibilities offered by Pivotal we can take advantage of three ways.
Pivotal Cloud Foundry – solution can be ran on public IaaS or private cloud like AWS, Google Cloud Platform, Microsoft Azure, VMware vSphere, OpenStack.
Pivotal Web Services – hosted cloud-native platform available at pivotal.io site.
PCF Dev – the instance which can be run locally as a a single virtual machine. It offers the opportunity to develop apps using an offline environment which basic services installed like Spring Cloud Services (SCS), MySQL, Redis databases and RabbitMQ broker. If you want to run it locally with SCS you need more than 6GB RAM free.
As a Spring Cloud Services there are available Circuit Breaker (Hystrix), Service Registry (Eureka) and standard Spring Configuration Server based on git configuration.
That’s all I wanted to say about the theory. Let’s move on to practice. On the Pivotal website we have detailed materials on how to set it up, create and deploy a simple microservice based on Spring Cloud solutions. In this article I will try to present the essence collected from these descriptions based on one of my standard examples from the previous posts. As always sample source code is available on GitHub. If you are interested in detailed description of the sample application, microservices and Spring Cloud read my previous articles:
Part 1: Creating microservice using Spring Cloud, Eureka and Zuul
Part 3: Creating Microservices: Circuit Breaker, Fallback and Load Balancing with Spring Cloud
If you have a lot of free RAM you can install PCF Dev on your local workstation. You need to have Virtual Box installed. Then download and install Cloud Foundry Command Line Interface (CF CLI) and PCF Dev. All is described here. Finally you can run command below and take a small break for coffee. Virtual machine needs to downloaded and started.
cf dev start -s scs
For those who do not have RAM enough (like me) there is Pivotal Web Services platform. It is available here. Before use it you have to register on Pivotal site. The rest of the article is identical for both options.
In comparison to previous examples of Spring Cloud based microservices, we need to make some changes. There is one additional dependency inside every microservice’s pom.xml.
<properties>
	...
	<spring-cloud-services.version>1.4.1.RELEASE</spring-cloud-services.version>
	<spring-cloud.version>Dalston.RELEASE</spring-cloud.version>
</properties>

<dependencies>
	<dependency>
		<groupId>io.pivotal.spring.cloud</groupId>
		<artifactId>spring-cloud-services-starter-service-registry</artifactId>
	</dependency>
	...
</dependencies>

<dependencyManagement>
	<dependencies>
		<dependency>
			<groupId>org.springframework.cloud</groupId>
			<artifactId>spring-cloud-dependencies</artifactId>
			<version>${spring-cloud.version}</version>
			<type>pom</type>
			<scope>import</scope>
		</dependency>
		<dependency>
			<groupId>io.pivotal.spring.cloud</groupId>
			<artifactId>spring-cloud-services-dependencies</artifactId>
			<version>${spring-cloud-services.version}</version>
			<type>pom</type>
			<scope>import</scope>
		</dependency>
	</dependencies>
</dependencyManagement>
We also use Maven Cloud Foundry plugin cf-maven-plugin for application deployment on Pivotal platform. Here is sample for account-service. We run two instances of that microservice with max memory 512MB. Our application name is piomin-account-service.
<plugin>
	<groupId>org.cloudfoundry</groupId>
	<artifactId>cf-maven-plugin</artifactId>
	<version>1.1.3</version>
	<configuration>
		<target>http://api.run.pivotal.io</target>
		<org>piotrminkowski</org>
		<space>development</space>
		<appname>piomin-account-service</appname>
		<memory>512</memory>
		<instances>2</instances>
		<server>cloud-foundry-credentials</server>
	</configuration>
</plugin>
Don’t forget to add credentials configuration into Maven settings.xml file.
<server>
	<id>cloud-foundry-credentials</id>
	<username>piotr.minkowski@gmail.com</username>
	<password>***</password>
</server>
Now, when building sample application we to append cf:push command.
mvn clean install cf:push
Here is circuit breaker implementation inside customer-service.
@Service
public class AccountService {

	@Autowired
	private AccountClient client;

	@HystrixCommand(fallbackMethod = "getEmptyList")
	public List<Account> getAccounts(Integer customerId) {
		return client.getAccounts(customerId);
	}

	List<Account> getEmptyList(Integer customerId) {
		return new ArrayList<>();
	}

}
There is randomly generated delay on the account’s service side, so 25% of calls circuit breaker should be activated.
@RequestMapping("/accounts/customer/{customer}")
public List<Account> findByCustomer(@PathVariable("customer") Integer customerId) {
	logger.info(String.format("Account.findByCustomer(%s)", customerId));
	Random r = new Random();
	int rr = r.nextInt(4);
	if (rr == 1) {
		try {
			Thread.sleep(2000);
		} catch (InterruptedException e) {
			e.printStackTrace();
		}
	}
	return accounts.stream().filter(it -> it.getCustomerId().intValue() == customerId.intValue())
		.collect(Collectors.toList());
}
After successfully deploying application using Maven cf:push command we can go to Pivotal Web Services console available at https://console.run.pivotal.io/. Here are our two deployed services: two instances of piomin-account-service and one instance of piomin-customer-service.
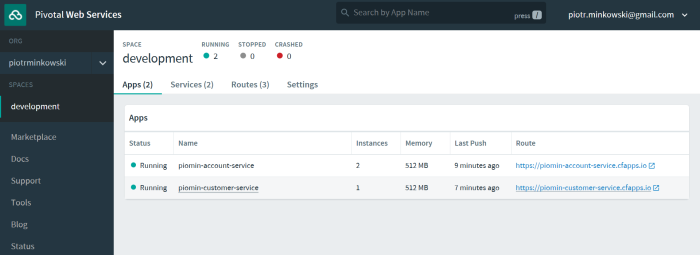
I have also activated Circuit Breaker and Service Registry from Marketplace.
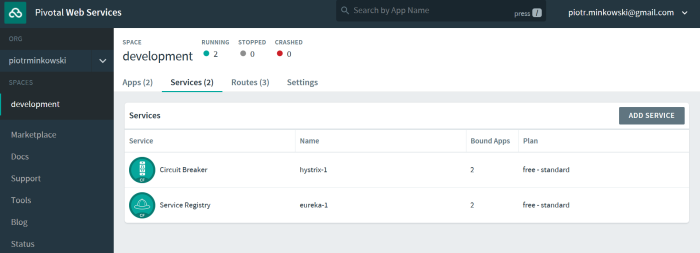
Every application need to be bound to service. To enable it select service, then expand Bound Apps overlap and select checkbox next to each service name.
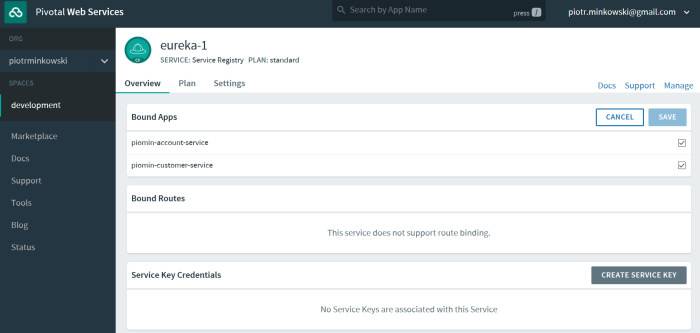
After this step applications needs to be restarted. It also can be be using web dashboard inside each service.
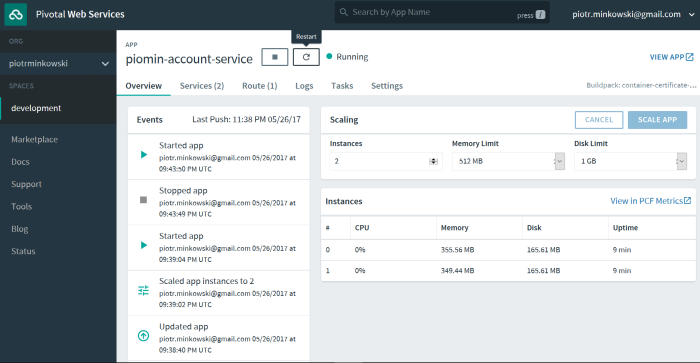
Finally, all services are registered in Eureka and we can perform some tests using customer endpoint https://piomin-customer-service.cfapps.io/customers/{id}.
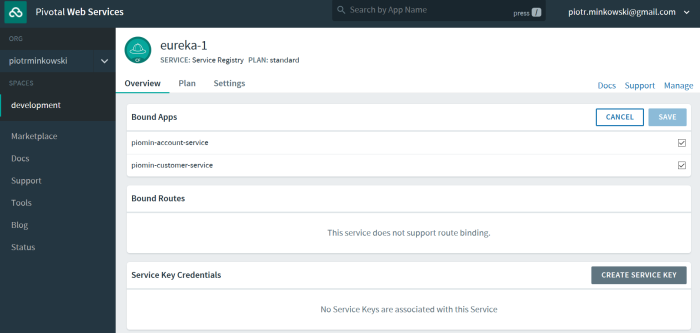
Final words
With Pivotal solution we can easily deploy, scale and monitor our microservices. Deployment and scaling can be done using Maven plugin or via web dashboard. On Pivotal there are also available some services prepared especially for microservices needs like service registry, circuit breaker and configuration server. Pivotal is a competition for such solutions like Kubernetes which based on Docker containerization (more about this tools here). It is especially useful if you are creating a microservices based on Spring Boot and Spring Cloud frameworks.
Part 3: Creating Microservices: Circuit Breaker, Fallback and Load Balancing with Spring Cloud
Probably you read some articles about Hystrix and you know in what purpose it is used for. Today I would like to show you an example of exactly how to use it, which gives you the ability to combine with other tools from Netflix OSS stack like Feign and Ribbon. In this I assume that you have basic knowledge on topics such as microservices, load balancing, service discovery. If not I suggest you read some articles about it, for example my short introduction to microservices architecture available here: Part 1: Creating microservice using Spring Cloud, Eureka and Zuul. The code sample used in that article is also also used now. There is also sample source code available on GitHub. For the sample described now see hystrix branch, for basic sample master branch.
Let’s look at some scenarios for using fallback and circuit breaker. We have Customer Service which calls API method from Account Service. There two running instances of Account Service. The requests to Account Service instances are load balanced by Ribbon client 50/50.

Scenario 1
Hystrix is disabled for Feign client (1), auto retries mechanism is disabled for Ribbon client on local instance (2) and other instances (3). Ribbon read timeout is shorter than request max process time (4). This scenario also occurs with the default Spring Cloud configuration without Hystrix. When you call customer test method you sometimes receive full response and sometimes 500 HTTP error code (50/50).
ribbon:
  eureka:
    enabled: true
  MaxAutoRetries: 0 #(2)
  MaxAutoRetriesNextServer: 0 #(3)
  ReadTimeout: 1000 #(4)

feign:
  hystrix:
    enabled: false #(1)
Scenario 2
Hystrix is still disabled for Feign client (1), auto retries mechanism is disabled for Ribbon client on local instance (2) but enabled on other instances once (3). You always receive full response. If your request is received by instance with delayed response it is timed out after 1 second and then Ribbon calls another instance – in that case not delayed. You can always change MaxAutoRetries to positive value but gives us nothing in that sample.
ribbon:
  eureka:
    enabled: true
  MaxAutoRetries: 0 #(2)
  MaxAutoRetriesNextServer: 1 #(3)
  ReadTimeout: 1000 #(4)

feign:
  hystrix:
    enabled: false #(1)
Scenario 3
Here is not a very elegant solution to the problem. We set ReadTimeout on value bigger than delay inside API method (5000 ms).
ribbon:
  eureka:
    enabled: true
  MaxAutoRetries: 0
  MaxAutoRetriesNextServer: 0
  ReadTimeout: 10000

feign:
  hystrix:
    enabled: false
Generally configuration from Scenario 2 and 3 is right, you always get the full response. But in some cases you will wait more than 1 second (Scenario 2) or more than 5 seconds (Scenario 3) and delayed instance receives 50% requests from Ribbon client. But fortunately there is Hystrix – circuit breaker.
Scenario 4
Let’s enable Hystrix just by removing feign property. There is no auto retries for Ribbon client (1) and its read timeout (2) is bigger than Hystrix’s timeout (3). 1000ms is also default value for Hystrix timeoutInMilliseconds property. Hystrix circuit breaker and fallback will work for delayed instance of account service. For some first requests you receive fallback response from Hystrix. Then delayed instance will be cut off from requests, most of them will be directed to not delayed instance.
ribbon:
  eureka:
    enabled: true
  MaxAutoRetries: 0 #(1)
  MaxAutoRetriesNextServer: 0
  ReadTimeout: 2000 #(2)

hystrix:
  command:
    default:
      execution:
        isolation:
          thread:
            timeoutInMilliseconds: 1000 #(3)
Scenario 5
This scenario is a more advanced development of Scenario 4. Now Ribbon timeout (2) is lower than Hystrix timeout (3) and also auto retries mechanism is enabled (1) for local instance and for other instances (4). The result is same as for Scenario 2 and 3 – you receive full response, but Hystrix is enabled and it cuts off delayed instance from future requests.
ribbon:
  eureka:
    enabled: true
  MaxAutoRetries: 3 #(1)
  MaxAutoRetriesNextServer: 1 #(4)
  ReadTimeout: 1000 #(2)

hystrix:
  command:
    default:
      execution:
        isolation:
          thread:
            timeoutInMilliseconds: 10000 #(3)
I could imagine a few other scenarios. But the idea was just a show differences in circuit breaker and fallback when modifying configuration properties for Feign, Ribbon and Hystrix in application.yml.
Hystrix
Let’s take a closer look on standard Hystrix circuit breaker and usage described in Scenario 4. To enable Hystrix in your Spring Boot application you have to following dependencies to pom.xml. Second step is to add annotation @EnableCircuitBreaker to main application class and also @EnableHystrixDashboard if you would like to have UI dashboard available.
<dependency>
	<groupId>org.springframework.cloud</groupId>
	<artifactId>spring-cloud-starter-hystrix</artifactId>
</dependency>
<dependency>
	<groupId>org.springframework.cloud</groupId>
	<artifactId>spring-cloud-starter-hystrix-dashboard</artifactId>
</dependency>
Hystrix fallback is set on Feign client inside customer service.
@FeignClient(value = "account-service", fallback = AccountFallback.class)
public interface AccountClient {

    @RequestMapping(method = RequestMethod.GET, value = "/accounts/customer/{customerId}")
    List<Account> getAccounts(@PathVariable("customerId") Integer customerId);

}
Fallback implementation is really simple. In this case I just return empty list instead of customer’s account list received from account service.
@Component
public class AccountFallback implements AccountClient {

	@Override
	public List<Account> getAccounts(Integer customerId) {
		List<Account> acc = new ArrayList<Account>();
		return acc;
	}

}
Now, we can perform some tests. Let’s start discovery service, two instances of account service on different ports (-DPORT VM argument during startup) and customer service. Endpoint for tests is /customers/{id}. There is also JUnit test class which sends multiple requests to this enpoint available in customer-service module pl.piomin.microservices.customer.ApiTest.
	@RequestMapping("/customers/{id}")
	public Customer findById(@PathVariable("id") Integer id) {
		logger.info(String.format("Customer.findById(%s)", id));
		Customer customer = customers.stream().filter(it -> it.getId().intValue()==id.intValue()).findFirst().get();
		List<Account> accounts =  accountClient.getAccounts(id);
		customer.setAccounts(accounts);
		return customer;
	}
I enabled Hystrix Dashboard on account-service main class. If you would like to access it call from your web browser http://localhost:2222/hystrix address and then type Hystrix’s stream address from customer-service http://localhost:3333/hystrix.stream. When I run test that sends 1000 requests to customer service about 20 (2%) of them were forwarder to delayed instance of account service, remaining to not delayed instance. Hystrix dashboard during that test is visible below. For more advanced Hystrix configuration refer to its documentation available here.
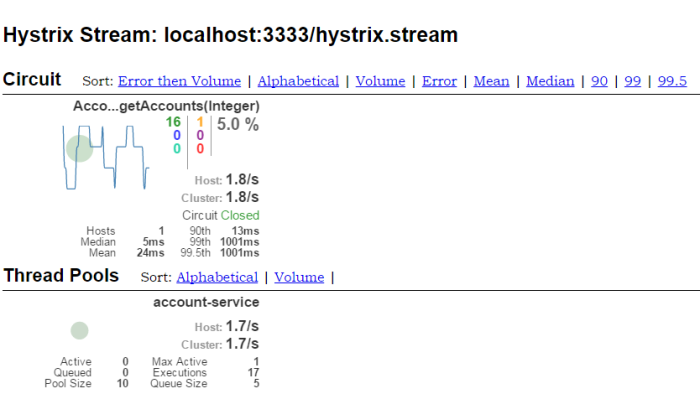
Testing Java Microservices
While developing a new application we should never forget about testing. This term seems to be particularly important when working with microservices. Microservices testing requires different approach than tests designing for monolithic applications. As far as monolithic testing is concerned, the main focus is put on unit testing and also in most cases integration tests with the database layer. In the case of microservices, the most important test seems to be interactions between those microservices. Although every microservice is independently developed and released the change in one of them can affect on all which are interacting with that service. Interaction between them is realized by messages. Usually these are messages send via REST or AMQP protocols.
We can divide five different layers of microservices tests. The first three of them are same as for monolith applications.
Unit tests – we are testing the smallest pieces of code, for example single method or component and mocking every call of other methods or components. There are many popular frameworks that supporting unit tests in java like JUnit, TestNG and Mockito for mocking. The main task of this type of testing is to confirm that the implementation meets the requirements.
Integration tests – we are testing interaction and communication between components basing on their interfaces with external services mocked out.
End-to-end test – also known as functional tests. The main goal of that tests is to verify if the system meets the external requirements. It means that we should design test scenarios which test all the microservices take a part in that process.
Contract tests – test at the boundary of an external service verifying that it meets the contract expected by a consuming service
Component tests – limits the scope of the exercised software to a portion of the system under test, manipulating the system through internal code interfaces and using test doubles to isolate the code under test from other components.
In the figure below we can see the component diagram of the one sample microservice (customer service). That architecture is similar for all other sample microservices described in that post. Customer service is interacting with Mongo database and storing there all customers. Mapped between object and database is realized by Spring Data @Document. We also use @Repository component as a DAO for Customer entity. Communication with other microservices is realized by @Feign REST client. Customer service collects all customer’s accounts and products from external microservices. @Repository and @Feign clients are injected into the @Controller which is exposed outside via REST resource.
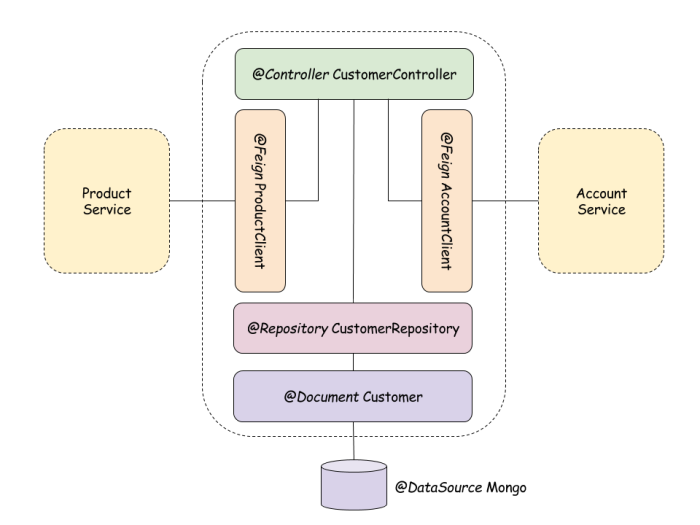
In this article I’ll show you contract and component tests for sample microservices architecture. In the figure below you can see test strategy for architecture showed in previous picture. For our tests we use embedded in-memory Mongo database and RESTful stubs generated with Spring Cloud Contract framework.
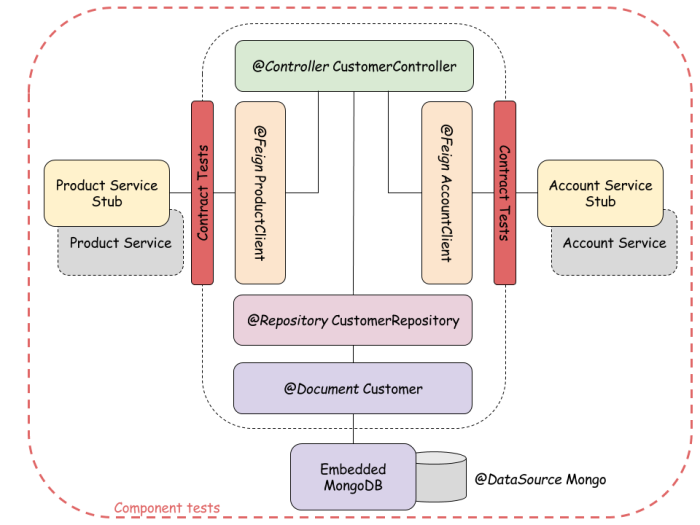
Now, let’s take a look on the big picture. We have four microservices interacting with each other like we see in the figure below. Spring Cloud Contract uses WireMock in the backgroud for recording and matching requests and responses. For testing purposes Eureka discovering on all microservices needs to be disabled.

Sample application source code is available on GitHub. All microservices are basing on Spring Boot and Spring Cloud (Eureka, Zuul, Feign, Ribbon) frameworks. Interaction with Mongo database is realized with Spring Data MongoDB (spring-boot-starter-data-mongodb dependency in pom.xml) library. DAO is really simple. It extends MongoRepository CRUD component. @Repository and @Feign clients are injected into CustomerController.
public interface CustomerRepository extends MongoRepository<Customer, String> {

	public Customer findByPesel(String pesel);
	public Customer findById(String id);

}
Here’s full controller code.
@RestController
public class CustomerController {

	@Autowired
	private AccountClient accountClient;
	@Autowired
	private ProductClient productClient;

	@Autowired
	CustomerRepository repository;

	protected Logger logger = Logger.getLogger(CustomerController.class.getName());

	@RequestMapping(value = "/customers/pesel/{pesel}", method = RequestMethod.GET)
	public Customer findByPesel(@PathVariable("pesel") String pesel) {
		logger.info(String.format("Customer.findByPesel(%s)", pesel));
		return repository.findByPesel(pesel);
	}

	@RequestMapping(value = "/customers", method = RequestMethod.GET)
	public List<Customer> findAll() {
		logger.info("Customer.findAll()");
		return repository.findAll();
	}

	@RequestMapping(value = "/customers/{id}", method = RequestMethod.GET)
	public Customer findById(@PathVariable("id") String id) {
		logger.info(String.format("Customer.findById(%s)", id));
		Customer customer = repository.findById(id);
		List<Account> accounts =  accountClient.getAccounts(id);
		logger.info(String.format("Customer.findById(): %s", accounts));
		customer.setAccounts(accounts);
		return customer;
	}

	@RequestMapping(value = "/customers/withProducts/{id}", method = RequestMethod.GET)
	public Customer findWithProductsById(@PathVariable("id") String id) {
		logger.info(String.format("Customer.findWithProductsById(%s)", id));
		Customer customer = repository.findById(id);
		List<Product> products =  productClient.getProducts(id);
		logger.info(String.format("Customer.findWithProductsById(): %s", products));
		customer.setProducts(products);
		return customer;
	}

	@RequestMapping(value = "/customers", method = RequestMethod.POST)
	public Customer add(@RequestBody Customer customer) {
		logger.info(String.format("Customer.add(%s)", customer));
		return repository.save(customer);
	}

	@RequestMapping(value = "/customers", method = RequestMethod.PUT)
	public Customer update(@RequestBody Customer customer) {
		logger.info(String.format("Customer.update(%s)", customer));
		return repository.save(customer);
	}

}
To replace external Mongo database with embedded in-memory instance during automated tests we only have to add following dependency to pom.xml.
<dependency>
	<groupId>de.flapdoodle.embed</groupId>
	<artifactId>de.flapdoodle.embed.mongo</artifactId>
	<scope>test</scope>
</dependency>
If we using different addresses and connection credentials also application seetings should be overriden in src/test/resources. Here’s application.yml file for testing. In the bottom there is a configuration for disabling Eureka discovering.
server:
  port: ${PORT:3333}

spring:
  application:
    name: customer-service
  data:
    mongodb:
      host: localhost
      port: 27017
  logging:
    level:
      org.springframework.cloud.contract: TRACE

eureka:
  client:
    enabled: false
In-memory MongoDB instance is started automatically during Spring Boot JUnit test. The next step is to add Spring Cloud Contract dependencies.
<dependency>
	<groupId>org.springframework.cloud</groupId>
	<artifactId>spring-cloud-starter-contract-stub-runner</artifactId>
	<scope>test</scope>
</dependency>
<dependency>
	<groupId>org.springframework.cloud</groupId>
	<artifactId>spring-cloud-starter-contract-verifier</artifactId>
	<scope>test</scope>
</dependency>
To enable automated tests generation by Spring Cloud Contract we also have to add following plugin into pom.xml.
<plugin>
	<groupId>org.springframework.cloud</groupId>
	<artifactId>spring-cloud-contract-maven-plugin</artifactId>
	<version>1.1.0.RELEASE</version>
	<extensions>true</extensions>
	<configuration>
			<packageWithBaseClasses>pl.piomin.microservices.advanced.customer.api</packageWithBaseClasses>
	</configuration>
</plugin>
Property packageWithBaseClasses defines package where base classes extended by generated test classes are stored. Here’s base test class for account service tests. In our sample architecture account service is only a produces it does not consume any services.
@RunWith(SpringRunner.class)
@SpringBootTest(classes = {Application.class})
public class ApiScenario1Base {

	@Autowired
	private WebApplicationContext context;

	@Before
	public void setup() {
		RestAssuredMockMvc.webAppContextSetup(context);
	}

}
As opposed to the account service customer service consumes some services for collecting customer’s account and products. That’s why base test class for customer service needs to define stub artifacts data.
@RunWith(SpringRunner.class)
@SpringBootTest(classes = {Application.class})
@AutoConfigureStubRunner(ids = {"pl.piomin:account-service:+:stubs:2222"}, workOffline = true)
public class ApiScenario1Base {

	@Autowired
	private WebApplicationContext context;

	@Before
	public void setup() {
		RestAssuredMockMvc.webAppContextSetup(context);
	}

}
Test classes are generated on the basis of contracts defined in src/main/resources/contracts. Such contracts can be implemented using Groovy language. Here’s sample contract for adding new account.
org.springframework.cloud.contract.spec.Contract.make {
  request {
    method 'POST'
    url '/accounts'
	body([
	  id: "1234567890",
          number: "12345678909",
          balance: 1234,
	  customerId: "123456789"
	])
	headers {
	  contentType('application/json')
	}
  }
response {
  status 200
  body([
    id: "1234567890",
    number: "12345678909",
    balance: 1234,
    customerId: "123456789"
  ])
  headers {
    contentType('application/json')
  }
 }
}
Test class are generated under target/generated-test-sources catalog. Here’s generated class for the code above.
@FixMethodOrder(MethodSorters.NAME_ASCENDING)
public class Scenario1Test extends ApiScenario1Base {

	@Test
	public void validate_1_postAccount() throws Exception {
		// given:
			MockMvcRequestSpecification request = given()
					.header("Content-Type", "application/json")
					.body("{\"id\":\"1234567890\",\"number\":\"12345678909\",\"balance\":1234,\"customerId\":\"123456789\"}");

		// when:
			ResponseOptions response = given().spec(request)
					.post("/accounts");

		// then:
			assertThat(response.statusCode()).isEqualTo(200);
			assertThat(response.header("Content-Type")).matches("application/json.*");
		// and:
			DocumentContext parsedJson = JsonPath.parse(response.getBody().asString());
			assertThatJson(parsedJson).field("id").isEqualTo("1234567890");
			assertThatJson(parsedJson).field("number").isEqualTo("12345678909");
			assertThatJson(parsedJson).field("balance").isEqualTo(1234);
			assertThatJson(parsedJson).field("customerId").isEqualTo("123456789");
	}

	@Test
	public void validate_2_postAccount() throws Exception {
		// given:
			MockMvcRequestSpecification request = given()
					.header("Content-Type", "application/json")
					.body("{\"id\":\"1234567891\",\"number\":\"12345678910\",\"balance\":4675,\"customerId\":\"123456780\"}");

		// when:
			ResponseOptions response = given().spec(request)
					.post("/accounts");

		// then:
			assertThat(response.statusCode()).isEqualTo(200);
			assertThat(response.header("Content-Type")).matches("application/json.*");
		// and:
			DocumentContext parsedJson = JsonPath.parse(response.getBody().asString());
			assertThatJson(parsedJson).field("id").isEqualTo("1234567891");
			assertThatJson(parsedJson).field("customerId").isEqualTo("123456780");
			assertThatJson(parsedJson).field("number").isEqualTo("12345678910");
			assertThatJson(parsedJson).field("balance").isEqualTo(4675);
	}

	@Test
	public void validate_3_getAccounts() throws Exception {
		// given:
			MockMvcRequestSpecification request = given();

		// when:
			ResponseOptions response = given().spec(request)
					.get("/accounts");

		// then:
			assertThat(response.statusCode()).isEqualTo(200);
			assertThat(response.header("Content-Type")).matches("application/json.*");
		// and:
			DocumentContext parsedJson = JsonPath.parse(response.getBody().asString());
			assertThatJson(parsedJson).array().contains("balance").isEqualTo(1234);
			assertThatJson(parsedJson).array().contains("customerId").isEqualTo("123456789");
			assertThatJson(parsedJson).array().contains("id").matches("[0-9]{10}");
			assertThatJson(parsedJson).array().contains("number").isEqualTo("12345678909");
	}

}
In the generated class there are three JUnit tests because I used scenario mechanisms available in Spring Cloud Contract. There are three groovy files inside scenario1 catalog like we can see in the picture below. The number in every file’s prefix defines tests order. Second scenario has only one definition file and is also used in the customer service (findById API method). Third scenario has four definition files and is used in the transfer service (execute API method).
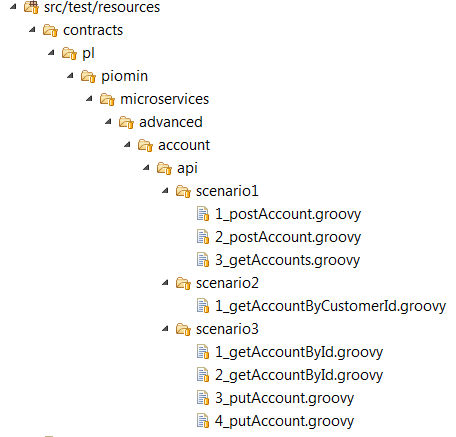
Like I mentioned before interaction between microservices is realized by @FeignClient. WireMock used by Spring Cloud Contract records request/response defined in scenario2 inside account service. Then recorded interaction is used by @FeignClient during tests instead of calling real service which is not available.
@FeignClient("account-service")
public interface AccountClient {

	@RequestMapping(method = RequestMethod.GET, value = "/accounts/customer/{customerId}", consumes = {MediaType.APPLICATION_JSON_VALUE})
	List<Account> getAccounts(@PathVariable("customerId") String customerId);

}
All the tests are generated and run during Maven build, for example mvn clean install command. If you are interested in more details and features of Spring Cloud Contract you can it here.
Finally, we can define Continuous Integration pipeline for our microservices. Each of them should be build independently. More about Continuous Integration / Continuous Delivery environment could be read in one of previous post How to setup Continuous Delivery environment. Here’s sample pipeline created with Jenkins Pipeline Plugin for account service. In Checkout stage we are updating our source code working for the newest version from repository. In the Build stage we are starting from checking out project version set inside pom.xml, then we build application using mvn clean install command. Finally, we are recording unit tests result using junit pipeline method. Same pipelines can be configured for all other microservices. In described sample all microservices are placed in the same Git repository with one Maven version for simplicity. But we can imagine that every microservice could be inside different repository with independent version in pom.xml. Tests will always be run with the newest version of stubs, which is set in that fragment of base test class with +: @AutoConfigureStubRunner(ids = {“pl.piomin:account-service:+:stubs:2222”}, workOffline = true)
node {

    withMaven(maven: 'Maven') {

        stage ('Checkout') {
            git url: 'https://github.com/piomin/sample-spring-microservices-advanced.git', credentialsId: 'github-piomin', branch: 'testing'
        }

        stage ('Build') {
            def pom = readMavenPom file: 'pom.xml'
            def version = pom.version.replace("-SNAPSHOT", ".${currentBuild.number}")
            env.pom_version = version
            print 'Build version: ' + version
            currentBuild.description = "v${version}"

            dir('account-service') {
                bat "mvn clean install -Dmaven.test.failure.ignore=true"
            }

            junit '**/target/surefire-reports/TEST-*.xml'
        }

    }

}
Here’s pipeline vizualization on Jenkins Management Dashboard.
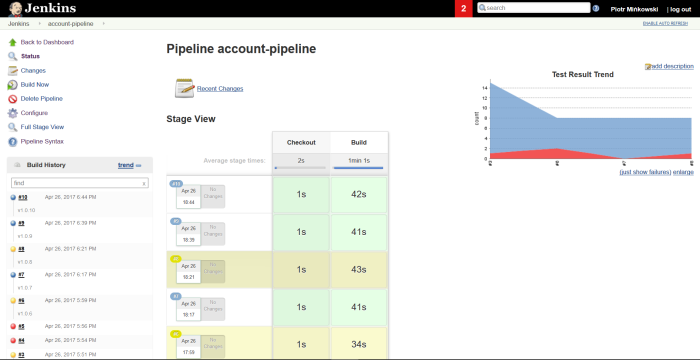
Part 2: Creating microservices – monitoring with Spring Cloud Sleuth, ELK and Zipkin
One of the most frequently mentioned challenges related to the creation of microservices based architecture is monitoring. Each microservice should be run on an environment isolated from the other microservices, so it does not share resources such as databases or log files with them. However, the essential requirement for microservices architecture is relatively easy to access the call history, including the ability to look through the request propagation between multiple microservices. Grepping the logs is not the right solution for that problem. There are some helpful tools which can be used when creating microservices with Spring Boot and Spring Cloud frameworks.
Spring Cloud Sleuth – library available as a part of Spring Cloud project. Lets you track the progress of subsequent microservices by adding the appropriate headers to the HTTP requests. The library is based on the MDC (Mapped Diagnostic Context) concept, where you can easily extract values put to context and display them in the logs.
Zipkin – distributed tracing system that helps to gather timing data for every request propagated between independent services. It has simple management console where we can find visualization of the time statistics generated by subsequent services.
ELK – Elasticsearch, Logstash, Kibana: three different tools usually used together. They are used for searching, analyzing, and visualizing log data in a real time.
Probably many of you, even if you have not had a touch with Java or microservices before, heard about Logstash and Kibana. For example, if you look at the hub.docker.com among the most popular images you will find the ones for the above tools. In our example, we will just use those images. Let’s begin from running container with Elasticsearch.
docker run -d -it --name es -p 9200:9200 -p 9300:9300 elasticsearch
The we can run Kibana container and link it to the Elasticsearch.
docker run -d -it --name kibana --link es:elasticsearch -p 5601:5601 kibana
At the end we will start Logstash with input and output declared. As an input we declare TCP which is compatible with LogstashTcpSocketAppender used as a logging appender in our sample application. As an output elasticsearch has been declared. Each microservice will be indexed on its name with micro prefix.
docker run -d -it --name logstash -p 5000:5000 logstash -e 'input { tcp { port => 5000 codec => "json" } } output { elasticsearch { hosts => ["192.168.99.100"] index => "micro-%{serviceName}"} }'
Now we can take a look on sample microservices. This post is a continuation of my previous article Part 1: Creating microservice using Spring Cloud, Eureka and Zuul. Architecture and exposed services are the same as in the previous sample. Source code is available on GitHub (branch logstash). Like a mentioned before we will use Logback library for sending log data to Logstash. In addition to the three Logback dependencies we also add libraries for Zipkin integration and Spring Cloud Sleuth starter. Here’s fragment of pom.xml for microservice.
		<dependency>
			<groupId>org.springframework.cloud</groupId>
			<artifactId>spring-cloud-starter-sleuth</artifactId>
		</dependency>
		<dependency>
			<groupId>org.springframework.cloud</groupId>
			<artifactId>spring-cloud-sleuth-zipkin</artifactId>
		</dependency>
		<dependency>
			<groupId>net.logstash.logback</groupId>
			<artifactId>logstash-logback-encoder</artifactId>
			<version>4.9</version>
		</dependency>
		<dependency>
			<groupId>ch.qos.logback</groupId>
			<artifactId>logback-classic</artifactId>
			<version>1.2.3</version>
		</dependency>
		<dependency>
			<groupId>ch.qos.logback</groupId>
			<artifactId>logback-core</artifactId>
			<version>1.2.3</version>
		</dependency>
There is also Logback configuration file in src/main/resources directory. Here’s logback.xml fragment. We can configure which logging field are sending to Logstash by declaring tags mdc, logLevel, message etc. We are also appending service name field for elasticsearch index creation.
	<appender name="STASH" class="net.logstash.logback.appender.LogstashTcpSocketAppender">
		<destination>192.168.99.100:5000</destination>

		<encoder class="net.logstash.logback.encoder.LoggingEventCompositeJsonEncoder">
			<providers>
				<mdc />
				<context />
				<logLevel />
				<loggerName />

				<pattern>
					<pattern>
						{
						"serviceName": "account-service"
						}
					</pattern>
				</pattern>

				<threadName />
				<message />
				<logstashMarkers />
				<stackTrace />
			</providers>
		</encoder>
	</appender>
The configuration of Spring Cloud Sleuth is very simple. We only have to add spring-cloud-starter-sleuth dependency to pom.xml and declare sampler @Bean . In the sample I declared AlwaysSampler that exports every span, but there is also an other other option – PercentageBasedSampler that samples a fixed fraction of spans.
	@Bean
	public AlwaysSampler defaultSampler() {
	  return new AlwaysSampler();
	}
After starting ELK docker containers we need to run our microservices. There are 5 Spring Boot applications which need to be run discovery-service, account-service, customer-service, gateway-service and zipkin-service. After launching all of them we can try call some services, for example http://localhost:8765/api/customer/customers/{id}, which causes calling of both customer and account service. All logs will be stored in elasticsearch with micro-%{serviceName} index. They can be searched in Kibana with micro-* index pattern. Index patterns are created in Kibana under section Management -> Index patterns. Kibana is available under address http://192.168.99.100:5601. After first running we will be prompt for index pattern, so let’s type micro-*. Under Discover section we can take o look on all logs matched typed pattern with timeline visualization.
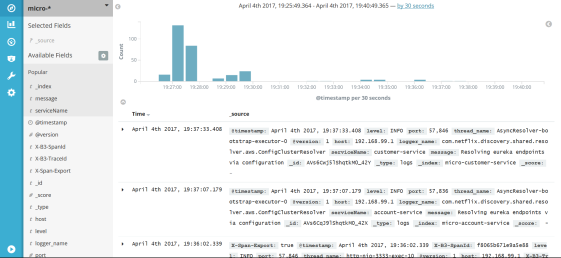
Kibana is rather intuitive and user friendly tool. I will not describe in the details how to use Kibana, because you can easily find it out by yourself reading a documentation or just clicking UI. The most important thing is to be able to search a logs by filtering criteria. In the picture below there is an example of searching logs by X-B3-TraceId field, which is add to the request header by Spring Cloud Sleuth. Sleuth also adds X-B3-SpanId for marking request for single microservice. We can select which field are displayed in the result list – in this sample I selected message and serviceName like you see in the left pane of the picture.
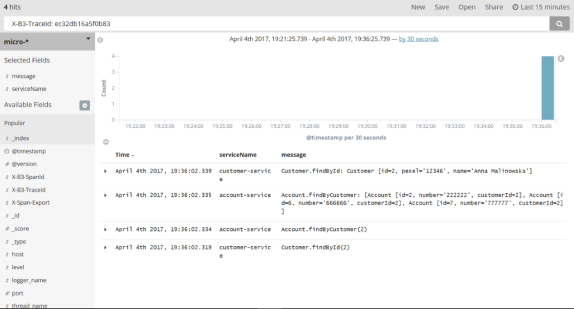
Here’s a picture with single request details. It is visible after expanding each log row.

Spring Cloud Sleuth also sends statistics to Zipkin. That is another kind of data than is stored in Logstash. These are timing statistics for each request. Zipkin UI is really simple. You can filter the requests by some criteria like time, service name, endpoint name. Here’s picture with same requests which were visualized with Kibana: http://localhost:8765/api/customer/customers/{id}.
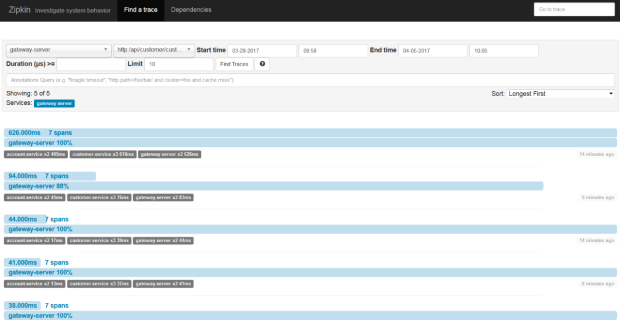
We can always see the details of each request by clicking on it. Then you see the picture similar to visible below. In the beginning, the request has been processed on API gateway. Then gateway discovered customer service on Eureka server and called that service. Customer service also has to discover account service and then call it. In this view you can easily find out which operation is the most time consuming.

Advanced Microservices Security with OAuth2
In one of my previous posts I described the basic sample illustrating microservices security with Spring Security and OAuth2. You could read there how to create and use authorization and resource server, basic authentication and bearer token with Spring Boot. Now, I would like to introduce more advanced sample with SSO OAuth2 behind Zuul gateway. Architecture of newest sample is rather similar to the previous sample like you can see in the picture below. The difference is in implementation details.

Requests to the microservices and authorization server are proxied by the gateway. First request is redirected to the login page. We need to authenticate. User authentication data is stored in MySQL database. After login there is also stored user HTTP session data using Spring Session library. Then you should to perform next steps to obtain OAuth2 authorization token by calling authorization server enpoints via gateway. Finally, you can call concrete microservice providing OAuth2 token as a bearer in Authorization HTTP request header.
If you are interested in technical details of the presented solution you can read my article on DZone. There is also available sample application source code on GitHub.
Part 1: Creating microservice using Spring Cloud, Eureka and Zuul
Spring framework provides set of libraries for creating microservices in Java. They are a part of Spring Cloud project. Today I’m going to show you how to create simple microservices using Spring Boot and following technologies:
- Zuul – gateway service that provides dynamic routing, monitoring, resiliency, security, and more
- Ribbon – client side load balancer
- Feign – declarative REST client
- Eureka – service registration and discovery
- Sleuth – distributed tracing via logs
- Zipkin – distributed tracing system with request visualization.
Sample application is available at https://github.com/piomin/sample-spring-microservices.git. Here’s picture with application architecture. Client calls endpoint available inside customer-service which stores basic customer data via Zuul gateway. This endpoint interacts with account-service to collect information about customer accounts served by endpoint in account-service. Each service registering itself on Eureka discovery service and sending its logs to Zipkin using spring-cloud-sleuth.
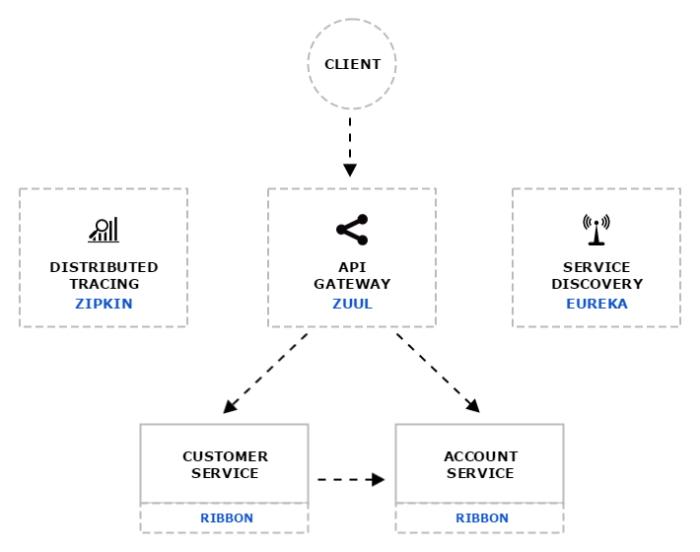
This is account-service controller. We use findByCustomer method for collecting customer accounts by his id.
@RestController
public class Api {
	private List<Account> accounts;

	protected Logger logger = Logger.getLogger(Api.class.getName());

	public Api() {
		accounts = new ArrayList<>();
		accounts.add(new Account(1, 1, "111111"));
		accounts.add(new Account(2, 2, "222222"));
		accounts.add(new Account(3, 3, "333333"));
		accounts.add(new Account(4, 4, "444444"));
		accounts.add(new Account(5, 1, "555555"));
		accounts.add(new Account(6, 2, "666666"));
		accounts.add(new Account(7, 2, "777777"));
	}

	@RequestMapping("/accounts/{number}")
	public Account findByNumber(@PathVariable("number") String number) {
		logger.info(String.format("Account.findByNumber(%s)", number));
		return accounts.stream().filter(it -> it.getNumber().equals(number)).findFirst().get();
	}

	@RequestMapping("/accounts/customer/{customer}")
	public List<Account> findByCustomer(@PathVariable("customer") Integer customerId) {
		logger.info(String.format("Account.findByCustomer(%s)", customerId));
		return accounts.stream().filter(it -> it.getCustomerId().intValue()==customerId.intValue()).collect(Collectors.toList());
	}

	@RequestMapping("/accounts")
	public List<Account> findAll() {
		logger.info("Account.findAll()");
		return accounts;
	}
}
This is customer-service controller. There is findById method which interacts with account-service using Feign client.
@RestController
public class Api {

	@Autowired
	private AccountClient accountClient;

	protected Logger logger = Logger.getLogger(Api.class.getName());

	private List<Customer> customers;

	public Api() {
		customers = new ArrayList<>();
		customers.add(new Customer(1, "12345", "Adam Kowalski", CustomerType.INDIVIDUAL));
		customers.add(new Customer(2, "12346", "Anna Malinowska", CustomerType.INDIVIDUAL));
		customers.add(new Customer(3, "12347", "Paweł Michalski", CustomerType.INDIVIDUAL));
		customers.add(new Customer(4, "12348", "Karolina Lewandowska", CustomerType.INDIVIDUAL));
	}

	@RequestMapping("/customers/pesel/{pesel}")
	public Customer findByPesel(@PathVariable("pesel") String pesel) {
		logger.info(String.format("Customer.findByPesel(%s)", pesel));
		return customers.stream().filter(it -> it.getPesel().equals(pesel)).findFirst().get();
	}

	@RequestMapping("/customers")
	public List<Customer> findAll() {
		logger.info("Customer.findAll()");
		return customers;
	}

	@RequestMapping("/customers/{id}")
	public Customer findById(@PathVariable("id") Integer id) {
		logger.info(String.format("Customer.findById(%s)", id));
		Customer customer = customers.stream().filter(it -> it.getId().intValue()==id.intValue()).findFirst().get();
		List<Account> accounts = accountClient.getAccounts(id);
		customer.setAccounts(accounts);
		return customer;
	}
}
@FeignClient("account-service")
public interface AccountClient {

	@RequestMapping(method = RequestMethod.GET, value = "/accounts/customer/{customerId}")
	List<Account> getAccounts(@PathVariable("customerId") Integer customerId);

}
To be able to using Feign client we only have to enable it in our main class.
package pl.piomin.microservices.customer;

import org.springframework.boot.SpringApplication;
import org.springframework.boot.autoconfigure.SpringBootApplication;
import org.springframework.cloud.client.discovery.EnableDiscoveryClient;
import org.springframework.cloud.netflix.feign.EnableFeignClients;

@SpringBootApplication
@EnableDiscoveryClient
@EnableFeignClients
public class Application {

	public static void main(String[] args) {
		SpringApplication.run(Application.class, args);
	}
}
There is also important configuration inside application.yml in customer-service. The ribbon load balancer needs to be enabled and also I suggest to set lease reneval and expiration on Eureka client to enable unregistration from discovery service when our service is shutting down.
server:
	port: ${PORT:3333}

eureka:
	client:
		serviceUrl:
			defaultZone: ${vcap.services.discovery-service.credentials.uri:http://127.0.0.1:8761}/eureka/
	instance:
		leaseRenewalIntervalInSeconds: 1
		leaseExpirationDurationInSeconds: 2

ribbon:
	eureka:
		enabled: true
Ok, fine. We’ve got our two microservices implemented and configured. But first we have to create and run discovery service based on Eureka server. This functionality is provided by our discovery-service. We only have to import one dependency in our pom.xml called spring-cloud-starter-eureka-server and enable it in application main class using @EnableEurekaServer annotation. Here is configuration of Eureka server in application.yml file:
server:
	port: ${PORT:8761}

eureka:
	instance:
		hostname: localhost
	client:
		registerWithEureka: false
		fetchRegistry: false
	server:
		enableSelfPreservation: false
After running discovery-service we see its monitoring console available on 8761 port. And now let’s run our two microservices on default ports set in their application.yml configuration file and more two instances of them on another ports using -DPORT VM argument, for example account-service on port 2223, and customer-service on port 3334. Now we take o look on Eureka monitoring console: we’ve got two instances of account-service running on 2222, 2223 ports and two instances of customer-service running on 3333, 3334 ports.
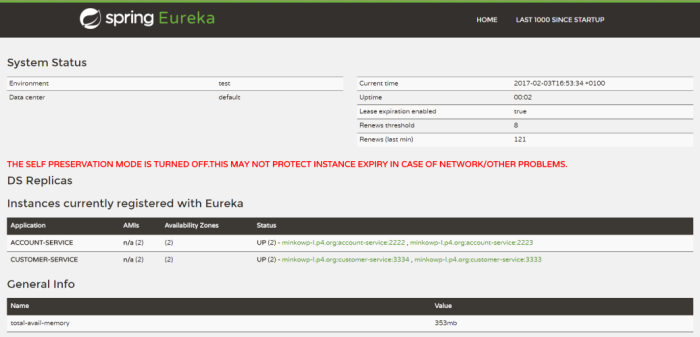
We have two instances of each microservice registered on discovery server. But we need to hide our system complexity to the outside world. There should be only one IP address exposed on one port available for inbound clients. That’s why we need API gateway – Zuul. Zuul will forward our request to the specific microservice based on its proxy configuration. Such request will also be load balances by ribbon client. To enable Zuul gateway dependency spring-cloud-starter-zuul should be added inside pom.xml and annotation @EnableZuulProxy in the main class. This is Zuul configuration for ourservices set in application.yml.
server:
	port: 8765

zuul:
	prefix: /api
	routes:
		account:
			path: /account/**
			serviceId: account-service
		customer:
			path: /customer/**
			serviceId: customer-service 				data-mce-type="bookmark" 				id="mce_SELREST_start" 				data-mce-style="overflow:hidden;line-height:0" 				style="overflow:hidden;line-height:0" 			></span>

...
Like we see Zuul is configured to be available under its default port 8765 and it forwards requests from /api/account/ path to account-service and from /api/customer/ to customer-service. When URL http://localhost:8765/api/customer/customers/1 is call several times we’ll see its load balanced between two instances of each microservice. Also when we shut down one of microservice instance we can take o look that it is unregistered from Eureka server.
In the second part of article I’ll present how to use Spring Cloud Sleuth, Zipkin and ELK. If you are interested in see Part 2: Creating microservices – monitoring with Spring Cloud Sleuth, ELK and Zipkin.


