Up-to-date cache with EclipseLink and Oracle

One of the most useful feature provided by ORM libraries is a second-level cache, usually called L2. L2 object cache reduces database access for entities and their relationships. It is enabled by default in the most popular JPA implementations like Hibernate or EclipseLink. That won’t be a problem, unless a table inside a database is not modified directly by third-party applications, or by the other instance of the same application in a clustered environment. One of the available solutions to this problem is in-memory data grid, which stores all data in a memory, and is distributed across many nodes inside a cluster. Such a tools like Hazelcast or Apache Ignite has been described several times in my blog. If you are interested in one of that tools I recommend you read one of my previous article bout it: Hazelcast Hot Cache with Striim.

However, we won’t discuss about it in this article. Today, I would like to talk about Continuous Query Notification feature provided by Oracle Database. It solves a problem with updating or invalidating a cache when the data changes in the database. Oracle JDBC drivers provide support for it since 11g Release 1. This functionality is based on receiving invalidation events from the JDBC drivers. Fortunately, EclipseLink extends that feature in their solution called EclipseLink Database Change Notification. In this article I’m going to show you how to implement it using Spring Data JPA together with EclipseLink library.

How it works

The most useful functionality provided by the Oracle Database Continuous Query Notification is an ability to raise database events when rows in a table were modified. It enables client applications to register queries with the database and receive notifications in response to DML or DDL changes on the objects associated with the queries. To detect modifications, EclipseLink DCN uses Oracle ROWID to intercept changes in the table. ROWID is included to all queries for a DCN-enabled class. EclipseLink also retrieves ROWID of saved entity after an insert operation, and maintains a cache index on that ROWID. It also selects the database transaction ID once for each transaction to avoid invalidating the cache during the processing of transaction.

When a database sends a notification it usually contains the followoing information:

  • Names of the modifying objects, for example a name of changed table
  • Type of change. The possible values are INSERT, UPDATE, DELETE, ALTER TABLE, or DROP TABLE
  • Oracle’s ROWID of changed record

Running Oracle database locally

Before starting working on our sample application we need to have Oracle database installed. Fortunately, there are some Docker images with Oracle Standard Edition 12c. The command visible below starts Oracle XE version and exposes it on default 1521 port. It is also possible to use web console available under port 9080.

$ docker run -d --name oracle -p 9080:8080 -p 1521:1521 sath89/oracle-12c

We need to have sysdba role in order to be able to grant privilege CHANGE NOTIFICATION to our database. The default password for user system is oracle.

GRANT CHANGE NOTIFICATION TO PIOMIN;

You may use any Oracle client like Oracle SQL Developer to connect with database or just login to a web console. Since I run Docker on Windows it is available on my laptop under address http://192.168.99.100:9080/em. Of course it is Oracle, so you need to settle in for a long haul, and wait until it starts. You can observer a progress of an installation by running command docker logs -f oracle. When you finally see a “100% complete” log entry you may grant the required privileges to the existing user or create a new one with a set of needed privileges, and proceed to the next step.

Sample application

The sample application source code is available on GitHub under address https://github.com/piomin/sample-eclipselink-jpa.git. It is Spring Boot application that uses Spring Data JPA as a data access layer implementation. Because the default JPA provider used in that project is EclipseLink, we should remember about excluding Hibernate libraries from starters spring-boot-starter-data-jpa and spring-boot-starter-web. Besides a standard EclipseLink library for JPA, we also have to include EclipseLink implementation for Oracle database (org.eclipse.persistence.oracle) and Oracle JDBC driver.

<dependency>
	<groupId>org.eclipse.persistence</groupId>
	<artifactId>org.eclipse.persistence.jpa</artifactId>
	<version>2.7.1</version>
</dependency>
<dependency>
	<groupId>org.eclipse.persistence</groupId>
	<artifactId>org.eclipse.persistence.oracle</artifactId>
	<version>2.7.1</version>
</dependency>
<dependency>
	<groupId>com.oracle</groupId>
	<artifactId>ojdbc7</artifactId>
	<version>12.1.0.1</version>
</dependency>

The next step is to provide connection settings to Oracle database launched as a Docker container. Do not try to do it through application.yml properties, because Spring Boot by default uses HikariCP for connection pooling. This in turn causes a conflict with Oracle datasource during application bootstrap. The following datasource declaration would work succesfully.

@Bean
public DataSource dataSource() {
	final DriverManagerDataSource dataSource = new DriverManagerDataSource();
	dataSource.setDriverClassName("oracle.jdbc.driver.OracleDriver");
	dataSource.setUrl("jdbc:oracle:thin:@192.168.99.100:1521:xe");
	dataSource.setUsername("piomin");
	dataSource.setPassword("Piot_123");
	return dataSource;
}

EclipseLink with Database Change Notification

EclipseLink needs some specific configuration settings to succesfully work with Spring Boot and Spring Data JPA. These settings may be provided inside @Configuration class that extends JpaBaseConfiguration class. First, we should set EclipseLinkJpaVendorAdapter as default JPA vendor adapter. Then, we may configure some additional JPA settings like detailed logging level or automatic creation of database objects during application startup. However, the most important thing for us in the fragment of source code visible below is Oracle Continuous Query Notification settings.
EclipseLink CQN support is enabled by the OracleChangeNotificationListener listener which integrates with Oracle JDBC in order to received database change notifications. The full class name of the listener should be passed as a value of eclipselink.cache.database-event-listener property. EclipseLink by default enabled L2 cache for all entities, and respectively all tables in the persistence unit are registered for a change notification. You may exclude some of them by using the databaseChangeNotificationType attribute of the @Cache annotation on the selected entity.

@Configuration
@EnableAutoConfiguration
public class JpaConfiguration extends JpaBaseConfiguration {

	protected JpaConfiguration(DataSource dataSource, JpaProperties properties, ObjectProvider jtaTransactionManager, ObjectProvider transactionManagerCustomizers) {
		super(dataSource, properties, jtaTransactionManager, transactionManagerCustomizers);
	}

	@Override
	protected AbstractJpaVendorAdapter createJpaVendorAdapter() {
		return new EclipseLinkJpaVendorAdapter();
	}

	@Override
	protected Map getVendorProperties() {
	    HashMap map = new HashMap();
	    map.put(PersistenceUnitProperties.WEAVING, InstrumentationLoadTimeWeaver.isInstrumentationAvailable() ? "true" : "static");
	    map.put(PersistenceUnitProperties.DDL_GENERATION, "create-or-extend-tables");
	    map.put(PersistenceUnitProperties.LOGGING_LEVEL, SessionLog.FINEST_LABEL);
	    map.put(PersistenceUnitProperties.DATABASE_EVENT_LISTENER, "org.eclipse.persistence.platform.database.oracle.dcn.OracleChangeNotificationListener");
	    return map;
	}

}

What is worth mentioning EclipseLink’s CQN integration has some important limitations:

  • Changes to an object’s secondary tables will not trigger it to be invalidate unless a version is used and updated in the primary table
  • Changes to an object’s OneToMany, ManyToMany, and ElementCollection relationships will not trigger it to be invalidate unless a version is used and updated in the primary table

The conclusion from these limitations is obvious. We should enable optimistic locking by including an @Version in our entities. The column with @Version in the primary table will always be updated, and the object will always be invalidated. There are three entities implemented. Entity Order is in many-to-one relationship with Product and Customer entities. All these classes has @Version feature enabled.

@Entity
@Table(name = "JPA_ORDER")
public class Order {

	@Id
	@SequenceGenerator(sequenceName = "SEQ_ORDER", allocationSize = 1, initialValue = 1, name = "orderSequence")
	@GeneratedValue(generator = "orderSequence", strategy = GenerationType.SEQUENCE)
	private Long id;
	@ManyToOne
	private Customer customer;
	@ManyToOne
	private Product product;
	@Enumerated
	private OrderStatus status;
	private int count;

	@Version
	private long version;

	public Long getId() {
		return id;
	}

	public void setId(Long id) {
		this.id = id;
	}

	public Customer getCustomer() {
		return customer;
	}

	public void setCustomer(Customer customer) {
		this.customer = customer;
	}

	public Product getProduct() {
		return product;
	}

	public void setProduct(Product product) {
		this.product = product;
	}

	public OrderStatus getStatus() {
		return status;
	}

	public void setStatus(OrderStatus status) {
		this.status = status;
	}

	public int getCount() {
		return count;
	}

	public void setCount(int count) {
		this.count = count;
	}

	public long getVersion() {
		return version;
	}

	public void setVersion(long version) {
		this.version = version;
	}

	@Override
	public String toString() {
		return "Order [id=" + id + ", product=" + product + ", status=" + status + ", count=" + count + "]";
	}

}

Testing

After launching your application you see the following logs generated with Finest level.

[EL Finest]: connection: 2018-03-23 15:45:50.591--ServerSession(465621833)--Thread(Thread[main,5,main])--Registering table [JPA_PRODUCT] for database change event notification.
[EL Finest]: connection: 2018-03-23 15:45:50.608--ServerSession(465621833)--Thread(Thread[main,5,main])--Registering table [JPA_CUSTOMER] for database change event notification.
[EL Finest]: connection: 2018-03-23 15:45:50.616--ServerSession(465621833)--Thread(Thread[main,5,main])--Registering table [JPA_ORDER] for database change event notification.

The registration are stored in table user_change_notification_regs, which is available for your application’s user (PIOMIN).

$ SELECT regid, table_name FROM user_change_notification_regs;
     REGID TABLE_NAME
---------- ---------------------------------------------------------------
       326 PIOMIN.JPA_PRODUCT
       326 PIOMIN.JPA_CUSTOMER
       326 PIOMIN.JPA_ORDER

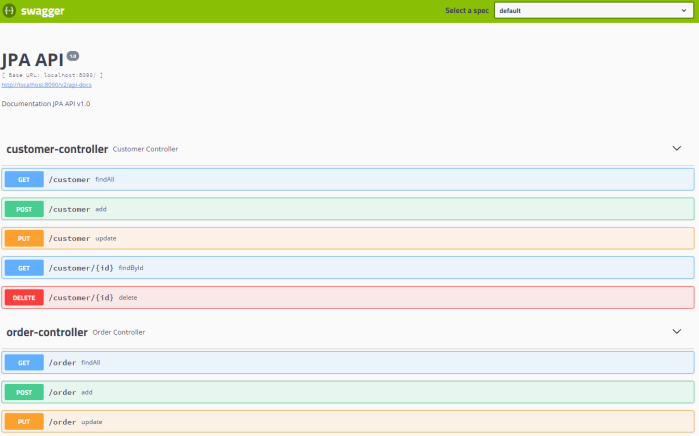
Our sample application exposes Swagger documentation of API, which may be accessed under address http://localhost:8090/swagger-ui.html. You can create or find some entities using it. If try to find the same entity several times you would see that the only first invoke generates SQL query in logs, while all others are taken from a cache. Now, try to change that record using any Oracle’s client like Oracle SQL Developer, and verify if cache has been succesfully refreshed.

eclipse-link-1

Summary

When I first heard about Oracle Database Change Notification supported by EclipseLink JPA vendor, my expectations were really high. It is very interesting solution, which guarantees automatic cache refresh after changes performed on database tables by third-party application avoiding your cache. However, I had some problems with that solution during tests. In some cases it just doesn’t work, and the detection of errors was really troublesome. It would be fine if such a solution could be also available for other databases than Oracle and JPA vendors like Hibernate.

Running Vert.x Microservices on Kubernetes/OpenShift

Automatic deployment, scaling, container orchestration, self-healing are a few of very popular topics in some recent months. This is reflected in the rapidly growing popularity of such tools like Docker, Kubernetes or OpenShift. It’s hard to find any developer who didn’t heard about these technologies. How many of you did setup and run all those tools locally?

Despite appearances, it is not very hard thing to do. Both Kubernetes and OpenShift provide simplified, single-node versions of their platform that allows you to create and try a local cluster, even on Windows.

In this article I’m going to guide you through the all steps that result in deploying and running microservices that communicates with each other and use MongoDB as a data source.

Technologies

Eclipse Vert.x – a toolkit for building reactive applications (and more) on the JVM. It’s a polyglot, event-driven, non blocking and fast framework what makes it the perfect choice for creating light-weight, high-performance microservices.

Kubernetes – is an open-source system for automating deployment, scaling, and management of containerized applications. Now, even Docker platform decided to get support for Kubernetes, although they are promoting their own clustering solution – Docker Swarm. You may easily run it locally using Minikube. However, we won’t use it this time. You can read interesting article about creating Spring Boot microservices and running them on Minikube here: Microservices with Kubernetes and Docker.

RedHat OpenShift – is an open source container application platform build on top of Docker containers and Kubernetes. It is also available online on website https://www.openshift.com/. You may easily run it locally with Minishift.

Getting started with Minishift

Of cource, you can read some tutorials available on RedHat website, but I’ll try to condense an instruction of installation and configuration in a few words. Firstly, I would like to point out that all the instructions will be applied to Windows OS.

Minishift requires a hyper-visor to start the virtual machine, so first you should download and install one of these tools. If you use other solution than Hyper-V, like I do, you would have to pass that driver name during Minishift starting. The command visible below launches it on Oracle VirtualBox and allocates 3GB of RAM memory for VM.

$  minishift start --vm-driver=virtualbox --memory=3G

The executable minishift.exe should be included in the system path. You should also have Docker client binary installed on your machine. Docker daemon is in turn managed by Minishift, so you can reuse it for other use-cases as well. All what you need to do to take an advantage of this functionality is to run the following command in your shell.

$ @FOR /f "tokens=* delims=^L" %i IN ('minishift docker-env') DO @call %i

OpenShift platform my be managed using CLI or web console. To enable CLI on Windows you should add it to the path and then run one command to configure your shell. The description of required steps is displayed after running the following command.

$ minishift oc-env
SET PATH=C:\Users\minkowp\.minishift\cache\oc\v3.7.1\windows;%PATH%
REM Run this command to configure your shell:
REM @FOR /f "tokens=*" %i IN ('minishift oc-env') DO @call %i

In order to use web console just run command $ minishift console, which automatically opens it in your web browser. For me, it is available under address https://192.168.99.100:8443/console. To check your ip just execute $ minishift ip.

Sample applications

The source code of sample applications is available on GitHub (https://github.com/piomin/sample-vertx-kubernetes.git). In fact, the similar application have been ran locally and described in the article Asynchronous Microservices with Vert.x. This article can be treated as an introduction to building microservices with Vert.x framework and to to Vert.x framework in general. The current application is even simpler, because it does not have to integrate with any external discovery server like Consul.

Now, let’s take a look on the code below. It declares a verticle that establishes a client connection to MongoDB and registers repository object as a proxy service. Such a service may be easily accessed by another verticle. MongoDB network address is managed by Minishift.

public class MongoVerticle extends AbstractVerticle {

	@Override
	public void start() throws Exception {
		JsonObject config = new JsonObject();
		config.put("connection_string", "mongodb://micro:micro@mongodb/microdb");
		final MongoClient client = MongoClient.createShared(vertx, config);
		final AccountRepository service = new AccountRepositoryImpl(client);
		ProxyHelper.registerService(AccountRepository.class, vertx, service, "account-service");
	}

}

That verticle can be deployed in the application’s main method. It is also important to set property vertx.disableFileCPResolving to true, if you would like to run your application on Minishift. It forces Vert.x to resolve file from the its classloader in addition from the file system.

public static void main(String[] args) throws Exception {
	System.setProperty("vertx.disableFileCPResolving", "true");
	Vertx vertx = Vertx.vertx();
	vertx.deployVerticle(new MongoVerticle());
	vertx.deployVerticle(new AccountServer());
}

AccountServer verticle contains simple API methods that performs CRUD operations on MongoDB.

Building Docker image

Assuming you have successfully installed and configured Minishift, and cloned my sample Maven project shared on GitHub, you may proceed to the build and deploy stage. The first step is to build the applications from source code by executing mvn clean install command on the root project. It consists of two independent modules: account-vert-service, customer-vertx-service. Each of these modules contains Dockerfile with image definition. Here’s the one created for customer-vertx-service. It is based openjdk:8-jre-alpine image. Alpine Linux is much smaller than most distribution base images, so our result image would have around 100MB, instead around 600MB if using standard OpenJDK image. Because we are generating Fat JAR files during Maven build we only have to run application inside container using java -jar command.

FROM openjdk:8-jre-alpine
ENV VERTICLE_FILE customer-vertx-service-1.0-SNAPSHOT.jar
ENV VERTICLE_HOME /usr/verticles
EXPOSE 8090
COPY target/$VERTICLE_FILE $VERTICLE_HOME/
WORKDIR $VERTICLE_HOME
ENTRYPOINT ["sh", "-c"]
CMD ["exec java -jar $VERTICLE_FILE"]

Once we have successfully build the project, we should navigate to the main directory of every module. The sample command visible below builds Docker image of customer-vertx-service.

$ docker build -t microservices/customer-vertx-service:1.0 .

In fact, there are some different approaches of building and deploying microservices on OpenShift. For example, we could use Maven plugin or OpenShift definition file. Currently discussed way of deploying application is obviously one the simplest, and it assumes using CLI and web console for configuring deployments and services.

Deploy application on Minishift

Before proceeding to the main part of that article including deploy and run application on Minishift we have to provide some pre-configuration. We have to begin from logging into OpenShift and creating new project with oc command. Here are two required CLI commands. The name of our first OpenShift project is microservices.

$ oc login -u developer -p developer
$ oc new-project microservices

We might as well perform the same actions using web console. After succesfully login there first you will see a dashboard with all available services brokered by Minishift. Let’s initialize a container with MongoDB. All the provided container settings should the same as configured inside application. After creating MongoDB service would available for all other services under mongodb name.

minishift-1

Creating MongoDB container managed by Minishift is only a part of a success. The most important thing is to deploy containers with two sample microservices, where each of them would have access to the database. Here as well, we may leverage two methods of resources creation: by CLI or via web console. Here are some CLI commands for creating deployment on OpenShift.

$ oc new-app --docker-image microservices/customer-vertx-service:1.0
$ oc new-app --docker-image microservices/account-vertx-service:1.0

The commands visible above create not only deployment, but also creates pods, and exposes each of them as a service. Now yoiu may easily scale number of running pods by executing the following command.

oc scale --replicas=2 dc customer-vertx-service
oc scale --replicas=2 dc account-vertx-service

The next step is to expose your service outside a container to make it publicly visible. We can achieve it by creating a route. OpenShift route is in fact Kubernetes ingress. OpenShift web console provides an interface for creating routes available under section Applications -> Routes. When defining new route you should enter its name, a name of a service, and a path on the basis of which requets are proxied. If hostname is not specified, it is automatically generated by OpenShift.

minishift-2

Now, let’s take a look on web console dashboard. There are three applications deployed: mongodb-persistent, account-vertx-service and customer-vertx-service. Both Vert.x microservices are scaled up with two running instances (Kubernetes pods), and are exposed under automatically generated hostname with given context path, for example http://account-route-microservices.192.168.99.100.nip.io/account.

minishift-3

You may check the details of every deployment by expanding it on the list view.

minishift-4

HTTP API is available outside and can be easily tested. Here’s the source code with REST API implementation for account-vertx-service.

AccountRepository repository = AccountRepository.createProxy(vertx, "account-service");
Router router = Router.router(vertx);
router.route("/account/*").handler(ResponseContentTypeHandler.create());
router.route(HttpMethod.POST, "/account").handler(BodyHandler.create());
router.get("/account/:id").produces("application/json").handler(rc -> {
	repository.findById(rc.request().getParam("id"), res -> {
		Account account = res.result();
		LOGGER.info("Found: {}", account);
		rc.response().end(account.toString());
	});
});
router.get("/account/customer/:customer").produces("application/json").handler(rc -> {
	repository.findByCustomer(rc.request().getParam("customer"), res -> {
		List accounts = res.result();
		LOGGER.info("Found: {}", accounts);
		rc.response().end(Json.encodePrettily(accounts));
	});
});
router.get("/account").produces("application/json").handler(rc -> {
	repository.findAll(res -> {
		List accounts = res.result();
		LOGGER.info("Found all: {}", accounts);
		rc.response().end(Json.encodePrettily(accounts));
	});
});
router.post("/account").produces("application/json").handler(rc -> {
	Account a = Json.decodeValue(rc.getBodyAsString(), Account.class);
	repository.save(a, res -> {
		Account account = res.result();
		LOGGER.info("Created: {}", account);
		rc.response().end(account.toString());
	});
});
router.delete("/account/:id").handler(rc -> {
	repository.remove(rc.request().getParam("id"), res -> {
		LOGGER.info("Removed: {}", rc.request().getParam("id"));
		rc.response().setStatusCode(200);
	});
});
vertx.createHttpServer().requestHandler(router::accept).listen(8095);

Inter-service communication

All the microservices are deployed and exposed outside the container. The last thing that we still have to do is provide a communication between them. In our sample system customer-vertx-service calls endpoint exposed by account-vertx-service. Thanks to Kubernetes services mechanism we may easily call another service from application’s container, for example using simple HTTP client implementation. Let’s take a look on the list of services exposed by Kubernetes.

minishift-6

Here’s client’s implementation responsible for communication with account-vertx-service. Vert.x WebClient takes three parameters when calling GET method: port, hostname and path. We should set a Kubernetes service name as a hostname paramater, and default container’s port as a port.

public class AccountClient {

	private static final Logger LOGGER = LoggerFactory.getLogger(AccountClient.class);

	private Vertx vertx;

	public AccountClient(Vertx vertx) {
		this.vertx = vertx;
	}

	public AccountClient findCustomerAccounts(String customerId, Handler<AsyncResult<List>> resultHandler) {
		WebClient client = WebClient.create(vertx);
		client.get(8095, "account-vertx-service", "/account/customer/" + customerId).send(res2 -> {
			LOGGER.info("Response: {}", res2.result().bodyAsString());
			List accounts = res2.result().bodyAsJsonArray().stream().map(it -> Json.decodeValue(it.toString(), Account.class)).collect(Collectors.toList());
			resultHandler.handle(Future.succeededFuture(accounts));
		});
		return this;
	}

}

AccountClient is invoked inside customer-vertx-service GET /customer/:id endpoint’s implementation.

router.get("/customer/:id").produces("application/json").handler(rc -> {
	repository.findById(rc.request().getParam("id"), res -> {
		Customer customer = res.result();
		LOGGER.info("Found: {}", customer);
		new AccountClient(vertx).findCustomerAccounts(customer.getId(), res2 -> {
			customer.setAccounts(res2.result());
			rc.response().end(customer.toString());
		});
	});
});

Summary

It is no coincidence that OpenShift is considered as the leading enterprise distribution of Kubernetes. It adds several helpful features to Kubernetes that simplify adopting it for developers and operation teams. You can easily try such features like CI/CD for DevOps, multiple projects with collaboration, networking, log aggregation from multiple pods on your local machine with Minishift.